Beginner Build Guide
How to Build a Gaming PC — A Complete Beginner's Guide for South Africa
Your first PC build, from the parts list to first boot — explained without jargon, with honest advice on what to spend and what to skip.
- components
- 8
- assembly
- 3 hrs
- total cost
- R12-30k
Why Build Instead of Buy a Pre-Built?
Building a gaming PC yourself gives you three things a pre-built generally can't: full control over every component, the knowledge to upgrade and troubleshoot for years, and the satisfaction of pressing the power button on something you put together yourself. Pre-builts from reputable South African builders like Evetech are excellent — they buy parts in volume and assemble in-house, so the price gap to DIY is often only R500 to R1,500. The difference is what you learn along the way.
If you're nervous about the assembly, don't be. A modern PC build is closer to expensive Lego than electronics work. The connectors are keyed so they only fit one way. There's no soldering. There's no exposed wiring. If you can follow a numbered set of steps and read a motherboard manual, you can build a PC.
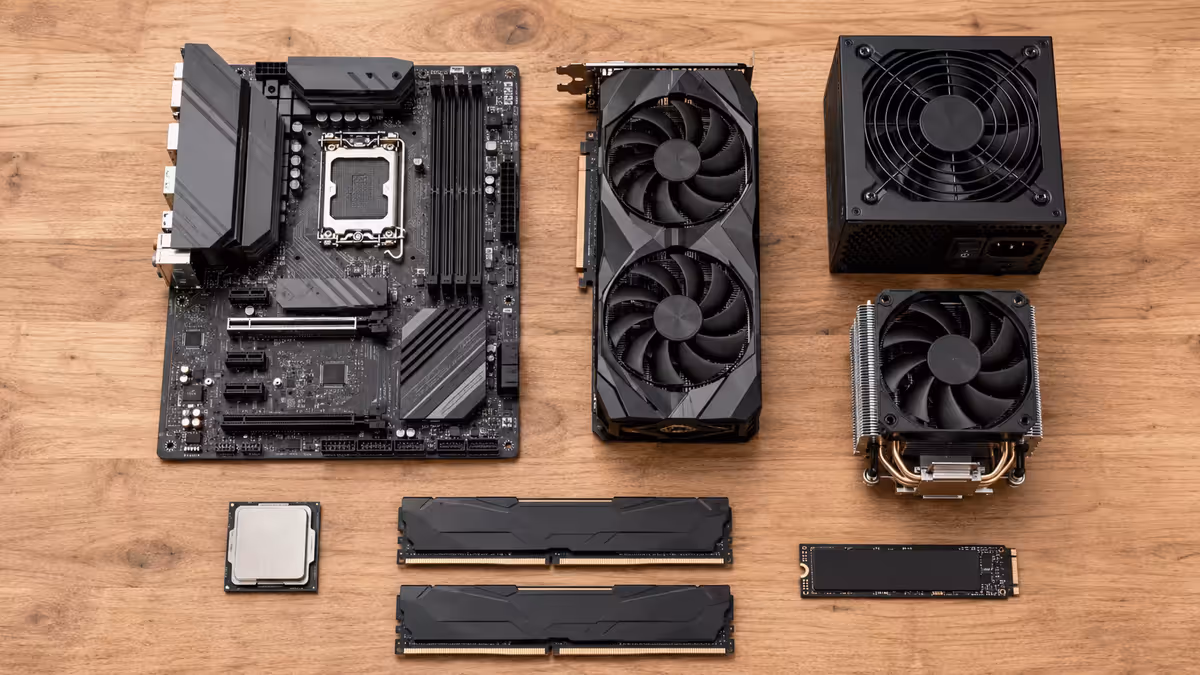
What Parts Do You Actually Need?
A working gaming PC needs eight components. That's it. Anything else is a nice-to-have. Here's the parts list with realistic South African price ranges for an entry-level to mid-range 1080p / 1440p build in 2026.
The brain. AMD Ryzen 5 7600 or 9600X for gaming sweet spot. R4,500–R8,000
B650 or B850 chipset for AMD, B760 / B860 for Intel. R2,500–R6,000
32GB DDR5-6000 kit (2x16GB). R1,800–R3,500
RTX 5060 for 1080p, RTX 5070 for 1440p. R6,500–R18,000
1TB or 2TB M.2 NVMe Gen 4. R900–R2,400
750W minimum, 80 Plus Gold. R1,800–R4,000
Mid-tower ATX with mesh front. R900–R2,500
Tower air cooler is fine for most. R600–R2,500
The Tools and Workspace You'll Need
The entire toolkit for a modern PC build fits in your hand. You need a Phillips #2 screwdriver, a clean and well-lit flat surface, the motherboard's manual, cable ties or velcro straps, and patience.
You don't need an anti-static wristband if you're working on a hard surface. You don't need thermal paste — modern coolers ship with it pre-applied.
Step-by-Step: Building Your PC
Here's the order most experienced builders follow. You'll do steps 1-3 outside the case, then transfer everything into the case.
- 01
Install the CPU into the motherboard
Lift the retention arm on the CPU socket. Line the small triangle marker on one corner of your CPU up with the matching triangle on the socket. Lower the CPU straight down and close the retention arm. Never force the CPU in. - 02
Mount the CPU cooler
Most coolers come with their bracket pre-mounted. Tighten the cooler down in a cross pattern a few turns at a time. Plug the CPU fan header into theCPU_FANconnector. - 03
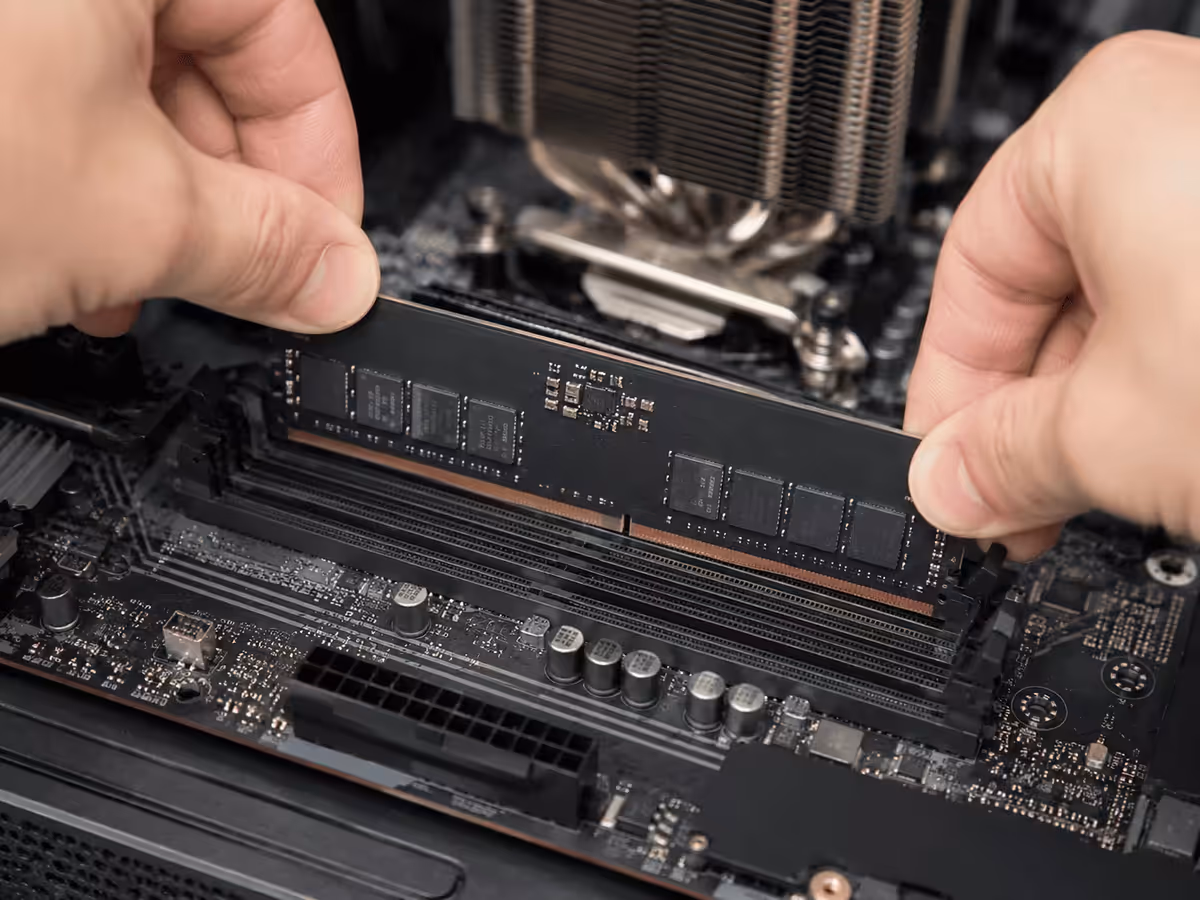
Install the RAM
With two sticks of RAM and four slots, you almost always use slots A2 and B2. Push the retention clips out, line up the notch, and press firmly straight down. Be firm — RAM needs more force than most people expect.
- 04
Install the M.2 NVMe SSD
Most motherboards have a tool-less retention clip — twist it 90° and lift the heatsink. Insert the SSD at a 30° angle, press it flat and lock the clip. - 05
Mount the motherboard in the case
Install the I/O shield. Lower the motherboard onto the case standoffs. Use the screws that came with the case (usually 9 of them). - 06
Install the power supply
Slide the PSU into its mounting bay. Orient the PSU fan facing down if your case has a vented bottom panel. - 07
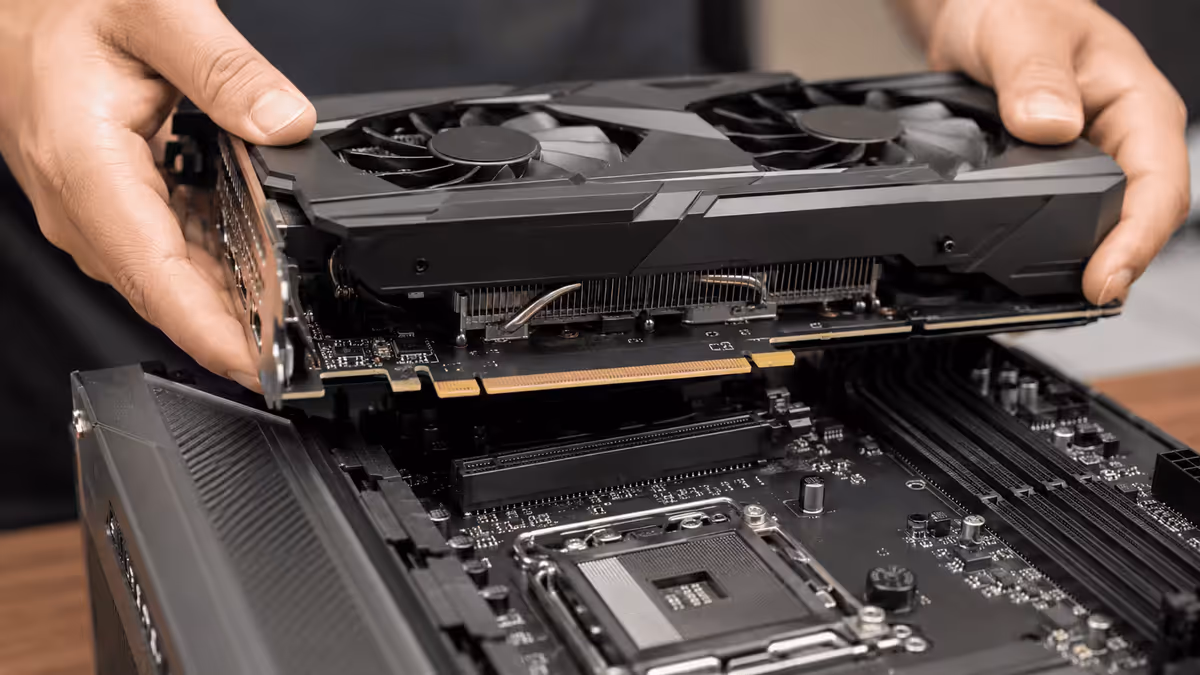
Install the graphics card
Remove the rear PCIe slot covers. Press the PCIe latch to release it. Line up the GPU and press straight down — you'll hear the latch click.
- 08
Connect the front panel headers
The case's power, reset, HDD LED and power LED wires plug into a small block of pins. Use the motherboard manual — every board labels them differently. - 09
Connect all power cables
From the PSU connect: the24-pin ATX, the8-pin EPS(CPU power), and thePCIecables to the GPU. Route cables through cable management cutouts. - 10
First power-on test
Plug in a monitor (use the GPU's display output), connect a keyboard, plug PSU into mains, flick the PSU switch on, and press the case's power button. You should see motherboard lights and a BIOS screen.
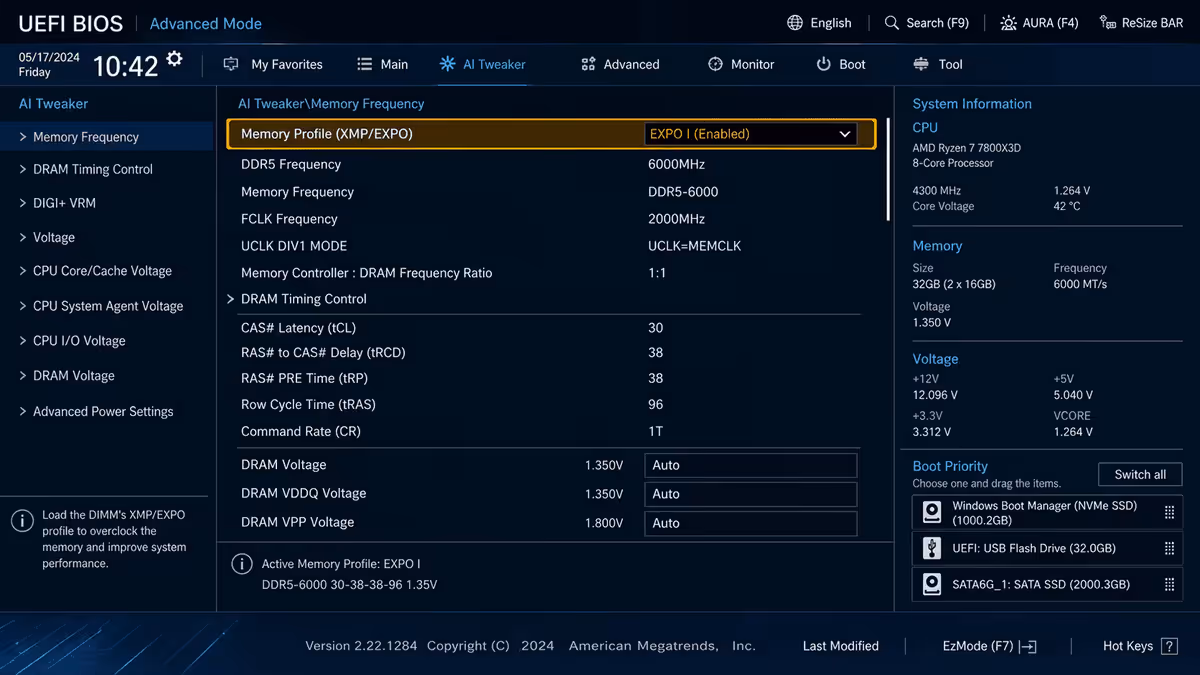
First Boot: BIOS and Enabling XMP / EXPO
Once your PC POSTs and you see the BIOS screen, three things to do before installing Windows: confirm all parts are detected, enable XMP/EXPO so your RAM runs at its rated speed, and set the boot order with your USB Windows installer first.
Installing Windows 11
Create a Windows 11 installer USB on another PC using the official Media Creation Tool. Boot from it, choose Custom install, select your M.2 SSD, and wait 10-15 minutes. After Windows finishes setup, install your motherboard's chipset drivers and the latest GPU driver.
Common First-Build Mistakes
RAM not fully seated. The most common reason a first build doesn't boot.
Forgetting the 8-pin CPU power. The 24-pin ATX gives the board life, but the CPU needs its own dedicated 8-pin EPS connector.
Plugging the monitor into the motherboard's HDMI. If you have a GPU installed, you must use the GPU's video outputs.
Skipping XMP / EXPO. Your DDR5-6000 kit will run at 4800 MHz out of the box.
Not setting up a UPS. Load shedding is brutal on PCs.
What to Do After Your First Boot
Before you install Steam, do these four things: run a stress test for an hour (OCCT or AIDA64), benchmark your GPU with 3DMark Time Spy, check temperatures under load (under 85°C is healthy), and set up a Windows backup.
Key Takeaways
- Modern PC builds are physically simple — there's no soldering, no exposed wiring, and every connector is keyed.
- Spend 40-50% of your budget on the GPU.
- Build steps 1-3 outside the case — far easier than working in cramped quarters.
- If the PC doesn't POST, reseat the RAM first and check the 8-pin CPU power.
- In South Africa, budget for a UPS up-front.
Frequently Asked Questions
How long does it take to build a PC for the first time?
Plan for 3 to 4 hours on your first build. The build itself is the easy part — slow down and you'll avoid almost every mistake.How much does it cost to build a gaming PC in South Africa?
R12,000-R15,000 for entry-level 1080p, R20,000-R30,000 for 1440p mid-range, R45,000+ for high-refresh 1440p or 4K builds. Tower only.Is it cheaper to build a PC than to buy a pre-built?
Not always. Reputable SA pre-builders buy in volume, so the gap is often R500-R1,500. The real value is what you learn.Do I need to apply thermal paste myself?
Most CPU coolers ship with thermal paste pre-applied. If not, a pea-sized blob in the centre of the CPU is enough.What is XMP / EXPO and do I need to enable it?
Yes. Without enabling, your DDR5-6000 runs at 4800 MHz. Enable in BIOS — 30 seconds.Can the PC turn on without a graphics card?
Only if your CPU has integrated graphics. Ryzen X-series chips often don't, so check before booting without a GPU.Do I need a UPS for my new gaming PC in South Africa?
Strongly recommended. A 1000-1500VA line-interactive UPS costs R1,500-R3,000 and gives 5-10 minutes for safe shutdown.What happens if I plug a cable in the wrong way?
Modern connectors are keyed. The exceptions are front-panel power/reset pins and the 8-pin CPU power.