Install How-To · CPU
How to install a CPU. — Two minutes. Zero force. No bent pins.
The step that intimidates first-time builders is actually the simplest in the whole build. Four moves, no force, two triangles to line up. Read this once and you'll do it right.
- install steps
- 4
- total time
- 2 min
- force needed
- 0 N
Before you start
A few preparation items that save time and stress later:
- Lay the motherboard flat on its anti-static box. Don't install the CPU after mounting the motherboard in the case — you'll have less light and harder access.
- Wash hands or ground yourself. Touch any unpainted metal surface to discharge static. Static-induced damage is rare but possible.
- Don't touch the CPU pads or pins. Hold the CPU by its edges. Oil from fingertips can cause contact issues.
- Have thermal paste ready. Pea-sized dot of Arctic MX-6 or similar. Unless your cooler ships with pre-applied paste.
- Read the motherboard manual's CPU installation page. Different brands have slight variations in retention arm location.
AMD vs Intel sockets — minor differences
| Spec | AMD AM5 / AM4 | Intel LGA1851 / LGA1700 |
|---|---|---|
| Socket type | LGA (AM5) / PGA (AM4) | LGA |
| Pins located | Motherboard (AM5) / CPU (AM4) | Motherboard |
| Retention | Single retention arm + frame | Single retention arm + frame |
| Alignment marker | Triangle on corner | Triangle on corner |
| Install difficulty | Same | Same |
The installation steps are nearly identical between AMD AM5 / AM4 and Intel LGA. The one historical exception is AMD AM4, which has pins on the CPU itself rather than the motherboard — meaning AM4 CPUs are easier to drop without bending pins, but the bend mode is on the CPU rather than the motherboard. In all modern sockets (AM5, LGA1851, LGA1700), pins are on the motherboard and the same care applies.
The 4 installation steps
- 1
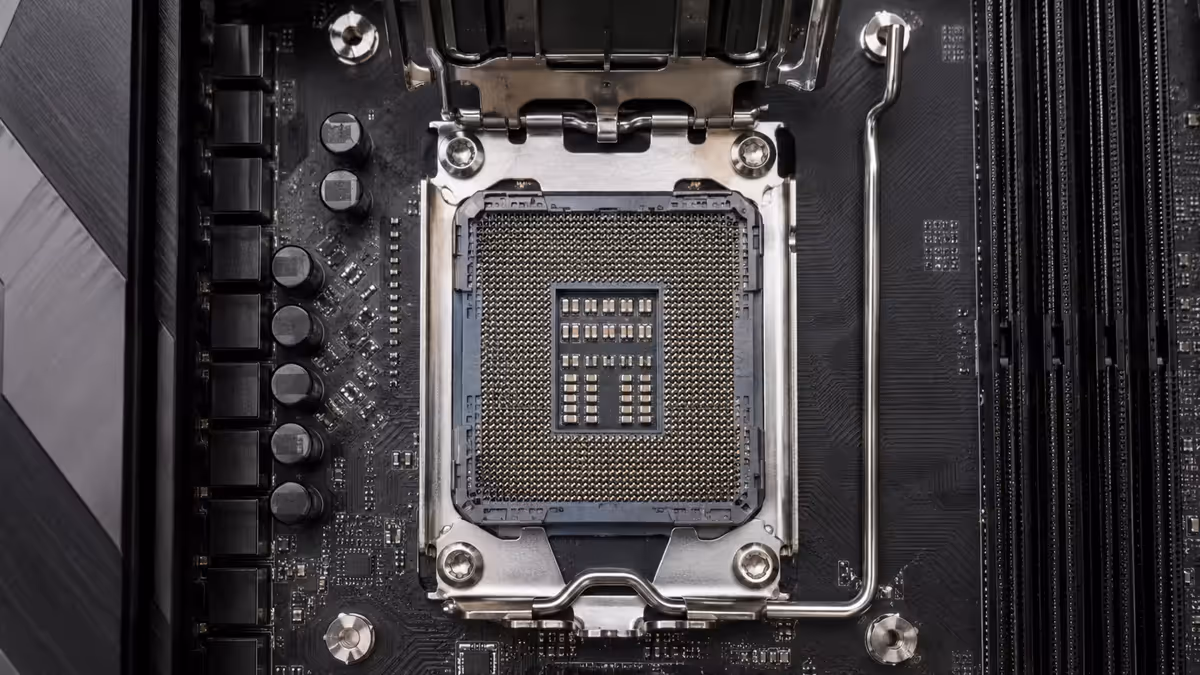
Open the socket retention arm
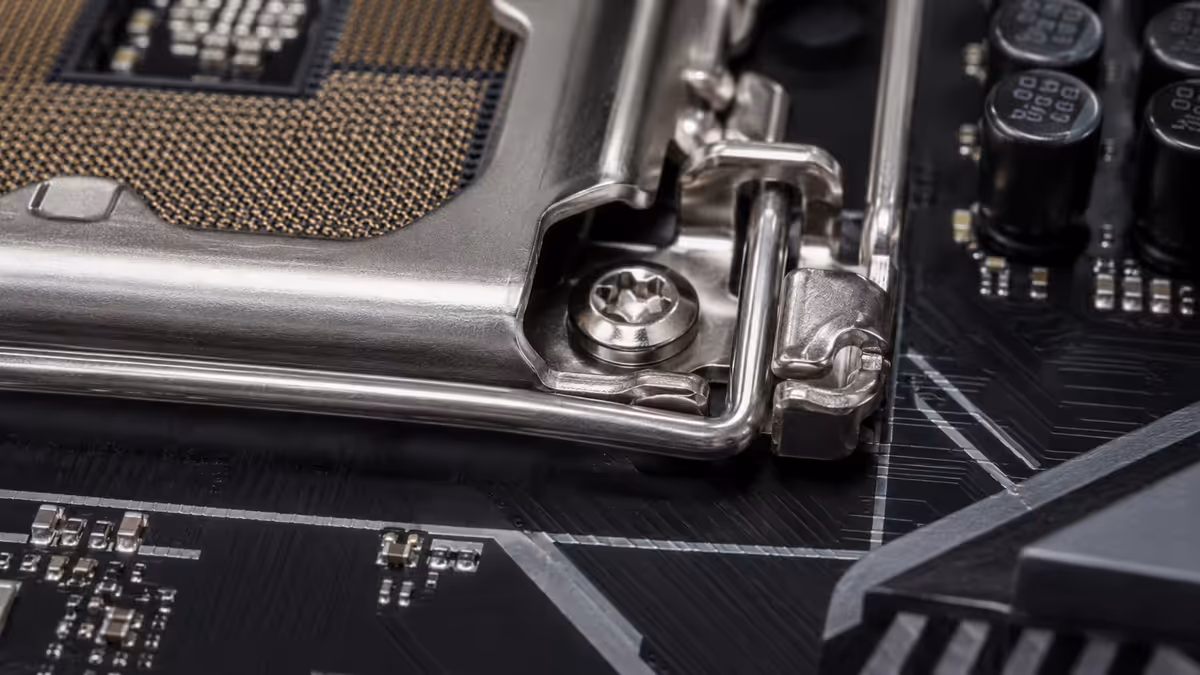
Locate the metal retention arm next to the CPU socket (usually on the right side, often coloured or marked). Press it down to clear the side clip, then push it outward. Once free, lift the arm fully open — it rotates up and back. The retention frame above the socket lifts with the arm. - 2
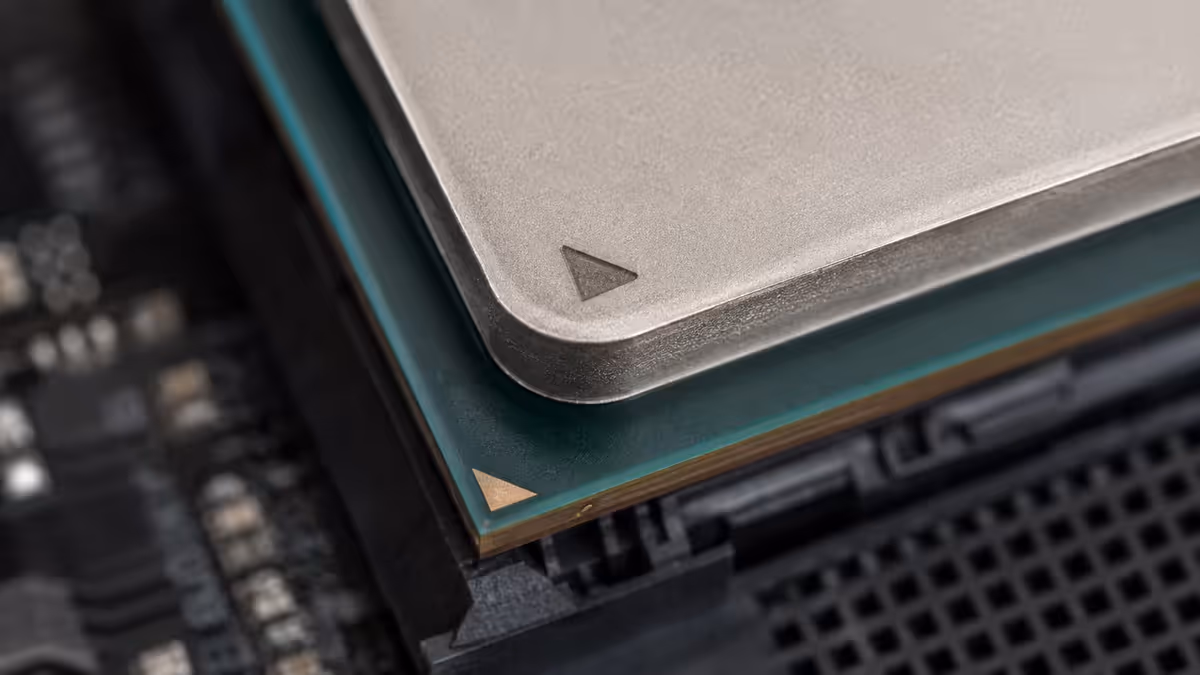
Match the triangle markers
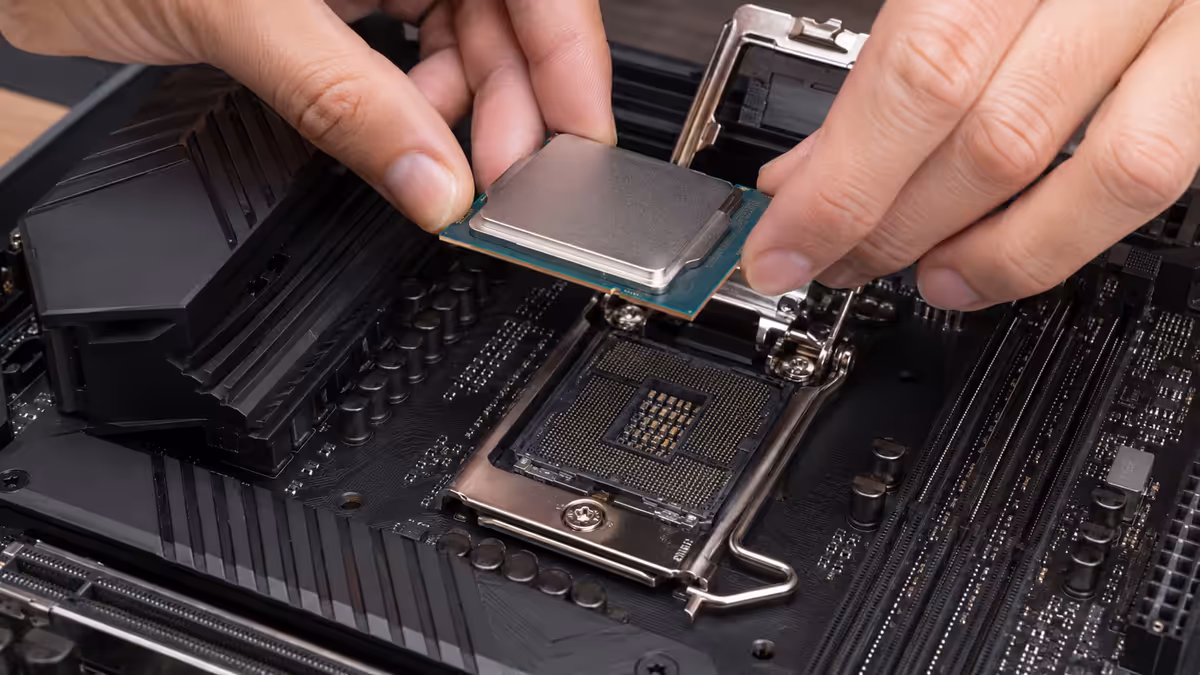
Find the small triangle on one corner of the CPU heat spreader (look closely — it's tiny). Find the matching triangle on the corner of the socket frame. Position the CPU above the socket so these two triangles are at the same corner. The alignment is unique — there's only one correct orientation. - 3
Lower the CPU straight down
With triangles aligned, gently lower the CPU straight down into the socket. Zero downward force. The CPU should drop the last few millimetres on its own. If it doesn't drop freely or seems to catch, lift it out, verify alignment, and try again. Never force. - 4
Lower the retention frame, lock the arm
Lower the retention frame back down over the CPU until it rests flush. Press the retention arm down — you'll feel significant spring resistance (it's spring-loaded to compress hundreds of contact points). Once the arm is fully down, tuck it under its side clip. The arm should rest flat against the motherboard, fully secured.
Verify it's installed correctly
Three checks before moving on to the cooler:
- CPU sits flat in the socket. Look from the side — no visible gap on any edge. Heat spreader is at the same height all around.
- Triangle markers aligned. Look at the corner where the triangles meet — both should be in the same corner.
- Retention arm fully tucked under its side clip. The arm should rest flat against the motherboard surface. Any angle = not fully closed.
All three checks passing = CPU is installed correctly. Proceed to thermal paste and cooler installation.
Common CPU install mistakes
Forcing the CPU when alignment is wrong. The most damaging mistake. Always lift and re-orient if the CPU doesn't drop freely.
Closing the retention arm too quickly. Lower the frame slowly and watch for any binding. The frame should rest flush before you press the arm.
Touching the contact pads or socket pins. Hold CPU by edges only. Oil from skin can interfere with contact reliability long-term.
Mixing up the triangle marker with logos or other graphics. The triangle is small (typically 2-3mm) and on the heat spreader, not the PCB. Look closely — it's usually gold or silver, near one corner.
Skipping the manual for non-standard sockets. Some Threadripper / Xeon sockets have multi-step torque sequences. Consumer AMD AM5 and Intel LGA1851 are straightforward; the manual still pays off for any specifics.
If you bend a pin — what to do
Step-by-step recovery:
- Stop. Don't try to install the CPU again until pins are straight.
- Get good light and magnification. Phone macro lens or magnifying glass.
- Identify each bent pin and the direction. Take photos before touching anything.
- Use a thin tool gently. Sewing needle, credit card edge or mechanical pencil tip. Bend each pin back to vertical with minimal force.
- Test fit the CPU. If pins are straight enough, the CPU drops in cleanly.
If the bend is too extreme, contact your retailer about RMA. Sometimes the bend happened in transit (before you opened the box) and they'll accept return. Document everything with photos — the more evidence, the better the conversation goes.
What's next — after the CPU is in
- Install RAM. Push fully into the slots until both side clips lock.
- Install M.2 SSD. 30° angle, slot in, screw down.
- Apply thermal paste — pea-sized dot in centre of CPU heat spreader.
- Install CPU cooler. Air tower or AIO. Follow the cooler's mounting instructions.
- Mount the motherboard in the case. Now you can place it onto its standoffs.
Key takeaways
- Four steps: open, align, drop, close. Total time under 2 minutes once you know the moves.
- Triangle on CPU = triangle on socket = same corner. Only one valid orientation.
- Zero downward force. CPU drops by itself. Forcing = bent pins.
- Retention arm closing requires noticeable force — that's spring tension compressing contact points, not misalignment.
- If alignment is wrong, lift, re-orient, try again. Never force a partially-seated CPU.
Frequently asked questions
How do I install a CPU without bending pins?
Align triangle markers (CPU + socket). Open retention arm fully. Lower CPU straight down with zero force. If it doesn't drop freely, lift and re-align.Do I install the CPU before mounting the motherboard?
Yes — much easier on the bench than in the case. CPU, RAM and M.2 all go in before motherboard mounting.What's the difference between AMD AM5 and Intel LGA1851 installation?
Nearly identical. Both LGA with pins on motherboard. Same steps: open arm, align triangles, drop CPU, close. Minor cosmetic differences only.Should I install the CPU before or after the cooler?
CPU first. Then thermal paste, then cooler. Some builders dry-fit cooler first to check clearance — fine but not required.What happens if I bend a CPU pin?
Single or low-count bent pins can sometimes be straightened with sewing needle under magnification. Multi-pin damage usually needs RMA / replacement. Contact retailer first.How tight should the CPU socket retention arm be?
Fully tucked under its side clip — arm rests flat against motherboard. Significant spring force is normal. If it won't close, lift and re-check alignment.Do I need to install thermal paste manually?
Only if your cooler doesn't have pre-applied. Apply pea-sized dot of Arctic MX-6 in the centre of the CPU IHS. Cooler spreads it under pressure.How do I check if the CPU is installed correctly?
CPU sits flat (no gaps from the side), triangle markers aligned, retention arm fully tucked. All three = correct install.