MacBook First-Time Setup
How to set up a new MacBook.
— Open the box. Two hours later, ready to work.
- Setup Assistant
- 30 min
- central key
- Apple ID
- to ready for work
- 2 hours
Unboxing checklist
A new MacBook ships with a tightly-curated set of items. Take a moment to verify everything is present before recycling the box — and keep the box itself for at least the warranty period (resale value, easier returns).
What's in a typical MacBook box (2026):
- The MacBook itself (Air or Pro)
- USB-C charger (30W for Air, 70-140W for Pro depending on screen size and config)
- USB-C to MagSafe 3 charging cable (or USB-C to USB-C on MacBook Air, model-dependent)
- Apple stickers (2 white)
- Quick-start documentation card
- SIM tool — actually not, since Macs don't have SIM trays — but you may have other docs
What's not in the box but worth ordering:
- A protective case or sleeve if you'll travel with it. Bellroy, Native Union, Tomtoc, MOFT and the Apple official sleeves are all solid SA-available options.
- A USB-C hub if you'll connect HDMI, SD card, USB-A, Ethernet. Anker, UGREEN, HyperDrive and Satechi cover this — R600-R2,500 depending on ports and quality.
- An external Thunderbolt SSD for Time Machine backups. SanDisk Extreme Pro, Crucial X9 Pro, Samsung T9 work well in SA — R1,200-R3,500 for 1-2TB.
- A laptop riser / monitor arm if this will be a primary work machine — see our ergonomic setup guide.
Before powering on: peel the protective plastic from the screen (sometimes overlooked), inspect the chassis for damage (rare but worth checking), and plug the charger in so you don't run out of power during a long Setup Assistant session.
Setup Assistant walkthrough
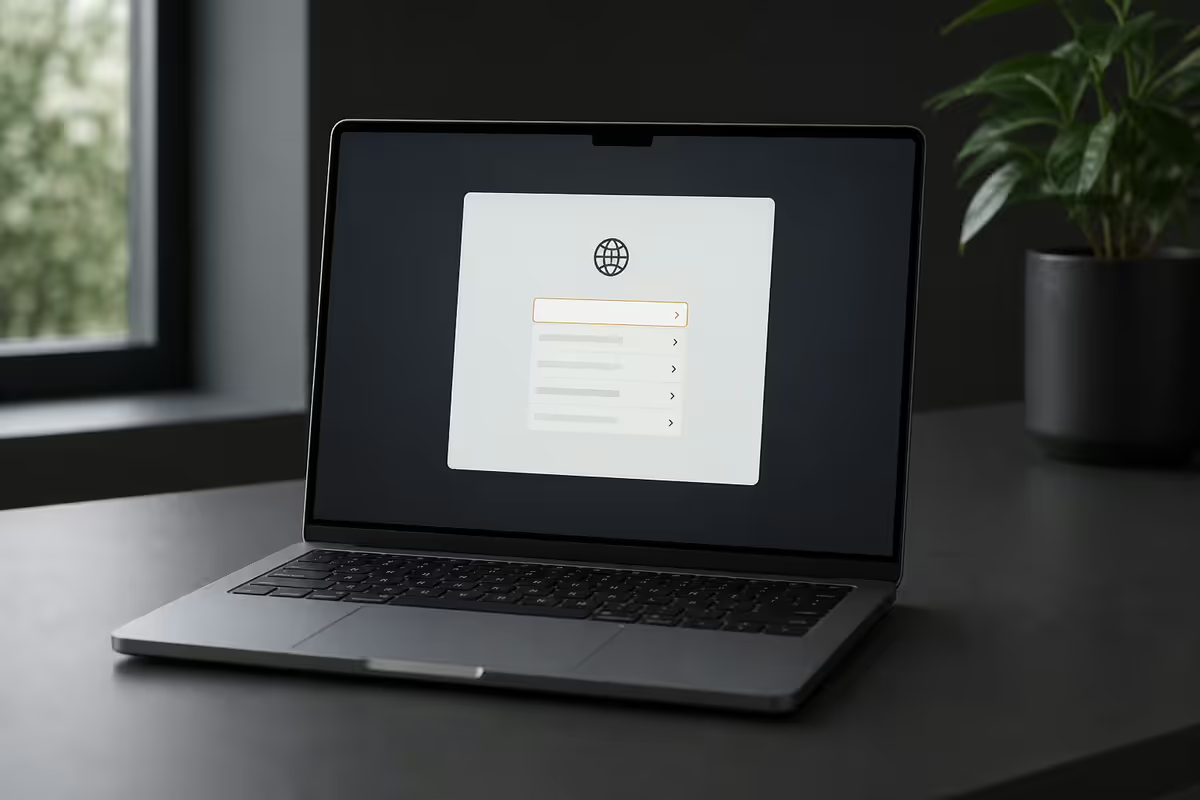
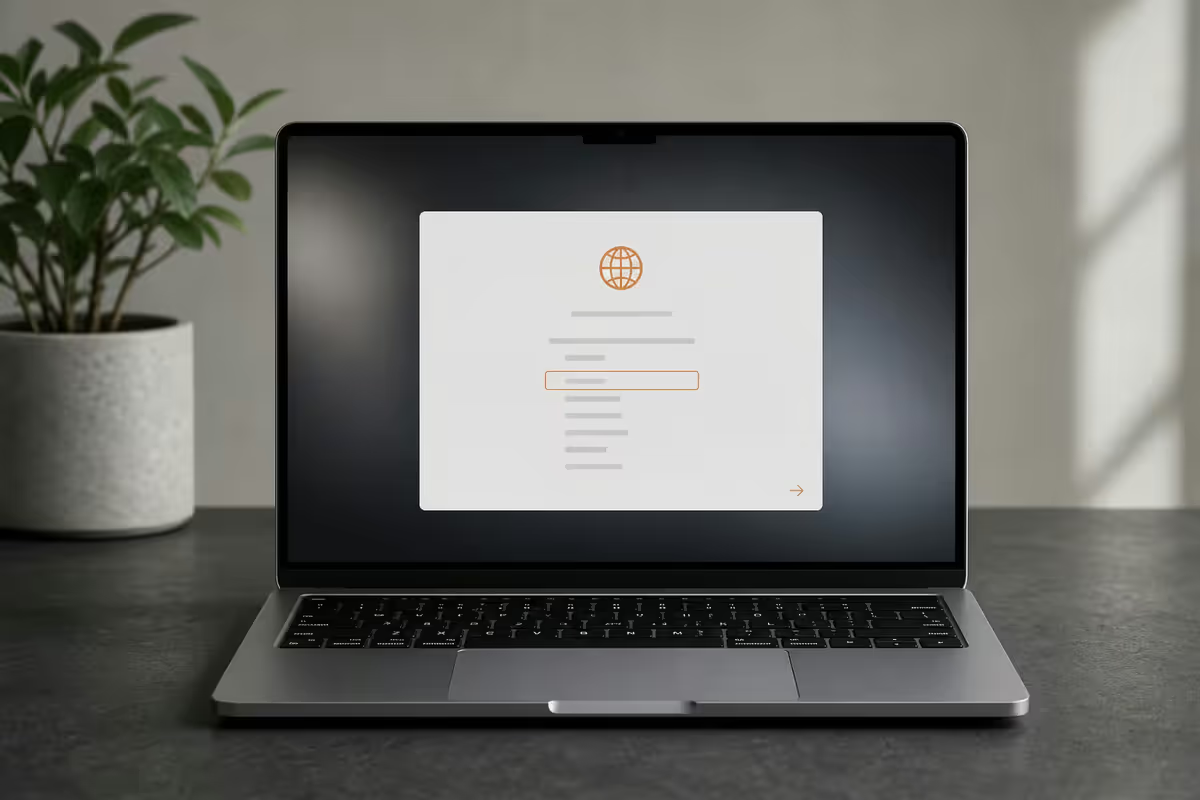
Power on by lifting the lid (or pressing the power button if the lid is open). The Welcome screen appears with "Hello" cycling through languages. From here, Setup Assistant walks through roughly 12-15 screens. Estimated time: 25-35 minutes if going slowly and thoughtfully.
The Setup Assistant flow:
- Language. Choose your preferred system language. English (UK) is standard for SA; English (US) is also widely used. This affects spell-check, date/time formats and default keyboard layout.
- Country / region. Choose South Africa (or your actual country). This affects App Store, payment methods, time zone defaults.
- Accessibility. Optional shortcuts to VoiceOver, Zoom, Voice Control. Skip unless you need them; you can enable later.
- Wi-Fi. Connect to your network. You'll need this for the rest of the setup.
- Data & Privacy. Apple explains its data practices. Read or skip.
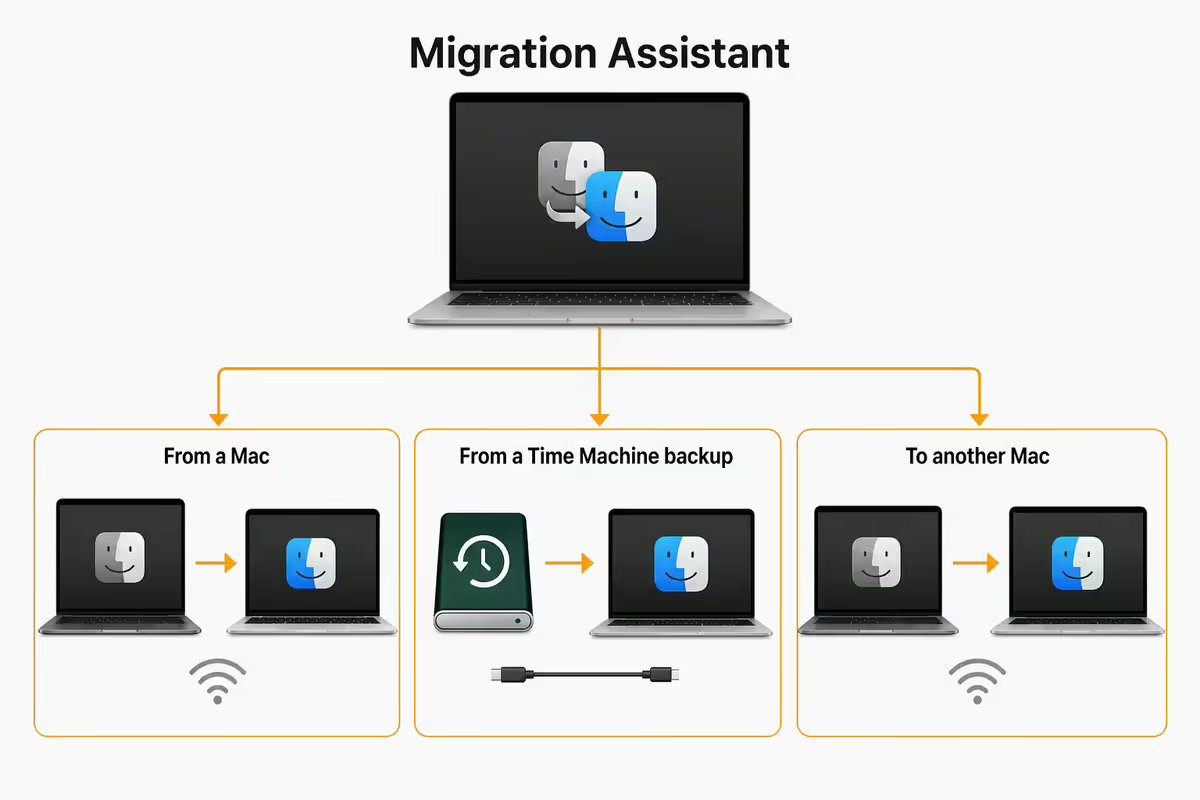
- Migration Assistant decision. "Set up as new Mac" or transfer from another Mac, Windows PC, Time Machine backup. See section below.
- Apple ID. Sign in to existing or create new. Central to everything that follows.
- Terms & Conditions. Accept to continue.
- Create computer account. Your user account name and password. Use a strong password; this is your daily login.
- Express Setup vs Customise. Express enables Siri, Location Services, Screen Time and Find My automatically. Customise lets you choose each. Most users do Customise to see what's being enabled.
- Touch ID / Face ID enrolment. Place your finger 3-4 times to capture your fingerprint (Touch ID Macs).
- Apple Pay. Add your debit/credit cards. SA support depends on your bank — see SA section.
- FileVault encryption. Enabled by default on Apple Silicon; optional but recommended on Intel.
- iCloud Drive / Photos / Keychain. Choose what syncs.
- Appearance. Light, Dark, or Auto. Most users default to Auto.
Once Setup Assistant finishes, you arrive at the desktop with all your settings applied. macOS may continue downloading iCloud content in the background for hours — don't be alarmed by slowness or fan activity during the first day. It settles down.
Apple ID — the central key
Apple ID is the single most important account decision during setup. It unlocks:
- iCloud — Photos, Drive, Mail, Keychain, Backup, Notes, Reminders sync across all your Apple devices.
- App Store — purchases follow your Apple ID, including past purchases on iPhone/iPad.
- FaceTime and iMessage — sync messages across devices.
- Find My — locate, lock, erase your Mac remotely.
- Apple Pay — register cards, pay in stores and apps.
- Apple subscriptions — iCloud+, Apple Music, Apple TV+, Arcade, Fitness+, News+.
- Continuity features — AirDrop, Handoff, Universal Control, Sidecar with iPad.
If you've used iPhone, iPad or another Mac before, sign in with your existing Apple ID. Your purchases, photos, contacts and settings will flow naturally to the new Mac (slowly over hours/days as iCloud syncs).
If completely new to Apple, create a new Apple ID during Setup Assistant. Use:
- A reliable email address you control long-term — not a temporary work address you might lose access to.
- A strong unique password — 14+ characters, not used anywhere else. Store in your password manager.
- A reliable phone number for two-factor authentication. Apple sends verification codes here for sign-ins on new devices.
- Security questions with answers you'll genuinely remember years from now.
Avoid: using a work email that will be lost when you change jobs (you'll lose access to all your Apple purchases), using a weak password ("apple" + birthday — common and dangerous), or skipping 2FA setup (massively reduces account hijack risk).
Migration Assistant — three routes
Migration Assistant moves data, apps, accounts and settings to your new Mac. There are three routes; each has different friction levels.
| From | What transfers | Friction |
|---|---|---|
| Old Mac (cable or Wi-Fi) | Everything — apps, accounts, settings, files, mail | Low — usually smooth |
| Time Machine backup | Everything (from the backup point) | Low — useful after disaster |
| Windows PC (via Migration Assistant for Windows) | Documents, photos, music, calendar, email accounts. Apps don't translate. | High — see below |
Mac-to-Mac migration is the smoothest path. Connect both Macs via Wi-Fi (or even better, a USB-C / Thunderbolt cable between them). Open Migration Assistant on the old Mac (Applications → Utilities) and choose "To another Mac." Setup Assistant on the new Mac picks up the connection and shows the user accounts available to migrate. Choose which accounts, apps and files; the rest is automatic. Time varies — 30 minutes for a light setup, several hours for a 500GB+ migration.
Time Machine migration uses an external drive containing a Time Machine backup. Plug it into the new Mac during Setup Assistant; choose the backup, choose the user accounts to migrate. Same time profile as Mac-to-Mac.
Windows migration is the difficult path. Install "Migration Assistant for Windows" on the old PC (download from Apple's website), close all other apps on Windows, run Migration Assistant on the new Mac and choose "From a Windows PC." The two computers find each other on the network. Common pain points: antivirus blocks the connection, the migration hangs on specific file types, encrypted data doesn't transfer cleanly, Windows apps (Outlook, OneDrive) don't translate to Mac equivalents. Plan for 2-4 hours of attention and expect some manual cleanup afterward — 44% of SA Migration Assistant users from Windows hit friction here.
The fresh-setup alternative: skip Migration Assistant entirely. Sign in with your Apple ID, let iCloud sync your photos, documents, mail, Safari bookmarks, contacts, and calendar. Reinstall apps fresh from App Store and developer sites. Manually copy any local files you need from an external drive. This avoids bringing forward old Login Items, stale caches and accumulated clutter — at the cost of more manual configuration.
iCloud setup — what to enable
iCloud has many sub-services. During Setup Assistant or in System Settings → Apple ID → iCloud, you can toggle each one. Recommended defaults for most users:
- iCloud Drive — ON. Your Documents and Desktop folders sync to iCloud. Files appear on iPhone/iPad. Major productivity unlock. Free tier 5GB; paid tiers (iCloud+) start at R19/month for 50GB.
- Photos — ON. Photos library syncs across devices. Take a photo on iPhone, it appears on Mac. Enable "Optimise Mac Storage" if your library is larger than your Mac's free space.
- Mail — ON only if you use @icloud.com email. If your email is Gmail or work-based, the iCloud Mail toggle doesn't affect it.
- Contacts, Calendars, Reminders, Notes — ON. Sync your address book, calendars, reminders and notes across devices.
- Safari — ON. Browser bookmarks, history, tabs, autofill sync.
- iCloud Keychain — ON if using Apple ecosystem only. Sync passwords, passkeys, 2FA codes across Apple devices.
- Find My Mac — ON. Essential for security. Enables remote lock, locate and erase.
- iCloud Backup (Mac doesn't have this — only iPhone/iPad). Set up Time Machine instead for Mac backup.
Free tier (5GB) is rarely enough for any serious user. Most SA Mac users upgrade to iCloud+ (R19-R349/month for 50GB-12TB) to handle photos and documents. The 200GB tier (R69/month) suits most individual users; family sharing splits across 5 family members.
Touch ID and Face ID
Most modern MacBooks include Touch ID — a fingerprint sensor on the power button. Enrol during Setup Assistant by placing your finger on the sensor multiple times from different angles. You can add up to 3 fingerprints; most users enrol both index fingers.
Where Touch ID works: macOS login, unlock from sleep, App Store purchases, Apple Pay, password autofill, sudo commands in Terminal, third-party apps that integrate with macOS auth (1Password, Bitwarden, banking apps).
Touch ID does not replace the password — it's a convenience layer. You'll still need the actual password after restart, after software update, or after extended idle.
Face ID is not currently on any Mac — Apple's biometric on Mac is Touch ID only as of May 2026. If using an external display + closed-lid setup, you'll need the password since the Touch ID sensor is on the laptop's power button. Some users add an Apple Watch — it can unlock the Mac automatically when nearby, even with the lid closed.
FileVault encryption
FileVault encrypts the entire Mac disk so that a lost or stolen device doesn't expose your data. Without the password (or recovery key), the disk is mathematically opaque.
- On Apple Silicon Macs (M1 onward), FileVault is enabled by default and uses hardware encryption with no performance cost. Nothing to do.
- On Intel Macs, you can enable in System Settings → Privacy & Security → FileVault. There's a small CPU overhead but it's worth it for any portable device.
The recovery key is essential. macOS gives you two storage options: store with your Apple ID (recoverable via your iCloud account), or save a local recovery key (print it, write it down, store in a password manager). The Apple ID option is easier; the local key is more secure (and works even if your Apple ID gets compromised). Save the key somewhere you'll find it years from now — without it, a forgotten password permanently locks the disk.
Don't disable FileVault to "speed up" the Mac — on Apple Silicon there's no benefit, and on Intel the performance cost is small relative to the security value.
Essential software downloads
Within the first hour, install the apps you actively use. Don't install everything you might use someday — Login Items multiply and Mac performance compounds with each background process.
Core for most users:
- Web browser — Safari is built in; install Chrome, Edge, Brave, Arc or Firefox only if you actively need them.
- Communication — Slack, Microsoft Teams, Discord, Zoom if you use them. Don't enable each one's auto-start at boot.
- Password manager — 1Password, Bitwarden, Dashlane (or stick with iCloud Keychain).
- Productivity suite — Microsoft 365, Google Workspace web apps, Apple's iWork (Pages, Numbers, Keynote — free), Notion, Obsidian.
- Backup helper — Time Machine is built in; alternatives include Carbon Copy Cloner, SuperDuper!, Backblaze.
- Utilities — Rectangle or Magnet (window management), Bartender (menu bar control), AppCleaner (proper uninstall), Stats (system monitoring in menu bar).
Where to install from:
- App Store — safest, auto-updates, sandboxed.
- Developer websites — direct download from the vendor (Adobe, Microsoft, Slack, Notion, etc.).
- Homebrew — command-line package manager for developer tools. Excellent for keeping tools updated.
Avoid: third-party app stores (MacUpdate, etc.), "free download" sites (often bundle adware), and pirated software (Mac malware ecosystem is small but specifically targets pirated installers).
System Settings tour — 30 minutes well spent
Open System Settings and walk through every section once. You don't need to change everything; you just need to know what's there. The 30 minutes pays back in years of "I didn't know I could do that."
The sections most worth visiting on a new Mac:
- Apple ID → iCloud: verify what's syncing.
- Wi-Fi → Settings (next to your network): save the password, configure DNS if needed (Cloudflare 1.1.1.1 is faster than most ISP defaults).
- Bluetooth: pair AirPods, mouse, keyboard.
- Notifications: turn off badges and sound for apps you don't want interrupting (most apps default to "everything on").
- Focus: set up Do Not Disturb, Work, Sleep modes.
- Sound: set input/output devices, configure Spatial Audio.
- General → Login Items: review what's set to launch at startup. Most new Macs start clean but apps add themselves over time.
- Appearance: light/dark/auto, accent colour, sidebar size.
- Desktop & Dock: Dock size, position, magnification, Mission Control settings, hot corners (excellent productivity feature).
- Displays: resolution, scaling (Retina lets you choose "more space" vs "larger text"), Night Shift schedule.
- Trackpad: review gestures, especially three-finger swipe between apps and four-finger swipe up for Mission Control. Macs have excellent gestures but most users only know two.
- Keyboard → Keyboard Shortcuts: customise as needed.
- Privacy & Security: review which apps have access to what. Disable anything suspicious.
- Time Machine: configure backup target.
Password manager setup
A password manager is essential infrastructure. Don't reuse passwords across sites; don't try to remember them all; don't write them in a text file.
The choices:
- iCloud Keychain — free, built in, syncs across Apple devices. Excellent if you live in Apple ecosystem only. Supports passwords, passkeys, 2FA codes, autofill in Safari.
- 1Password — best cross-platform polish. R110-R220/month depending on plan. Family sharing, Watchtower security audits, Travel Mode, secure notes, document storage.
- Bitwarden — open source, generous free tier, R250/year for Premium. Works on every platform. Power user favourite.
- Dashlane — strong autofill, VPN bundled, more expensive.
- Apple Passwords app (new in macOS Sequoia onward) — Apple's standalone password manager, essentially a UI for iCloud Keychain. Use this rather than digging through Safari preferences.
Don't run two simultaneously — pick one. Import all existing passwords from browsers and old password files. Generate fresh strong passwords for important accounts (email, banking, Apple ID). Enable 2FA everywhere it's available.
Backup strategy — Time Machine + cloud
Macs make backups trivial. The 3-2-1 principle: 3 copies of important data, on 2 different media, with 1 off-site.
- Copy 1 — Mac SSD (working copy). What you use daily.
- Copy 2 — Time Machine to external drive. Plug an external SSD into your Mac. macOS asks to use it for Time Machine. Say yes. Done. Backups happen hourly while connected.
- Copy 3 — Cloud backup. iCloud (limited to ~12TB max), Backblaze (R150/month unlimited, popular SA choice), or iDrive.
For Time Machine:
- External SSD is dramatically faster than HDD for Time Machine (especially Apple Silicon writing speed). R1,200-R3,500 for 1-2TB SanDisk Extreme Pro, Crucial X9 Pro, Samsung T9.
- Size: at least 2× your Mac's internal storage. 1TB Mac → 2TB external minimum.
- Format: macOS Extended (Journaled) or APFS — Time Machine will format it for you.
- Connect daily, or use a Thunderbolt dock so it's always connected at the desk.
For cloud backup:
- Backblaze — unlimited backup of a single Mac for ~R150/month. Most popular SA choice. Bandwidth-friendly upload throttling.
- iDrive — multi-device, includes 5TB plan, frequent specials.
- iCloud+ — bundles with everything else if you're already in the ecosystem. Up to 12TB.
Find My and 2FA setup
Find My Mac is essential security. Enable in System Settings → Apple ID → iCloud → Find My. With it enabled, a lost or stolen Mac can be:
- Located on a map (when online).
- Locked remotely with a custom message.
- Erased remotely so data isn't compromised.
- Marked as Activation-Locked — the thief can't reset and resell it without your Apple ID password.
2FA on Apple ID is the single most important account security setting. Already required for most new Apple IDs. Verify it's on in System Settings → Apple ID → Sign-In & Security. Save backup codes in your password manager.
Then enable 2FA on every other critical account: email (Gmail, Outlook), banking, employer SSO, social media, password manager itself. Use authenticator apps (Google Authenticator, Authy, 1Password's built-in 2FA) rather than SMS where possible — SMS 2FA is vulnerable to SIM-swap attacks, particularly relevant in SA where SIM-swap fraud is common.
AppleCare+ within 60 days
You have 60 days from purchase to add AppleCare+ to a new MacBook. After day 60, you can't add it. The 60-day clock is firm.
What AppleCare+ adds:
- Extends warranty from 1 year to 3 years.
- Adds accidental damage cover (drop, spill) with a fixed-price excess.
- 24/7 technical support direct with Apple.
- Includes battery replacement if capacity drops below 80% within the 3-year period.
SA pricing (May 2026, rough):
| Model | AppleCare+ cost | Out-of-warranty repair (example) |
|---|---|---|
| MacBook Air 13"/15" | R3,500-R4,500 | Screen R8,000-R12,000 |
| MacBook Pro 14" | R5,500-R7,000 | Screen R12,000-R18,000 |
| MacBook Pro 16" | R7,500-R9,000 | Screen R15,000-R22,000 |
Worth it for most portable Macs. A single screen or keyboard incident at iStore costs more than the AppleCare+ premium. For a Mac that stays on a desk (mini, Studio), the value is lower.
SA-specific — region and payment
Apple ID country/region determines which App Store you see, which payment methods work, and which subscriptions are available.
South Africa region:
- Rand pricing.
- SA credit/debit cards accepted (most major banks).
- EFT and Apple ID gift cards available.
- Smaller App Store catalogue — some US-exclusive apps not available.
- Apple Pay supported on FNB, Standard Bank, Absa, Nedbank, Capitec (varies by bank — check current state).
- Apple Music, Apple TV+, iCloud+ all available with Rand pricing.
US region (if used):
- USD pricing — works only if you have a US billing address and US payment method.
- Full App Store catalogue.
- SA bank cards typically rejected.
- US Apple ID gift cards work.
- Most SA users with US Apple IDs are people who set them up years ago for app purchases not available in SA store. If you have one, you can keep using it — but expect occasional payment friction.
Region mismatch (US Apple ID but SA-resident user) is the source of about 28% of SA first-time MacBook setup friction — most often Apple Pay refusing to add SA bank cards, or App Store subscriptions failing to charge.
Common first-time setup mistakes
Using a work email for Apple ID. When you change jobs, you lose access to the email — and therefore to your Apple ID, App Store purchases, photos, and everything else. Always use a personal email for Apple ID.
Skipping 2FA setup. Account hijack is the single largest threat to your data. 2FA blocks 99%+ of automated attacks. Enable it on Apple ID first, then everything else.
Migrating from a slow old Mac. Inherits the same Login Items, accumulated junk, performance problems. Start fresh; let iCloud restore the important data.
Running two password managers. iCloud Keychain AND 1Password AND browser passwords AND a text file. Pick one; commit. Migrate everything into it within the first week.
Missing the 60-day AppleCare+ window. Worth setting a calendar reminder for day 45 to decide.
Skipping Time Machine setup. The first hard drive failure or lost laptop is when people regret no backup. Plug in an external SSD on day one; set it up and forget.
Letting every app auto-start at boot. Slack, Spotify, Adobe CC, Microsoft AutoUpdate, OneDrive, Dropbox — each adds itself to Login Items. Review and prune after the first week of use.
Not customising trackpad gestures. macOS gestures are excellent but most users never explore beyond two-finger scroll. Spend 10 minutes in System Settings → Trackpad — three-finger and four-finger gestures are major productivity unlocks.
Key takeaways
- Plan ~2 hours total: 30 min Setup Assistant + 1 hour software/account sign-ins + 30 min System Settings tour.
- Apple ID is the central key — use a personal email (not work), strong unique password, reliable phone for 2FA.
- Migration Assistant from Windows is the hardest path (many struggle) — fresh setup is often smoother.
- Within 60 days: AppleCare+ decision, Time Machine setup, Find My enabled, 2FA everywhere.
- For SA: South Africa region is the default unless you have a US billing address. Buy from authorised SA channels for warranty.
Frequently asked questions
How long does first-time MacBook setup take?
Roughly 2 hours: 30 min Setup Assistant, 1 hour software downloads, 30 min System Settings tuning. Add 1-3 hours if using Migration Assistant.Should I use Migration Assistant or set up from scratch?
Migration Assistant if old Mac was running well. Fresh setup if it was slow or cluttered, or if moving from Windows. Selective migration is the middle path.What is Apple ID and do I need one?
Yes — it's the central key to iCloud, App Store, FaceTime, iMessage, Find My, Apple Pay. Use existing if you've had iPhone/iPad/Mac; create new during setup if completely new to Apple.Should I enable iCloud Keychain or use a third-party password manager?
iCloud Keychain if Apple-only. 1Password / Bitwarden if cross-platform or need family vaults and advanced features. Don't run two simultaneously.How does Apple ID region work for South African users?
South Africa region: Rand pricing, SA bank cards, smaller App Store catalogue. US region requires US billing address. Most SA users default to South Africa.Do I need to enable FileVault encryption?
On Apple Silicon, enabled by default with hardware encryption, zero performance cost. On Intel, enable for any portable device. Save the recovery key.Is AppleCare+ worth it on a new MacBook?
For portable MacBooks, usually yes — a single screen incident costs more than the premium. 60-day window from purchase. Lower value for desktop Macs (mini, Studio).What should I do in the first 60 days with a new MacBook?
AppleCare+ decision (60-day window), set up Time Machine, enable Find My, complete 2FA setup, register Apple Pay, tour System Settings, review which apps you actually use.
Get the Evetech app
Exclusive app-only prices, daily flash sales, and free delivery on orders over R4,000 — download the app and start saving.