Mac Migration Guide
Old Mac to new Mac. — Migration Assistant. One hour. Everything moves.
Apple built Migration Assistant to make this the easiest hardware-swap in computing. Three transfer methods, one workflow, and your new Mac wakes up looking exactly like your old one.
- Migration Assistant
- Automatic
- depending on data
- 30-90 min
- transfer routes
- Wi-Fi / USB-C
Migration Assistant — Apple's built-in answer
Migration Assistant is the official Apple tool for moving everything from your old Mac to your new one. It's installed on every Mac shipped since 2007, lives at Applications → Utilities → Migration Assistant, and handles the entire transfer with one workflow.
When you first power on a brand-new Mac, Setup Assistant offers Migration as part of the first-run experience — this is often the easiest moment to do it. If you skipped that step (or your new Mac is already set up), you can run Migration Assistant any time from System Settings → General → Transfer or Reset → Open Migration Assistant.
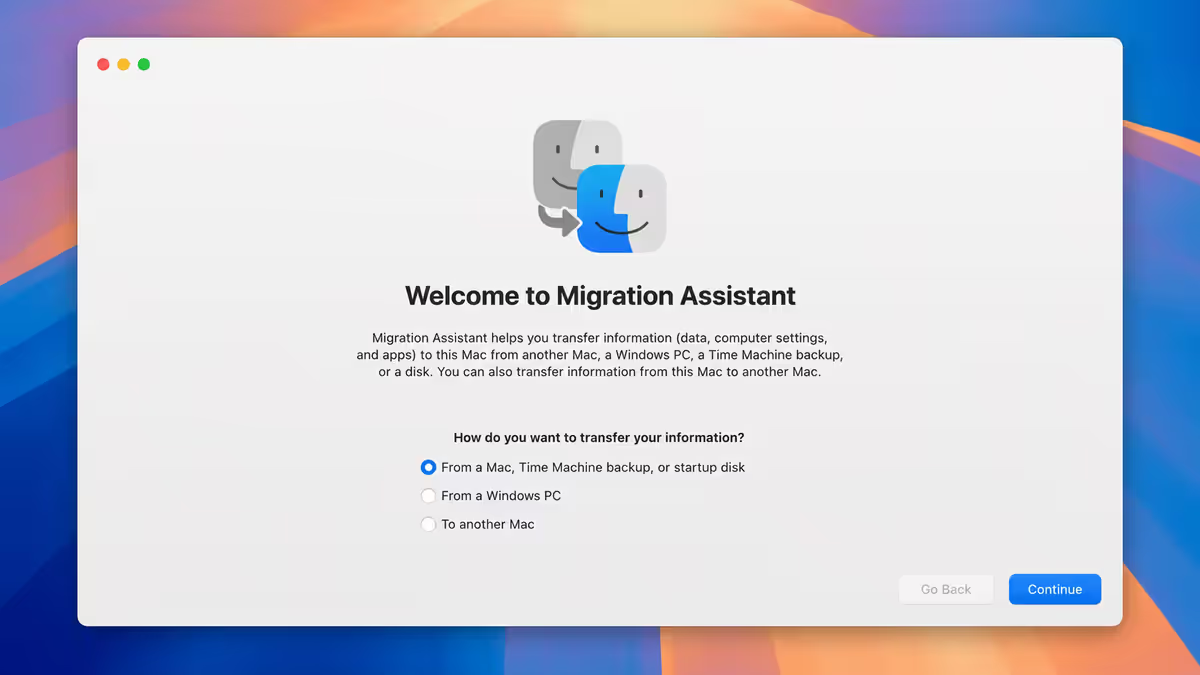
On the new Mac, choose "From a Mac, Time Machine backup, or startup disk." On the old Mac, run Migration Assistant and choose "To another Mac." The two Macs negotiate a connection, the new Mac displays which sources are available, and the transfer begins after you confirm what to bring over.
Three transfer methods — pick the right one
Migration Assistant accepts three different connection methods. The right one depends on data volume, your patience for waiting, and whether you have both Macs in the same room.
| Method | Speed | Best when |
|---|---|---|
| Wi-Fi (both Macs same network) | Slowest — ~80-200 GB/hour | No cable available, small data set (under 200GB) |
| USB-C / Thunderbolt cable | Fastest — ~600-1500 GB/hour | Both Macs in the same room, fast turnaround needed |
| Time Machine backup on external drive | Reliable — drive-speed-dependent | Old Mac unavailable, offline migration, failsafe approach |
Wi-Fi migration is the no-cable route. Both Macs join the same Wi-Fi network, then Migration Assistant pairs them with a one-time code displayed on both screens. Easy but slow — a 500GB transfer routinely takes 3-5 hours on Wi-Fi 5, around 2 hours on Wi-Fi 6/6E with a strong signal.
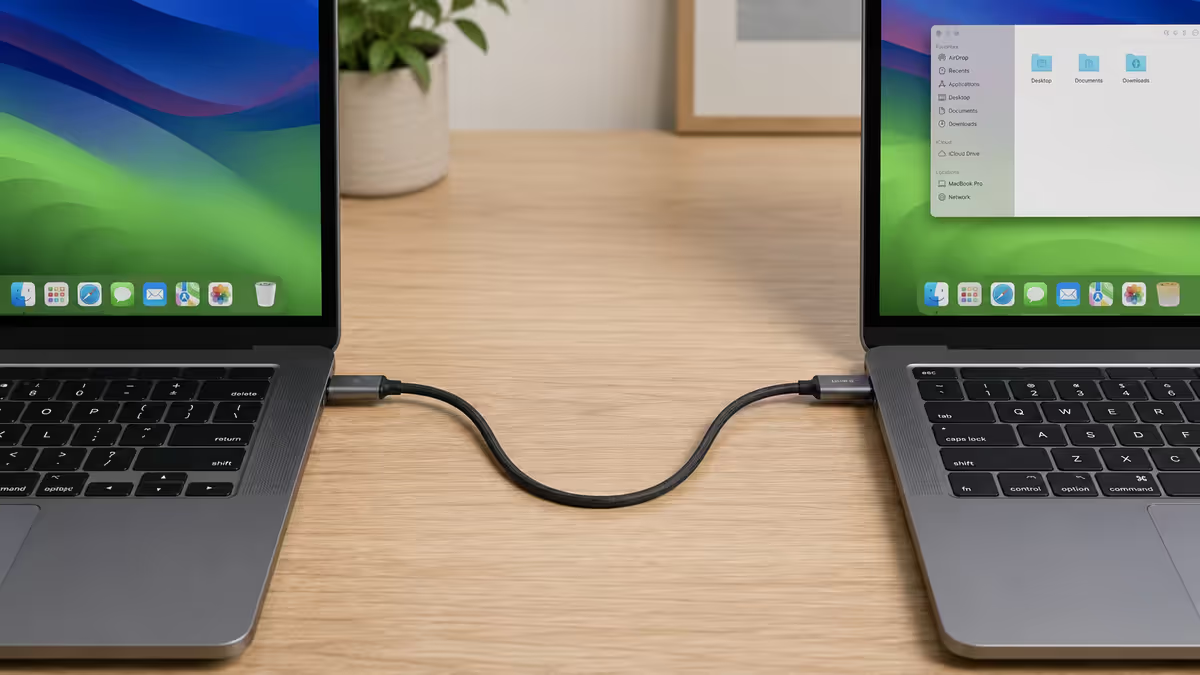
USB-C / Thunderbolt cable migration is the winner if you have a cable handy. Connect the two Macs with a USB-C cable (any USB-C cable works, but Thunderbolt is fastest). Migration Assistant detects the direct connection automatically and uses it in preference to Wi-Fi. A 500GB transfer typically completes in 25-40 minutes.
Time Machine backup migration is the safest route if you can't have both Macs powered on at the same time. Make a complete Time Machine backup of the old Mac to an external SSD or HDD, then on the new Mac select that drive as the migration source. Bonus: you have a full backup of the old Mac for years afterwards.
What migrates (and what doesn't)
Migration Assistant brings across the vast majority of your old Mac's data and configuration. Here's the full breakdown.
What migrates automatically
- User account folders: Documents, Pictures, Music, Videos, Desktop, Downloads
- Browser data: Safari, Chrome, Firefox bookmarks, history, saved passwords
- Mail accounts: all configured email accounts and local mailboxes
- Most installed apps: apps in /Applications, including third-party
- System settings: Dock layout, Finder preferences, Mission Control, hot corners
- User accounts: multiple users transfer with their full home folders
- Network passwords and Wi-Fi: all saved networks and credentials
- iCloud Keychain: saved passwords sync via iCloud (not migration directly)
- Calendars, Contacts, Reminders: via iCloud sync after Apple ID sign-in
What doesn't migrate cleanly
- Apps requiring re-licensing: Adobe Creative Cloud (re-activate per device), Microsoft Office (re-sign-in to Microsoft 365), Final Cut Pro (signs in via Apple ID automatically), Logic Pro (same)
- FileVault encryption state: the new Mac's FileVault is a fresh state — re-enable in Settings → Privacy & Security if you want full-disk encryption
- Some system-level configurations: kernel extensions, virtualisation configs (Parallels, UTM, VMware Fusion), and software requiring kext load
- Time Machine source drive history: the new Mac is treated as a new device for Time Machine — start a fresh backup chain
- Touch ID fingerprints: Touch ID enrolment is hardware-bound — re-enrol on the new Mac
Pre-migration checks
Five things to verify before you start. These prevent the most common failure modes and save you re-running a 90-minute migration.
- Both Macs on the same Wi-Fi network (for Wi-Fi migration) or USB-C cable connected (for cable migration). Same SSID, same router, both showing strong signal.
- Old Mac signed in to your Apple ID at System Settings → Apple ID. This ensures iCloud-stored data (iCloud Drive, Photos, Messages history) syncs to the new Mac after the migration completes.
- Time Machine backup completed before migration as a failsafe. Even if you're not migrating via Time Machine, having a current backup means you can recover any individual file post-migration if something didn't carry over.
- New Mac has at least 150% of the old Mac's used storage free. Migration creates temporary files during transfer. A 500GB old Mac needs roughly 750GB free on the new Mac.
- Both Macs plugged into power. Migration on battery can pause if power drops below 20%. Plug both in for the duration.
Step-by-step migration process
The full migration workflow, assuming both Macs powered on and connected via USB-C or Wi-Fi.
On the new Mac
- Open System Settings → General → Transfer or Reset → Open Migration Assistant (or run from Applications → Utilities)
- Authenticate with admin password
- Choose "From a Mac, Time Machine backup, or startup disk" when prompted
- Wait for the old Mac to appear in the source list
On the old Mac
- Open the same Migration Assistant (Applications → Utilities)
- Authenticate with admin password
- Choose "To another Mac"
- Wait for both Macs to display a matching pairing code
- Confirm the code matches on both screens, then accept on both
Confirm what to transfer
- On the new Mac, you'll see categories: Applications, User accounts, Other files & folders, Network settings, System settings
- Default selection is everything — leave it ticked unless you have a specific reason to exclude
- Confirm and start. The estimated time appears (typically 30-90 minutes)
- Both Macs must stay powered, awake and connected for the duration
After transfer completes: the new Mac restarts and presents the login screen with your migrated user account. Sign in with your old Mac's password. Open System Settings → Apple ID and sign in to your Apple ID — iCloud Drive, Photos and Messages will begin syncing.
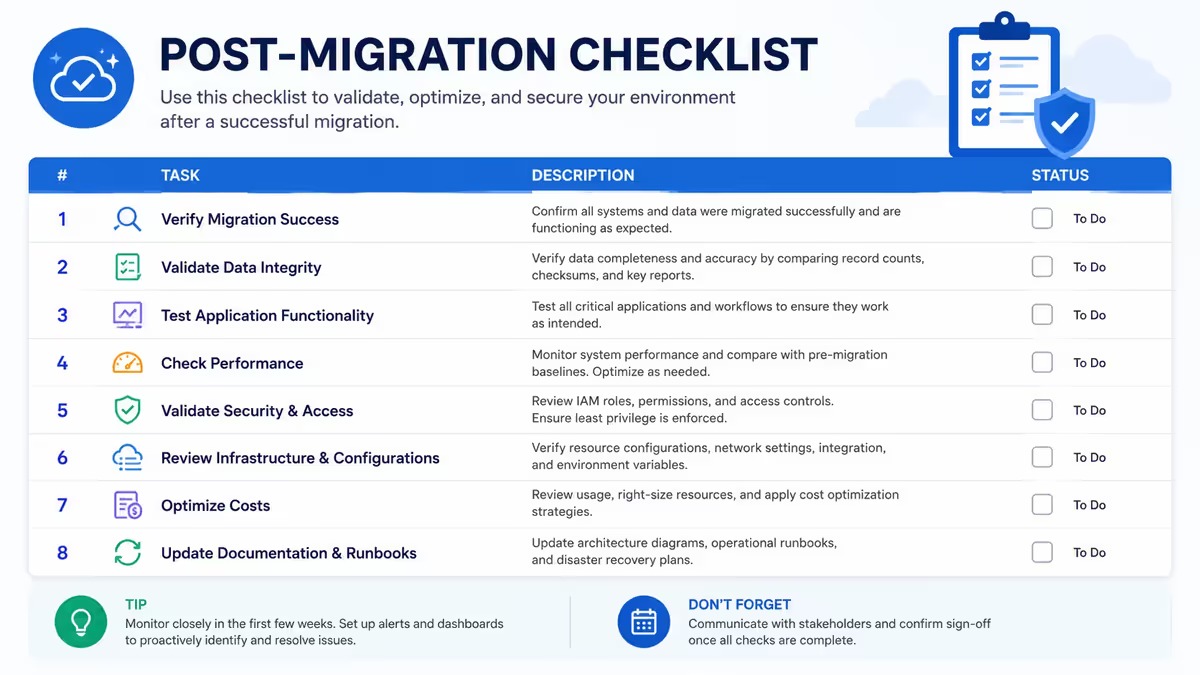
Post-migration cleanup & verification
Once migration finishes and you've signed in to the new Mac, run through this checklist. About 15-20 minutes of work, and you'll catch the small issues that catch most people out.
- Sign in to Apple ID at System Settings → Apple ID (top of sidebar). iCloud Drive, Photos, Messages and Keychain start syncing.
- Verify iCloud sync — open Photos and wait for the library to download (can take 10-60 min for large libraries); check iCloud Drive in Finder sidebar
- Re-sign-in to Microsoft 365 — open Word or Excel, click "Sign In" in the top-right, enter your Microsoft account
- Re-activate Adobe Creative Cloud — open Creative Cloud app, sign in; if it shows "device limit reached", sign out remotely at adobe.com → account → devices
- Re-enable FileVault — System Settings → Privacy & Security → FileVault → Turn On (recovery key saved to your Apple ID by default)
- Re-enrol Touch ID — System Settings → Touch ID & Password → Add Fingerprint (your old fingerprints aren't portable across Macs)
- Verify printers and scanners — Wi-Fi printers usually re-appear automatically; USB printers may need driver re-install
- Re-pair Bluetooth devices — magic mouse, AirPods etc. auto-sync via iCloud; non-Apple Bluetooth devices need re-pairing
- Check 1Password / password manager — sign in to confirm your vault unlocks on the new Mac
Factory-reset the old Mac before selling
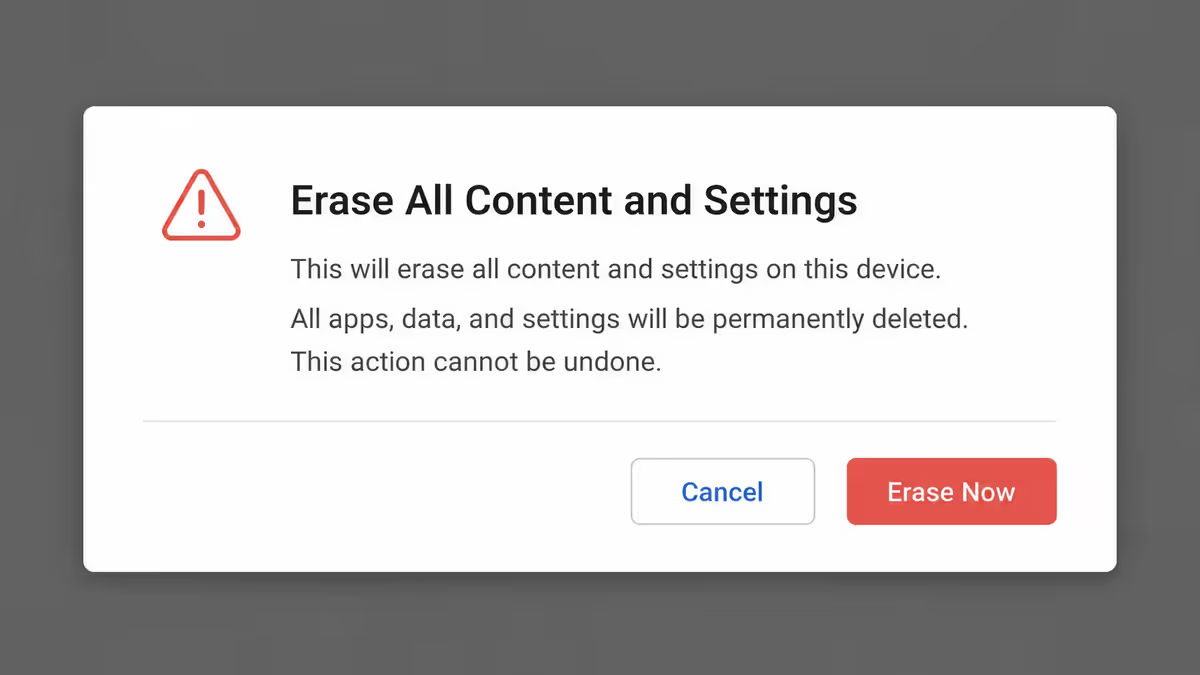
If you're selling or donating the old Mac, factory-reset is essential. Apple Silicon Macs (M1, M2, M3, M4 series) make this trivially easy — under 5 minutes via the built-in Erase All Content function.
On Apple Silicon Macs (M1 and later)
- Open System Settings → General → Transfer or Reset
- Click Erase All Content and Settings
- Authenticate with admin password
- The Mac unpairs from iCloud, removes Find My, erases the SSD, and reboots to setup screen
- Power down and box up — ready to sell
On Intel Macs (no T2 chip)
- Sign out of iCloud, iMessage and Find My manually first
- Restart and hold Cmd+R during boot to enter Recovery mode
- Open Disk Utility, select the internal disk, choose Erase (APFS, GUID partition map)
- Quit Disk Utility, choose Reinstall macOS, complete reinstall
- At the setup screen, press Cmd+Q to shut down without setting up
Why factory reset matters: without it, the new owner could potentially access your personal files (FileVault notwithstanding, leaving an account active is poor hygiene), and your Apple ID remains tied to the device's Find My / Activation Lock — making the Mac unusable for the buyer.
Common migration mistakes
Migrating onto a Mac that's already set up with a user account. Migration Assistant works best on a fresh-out-of-box Mac during Setup Assistant. Migrating to an already-set-up Mac forces a username conflict and creates "yourname1" suffix accounts. Erase the new Mac and restart Setup Assistant if you accidentally set it up first.
Choosing Wi-Fi migration when you have a USB-C cable. A USB-C cable is roughly 4× faster than Wi-Fi for the same data volume. Always use cable migration when both Macs are in the same room.
Not signing out of Adobe / Microsoft / 1Password before migration. These count active devices against your licence. Sign out from the old Mac before migration so you don't burn a device slot.
Selling the old Mac without factory-reset. The next owner inherits your Find My / Activation Lock, which means they can't use the Mac at all. Apple support has to be involved to unlock. Easy to avoid — Erase All Content in Settings takes 3 minutes.
Pulling the cable / killing power mid-migration. The transfer aborts and you'll need to restart from scratch. Set both Macs on a flat surface, plug both into power, kick off the migration, and walk away.
Key takeaways
- Migration Assistant (built into macOS) handles everything — apps, files, settings, accounts.
- USB-C cable migration is ~4× faster than Wi-Fi. Use cable when both Macs are in the same room.
- Re-sign-in to Microsoft 365 and re-activate Adobe Creative Cloud post-migration — they're per-device licences.
- Re-enable FileVault and re-enrol Touch ID after migration — these don't carry over.
- Factory-reset the old Mac via Settings → General → Erase All Content before sale or donation.
Frequently asked questions
How long does Mac-to-Mac migration take?
Typically 30-90 minutes. Median migration time is 52 minutes for 100-500GB of data. USB-C migrations are ~4× faster than Wi-Fi. A full 1TB SSD can take 2-3 hours over Wi-Fi but 30-45 minutes over USB-C.What's the fastest way to migrate?
Connect both Macs with a USB-C or Thunderbolt cable, then run Migration Assistant. ~4× faster than Wi-Fi.What gets transferred?
Documents, Pictures, Music, Videos, bookmarks, mail accounts, most Mac apps, system settings, user accounts, network passwords, Wi-Fi, and iCloud Keychain. Per-device licensed apps (Adobe CC, Microsoft Office) need re-activation.Do I need to back up my old Mac first?
Yes — always create a Time Machine backup as a failsafe before migration. It's also the easiest fallback method if both Macs can't be on at the same time.Will my apps work after migration?
Most Mac App Store apps and standard apps work immediately. Microsoft 365 often needs a re-sign-in. Adobe Creative Cloud needs per-device re-activation. Final Cut Pro and Logic Pro re-activate automatically after Apple ID sign-in.What happens to Apple ID and iCloud?
Sign in to your Apple ID on the new Mac. iCloud Drive, Photos, Mail, Messages and Keychain start syncing. Two-factor may prompt on your old Mac or iPhone to authorise.Should I factory-reset the old Mac before selling?
Yes — on Apple Silicon Macs, Settings → General → Transfer or Reset → Erase All Content and Settings. Under 5 minutes. Without this, Find My / Activation Lock prevents the next owner from using the Mac.Can I migrate from Intel Mac to Apple Silicon?
Yes — Migration Assistant handles Intel-to-Apple-Silicon seamlessly. Rosetta 2 translates Intel-only apps transparently. Native Apple Silicon versions install automatically where available.
Get the Evetech app
Exclusive app-only prices, daily flash sales, and free delivery on orders over R4,000 — download the app and start saving.