iOS Developer Setup Guide
Xcode on Mac — your first iOS app. — Swift. SwiftUI. Shipped.
The iOS toolchain runs on one platform: macOS. You need the right hardware, the right Xcode version, and a clear path from "Hello, World" to "live on TestFlight". Here is that path.
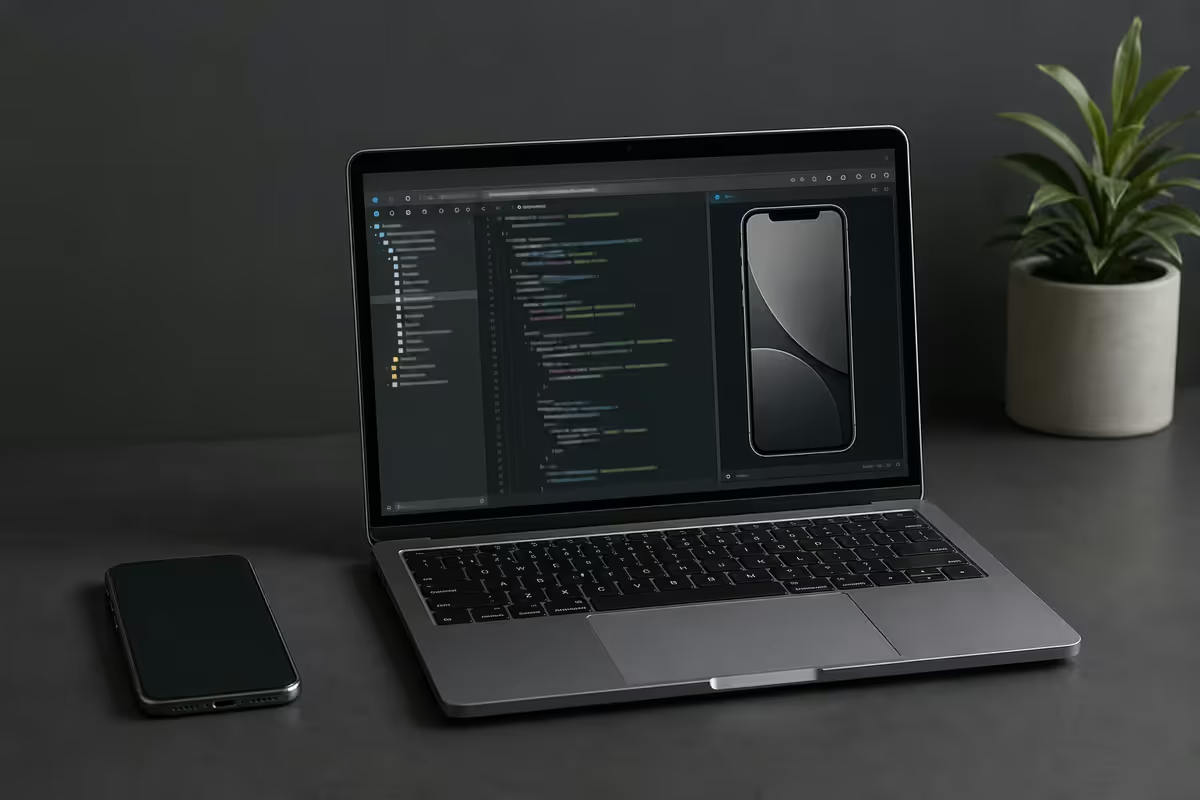
Why a Mac is required for iOS development
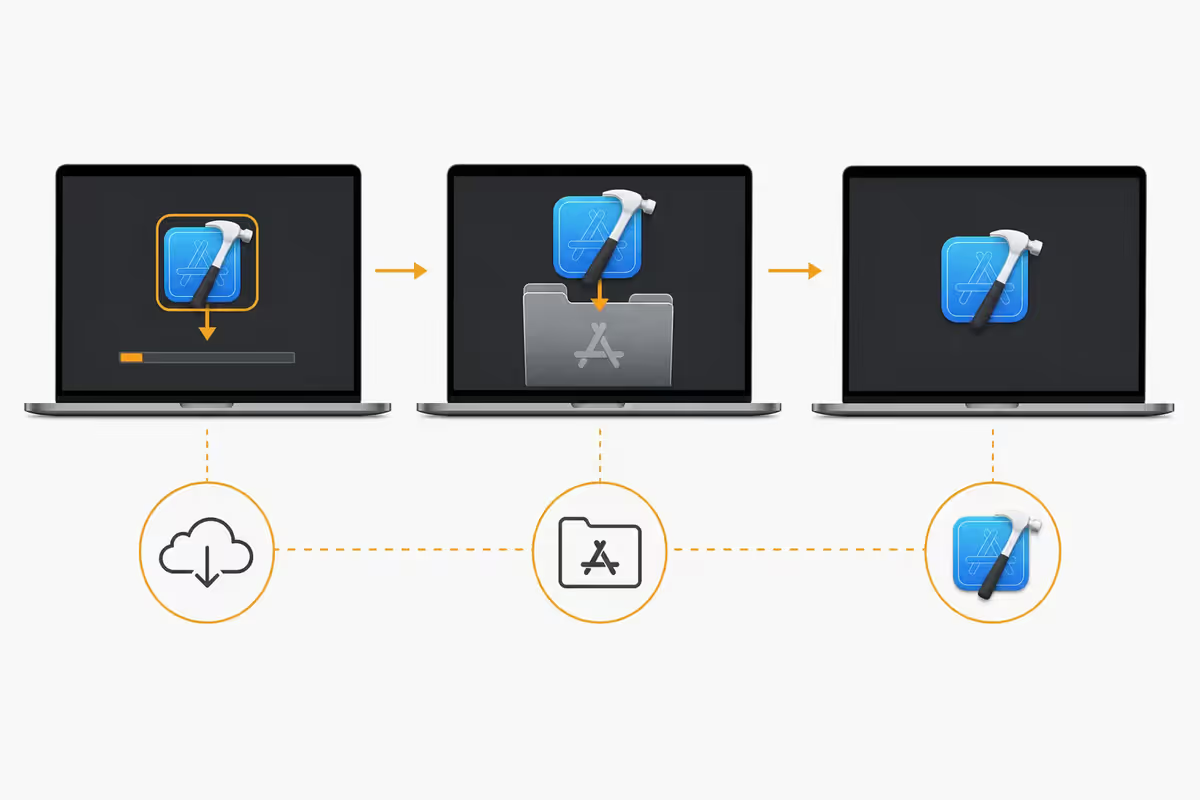
Xcode — Apple's iOS development environment — runs only on macOS. It is not available on Windows, not available on Linux, and Apple's licence agreement explicitly forbids running macOS on non-Apple hardware (so VMs on a PC are off the table legally).
There are three workarounds, all imperfect:
- Cloud Mac services like MacStadium or MacInCloud rent a real Mac in a data centre. Works for occasional use; expensive for full-time development (~R3,000-R6,000/month).
- Cross-platform frameworks like React Native, Flutter or .NET MAUI let you write iOS apps on Windows/Linux. You still need a Mac to compile the final iOS build and submit to the App Store.
- "Borrowing a Mac for the App Store submission step" — works for hobbyists once or twice but breaks down for any real iteration cycle.
For serious iOS development, owning a Mac is the cost of entry. The good news: in 2026 an M3 MacBook Air starts at about R23,000 in SA and is genuinely capable of small-to-medium iOS projects.
What Mac hardware do you need
Apple stopped supporting new Xcode versions on Intel Macs in 2025. Apple Silicon (M-series) is essentially mandatory for current iOS development.
| Spec | Minimum | Recommended |
|---|---|---|
| Chip | M2 base | M3 Pro / M4 Pro or better |
| RAM | 16GB | 32GB (large projects) |
| Storage | 512GB | 1TB (Xcode + simulators + projects) |
| Free space for Xcode | ~50GB | 100GB+ with multiple simulator runtimes |
| Display | 13" laptop | 16" laptop or external 27" for editor + sim side-by-side |
Why 16GB minimum: Xcode alone happily uses 4-6GB, the iOS Simulator another 2-3GB, your browser 2-3GB, plus macOS itself. On 8GB Macs (still sold in 2023-2024), swap thrashing dramatically slows builds.
Why 32GB recommended: medium-to-large projects open multiple simulator runtimes, additional Xcode windows, a database tool and a chat app concurrently. 32GB stays smooth; 16GB starts swapping.
Why M-Pro / M-Max matters: build time scales heavily with CPU performance cores. An M-Pro builds a 500-file Swift project in 30-50 seconds where an M-base takes 80-120 seconds. Over a day, that's hours.
Installing Xcode
Xcode is a free download from the Mac App Store. Search "Xcode", click Get, wait. The download is ~15-20GB.
After install, launch Xcode once. It will:
- Ask you to accept the licence agreement
- Install additional components (~5GB)
- Download the default iOS simulator runtime (~10GB per iOS version)
Allow 30-45 minutes for first-time setup on a 100Mbps fibre connection. From SA, the App Store download is fast on most ISPs (Cool Ideas, Webafrica, Vox, Afrihost all good).
Multiple Xcode versions — xcodes CLI
As soon as you're maintaining an app, you'll hit this problem: production app needs Xcode 15.4 (because its CI pipeline pins to it), your new side project wants Xcode 16.2 features. The Mac App Store only ever holds one version of Xcode.
The solution: xcodes — a community CLI that installs and switches between any Xcode version side-by-side:
brew install xcodesorg/made/xcodesxcodes install 16.2— downloads from Apple's developer sitexcodes installed— lists what you havexcodes select 15.4— sets the active Xcode
Each Xcode lives in /Applications/Xcode-X.Y.Z.app. Disk-hungry — each is 15-20GB — but invaluable when you work on multiple apps with different toolchain pins.
Apple Developer Program — when you need it
Apple offers two tiers of developer access:
| Tier | Cost | What you get |
|---|---|---|
| Free Apple ID | R0 | Xcode, simulator, side-load to your personal device (7-day expiry) |
| Apple Developer Program | R1,800/yr (~$99) | App Store publishing, TestFlight, push notifications, Sign in with Apple, advanced capabilities |
| Enterprise Program | R5,500/yr (~$299) | Internal distribution to employees, not for public release. Rare — most companies use TestFlight instead |
Skip the paid program while learning. A free Apple ID is enough to run apps in the simulator, side-load to your own iPhone (rebuild every 7 days), and follow tutorials.
Pay when you need to: ship to the App Store, distribute beta builds via TestFlight, use push notifications, access HealthKit / Sign in with Apple, or get more than 7-day device installs.
Swift in 2026 — the default language
Swift has been Apple's primary iOS development language since 2015. By 2026 it is essentially universal — Apple's APIs are Swift-first, sample code is Swift, every new project starts in Swift.
Objective-C still exists and Xcode supports it, but only for maintaining legacy codebases. No major new iOS app in 2026 starts in Objective-C.
Swift is modern, type-safe, has gentle syntax (closer to Python than C++) and great compiler diagnostics. It's also useful outside iOS — Swift on the server (Vapor framework), Swift on Linux, even Swift on Windows have small but real ecosystems.
SwiftUI vs UIKit — which UI framework
Apple has two UI frameworks for iOS apps:
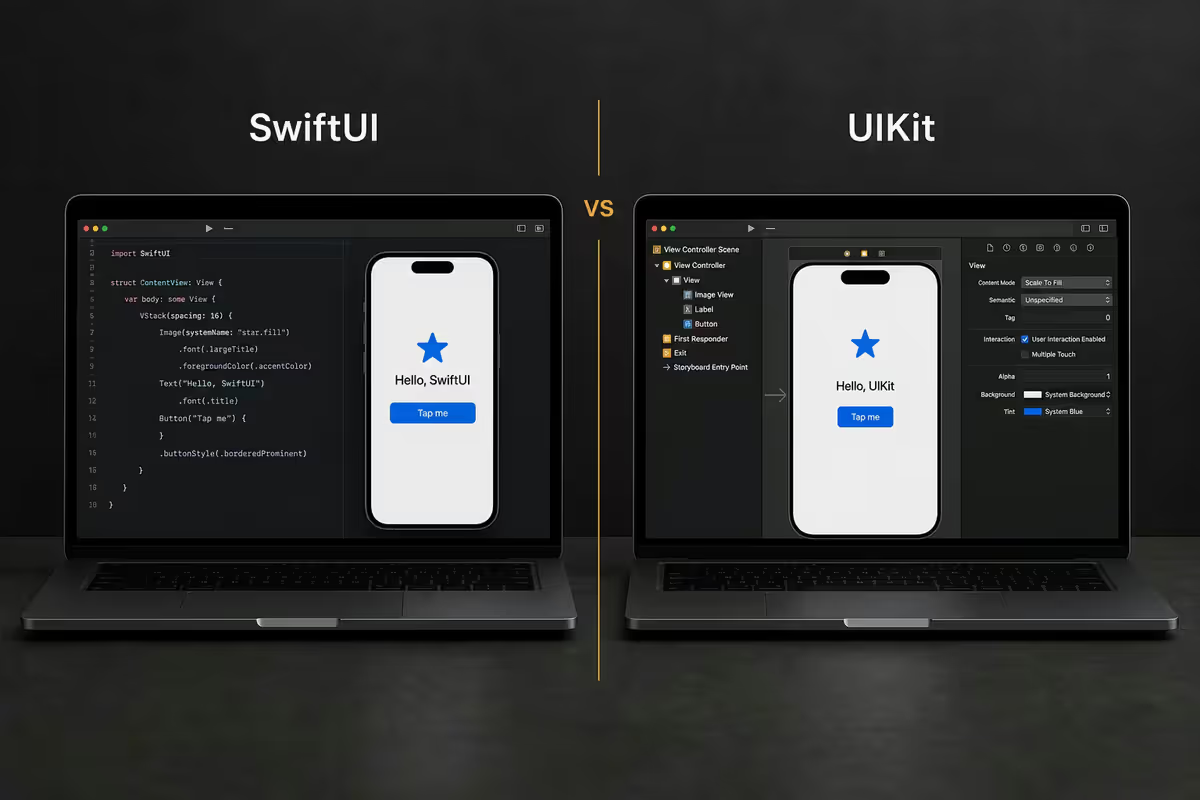
- SwiftUI — modern declarative framework, introduced 2019, matured by 2024. Works across iOS, iPadOS, macOS, watchOS and visionOS with one codebase. Apple's strategic direction.
- UIKit — the older imperative framework that powered every iPhone app from 2007 onwards. Still fully supported, still used in many shipping apps.
For new projects in 2026: SwiftUI. Apple's samples are SwiftUI-first, the developer mind-share has shifted, and SwiftUI is dramatically faster to build with for typical app UI.
When UIKit still matters: very complex custom controls, performance-critical interfaces (high-frame-rate games, drawing apps), maintaining a UIKit codebase. You can mix the two in one app — embed UIKit views in SwiftUI and vice versa.
Your first project — Hello, SwiftUI
Launch Xcode, click "Create New Project", and follow this path:
- Template: iOS → App
- Product Name:
MyFirstApp - Interface: SwiftUI
- Language: Swift
- Bundle Identifier: reverse-domain convention —
za.co.yourname.myfirstapp - Storage: None (you can add Core Data or SwiftData later)
Xcode creates a working app with one screen showing a globe icon and "Hello, world!" text. Press the play button or Cmd+R to run in the simulator. First build is ~15-30 seconds; subsequent builds are 2-5 seconds.
The bundle identifier matters: it uniquely identifies your app on Apple's side. Choose it carefully and use a domain you control — once your app ships under za.co.yourname.myfirstapp, you can't change it without losing existing users.
Simulator vs real device
The iOS Simulator runs a full iOS image as a Mac process. It is excellent for fast iteration — instantaneous app launches, debug attach, simulate any iPhone or iPad screen size.
What the simulator doesn't do:
- Camera input (uses a procedurally generated test pattern)
- GPS / location services (you can spoof a location, but no real GPS)
- Real push notifications (limited test support in newer Xcode)
- App Store In-App Purchase (use StoreKit sandbox + real device)
- Accelerometer / gyroscope / motion sensors
- HealthKit, accurate Bluetooth
- Performance profiling that maps to actual device performance
Connecting a real iPhone: plug in via USB-C, trust the device on first connection, select it from the Xcode device dropdown. After initial setup, wireless debugging over the same Wi-Fi network works flawlessly.
Provisioning profiles and code signing
Code signing is the part of iOS development most new developers find frustrating. The mental model:
- Certificates identify you as a developer (signed by Apple)
- App IDs uniquely identify each app you make (e.g.,
za.co.yourname.myfirstapp) - Devices are individual iPhones/iPads registered for testing
- Provisioning profiles tie these three together — they say "this developer can run this app on these devices"
Xcode's "Automatically manage signing" handles most of this transparently — toggle it on in your target's Signing & Capabilities tab, sign in with your Apple ID, and Xcode handles certificate creation, device registration and profile generation. For 95% of indie developers, this is enough.
Manual signing (uncheck automatic) is needed for teams with shared certificates, CI build servers, or distribution-side profiles (vs development profiles).
App Store Connect and TestFlight
App Store Connect is Apple's web portal for managing your apps — metadata, screenshots, pricing, builds, beta testers, sales reports. Logging in requires an active Apple Developer Program subscription.
TestFlight is the built-in beta distribution flow:
- Archive a build in Xcode (Product → Archive)
- Upload to App Store Connect (Xcode does this directly)
- Wait 5-15 minutes for Apple to process the build
- Add internal testers (your Apple Developer team) — instant install
- Add external testers by email or shareable link — needs a brief Apple review (1-2 days)
- Testers install via the free TestFlight app on the App Store
Limits: up to 100 internal testers, up to 10,000 external testers. Builds expire 90 days after upload — push a new build to extend.
Common iOS development gotchas
Sandboxing. iOS apps run in a strict sandbox — you can't read other apps' data, you can only write into your own app's container. Surprising for developers coming from desktop.
Entitlements. Many features require explicit entitlement requests — Push Notifications, iCloud, HealthKit, Game Center, App Groups. Set these in the Signing & Capabilities tab.
App Transport Security (ATS). By default, iOS apps can only make HTTPS connections. Plain HTTP requires Info.plist exemptions and increasingly strict App Store review.
Background app refresh. iOS aggressively suspends backgrounded apps. Background tasks need careful design — BackgroundTasks framework, silent push notifications, or location-trigger wake-ups.
Privacy permission strings. Every privacy-sensitive API (camera, mic, contacts, location, photos, calendar) needs an Info.plist string explaining why your app needs it. Missing strings cause runtime crashes.
Where to actually learn — free and paid
Free resources (highly recommended):
- 100 Days of SwiftUI (Paul Hudson) — project-based, free, the modern community standard for learning
- Develop in Swift Tutorials (Apple official)
- Stanford CS193p (Paul Hegarty) — full university course, free on YouTube, deep dive into SwiftUI fundamentals
- Apple Developer documentation — significantly improved in 2025-2026, now reliably useful
Paid resources worth the money:
- Designcode — SwiftUI + design focus, great for product-thinking developers
- Sean Allen — pragmatic, App-Store-shipping content
- Kodeco (ex-Ray Wenderlich) — deep dives, especially for advanced topics
Common mistakes
Buying a MacBook Air for serious dev work. It runs Xcode fine, but the passive cooling means thermal throttling on long builds. Pro chips with active cooling stay fast for hours.
Under-speccing RAM. 16GB is the floor, not the target. Xcode + simulator + browser eats 16GB easily.
Paying the developer fee on day one. Wait until you actually need TestFlight or push notifications. Most of learning iOS dev needs zero paid subscription.
Picking a bundle identifier you don't own. Use a reverse-domain you control. Don't use com.apple.something, that's reserved and Apple will reject submissions.
Starting in UIKit because the tutorial is from 2018. Old tutorials still teach UIKit-first. In 2026, SwiftUI is the default — pick up UIKit only when you need it.
Never testing on a real device. Simulator hides camera issues, GPS issues, performance issues. Test on real hardware before TestFlight.
Key takeaways
- iOS development requires a Mac. Apple Silicon (M-series), 16GB RAM minimum, 32GB recommended.
- Xcode is free from the Mac App Store. Allow ~50GB free disk plus 10GB per extra simulator runtime.
- Apple Developer Program (R1,800/yr) is needed for App Store + TestFlight, not for learning.
- Use Swift + SwiftUI for new projects. UIKit only when a specific problem requires it.
- Test on a real device before TestFlight. Simulator hides camera, GPS, performance issues.
Frequently asked questions
Do I really need a Mac to develop iOS apps?
Yes — Xcode is macOS-only and Apple's licence forbids macOS in VMs on non-Apple hardware. Cloud Mac rentals exist but are expensive long-term.What Mac hardware do I need for Xcode?
Apple Silicon (M-series) is essentially required. 16GB RAM minimum, 32GB recommended. 100GB+ free storage. M-Pro or better for serious work.How much does the Apple Developer Program cost in South Africa?
R1,800/year (approximately $99). Needed for App Store publishing, TestFlight, push notifications. Skip while learning.Swift or Objective-C in 2026?
Swift, with rare exceptions. Objective-C is legacy maintenance only. New projects start in Swift.SwiftUI or UIKit for new projects?
SwiftUI for almost all new projects in 2026. UIKit is still relevant for complex custom UI and legacy app maintenance.Can I test iOS apps without a real iPhone?
Yes — iOS Simulator covers 80% of testing. Real device needed for camera, GPS, push notifications, IAP, sensors, performance.What's TestFlight and do I need it?
Apple's official beta distribution — up to 10,000 external testers. Needs Apple Developer Program. Builds expire after 90 days.Where should I start learning iOS development?
Hacking with Swift's free 100 Days of SwiftUI, Apple's Develop in Swift Tutorials, or Stanford CS193p on YouTube. Pick one and finish it.
Get the Evetech app
Exclusive app-only prices, daily flash sales, and free delivery on orders over R4,000 — download the app and start saving.