Mac Dev Environment Setup
Set up Mac for web dev.
— Homebrew first. nvm before Node. Order matters.
Step 1 — Xcode Command Line Tools
Almost everything downstream depends on Apple's Command Line Tools — Git, compilers, and a stack of libraries Homebrew needs. You don't need the full Xcode IDE (15GB), just the Command Line Tools (~2GB).
macOS prompts you to install. Accept and wait 10-15 minutes depending on your internet. Verify it worked:
/Library/Developer/CommandLineTools
$ git --version
git version 2.43.0
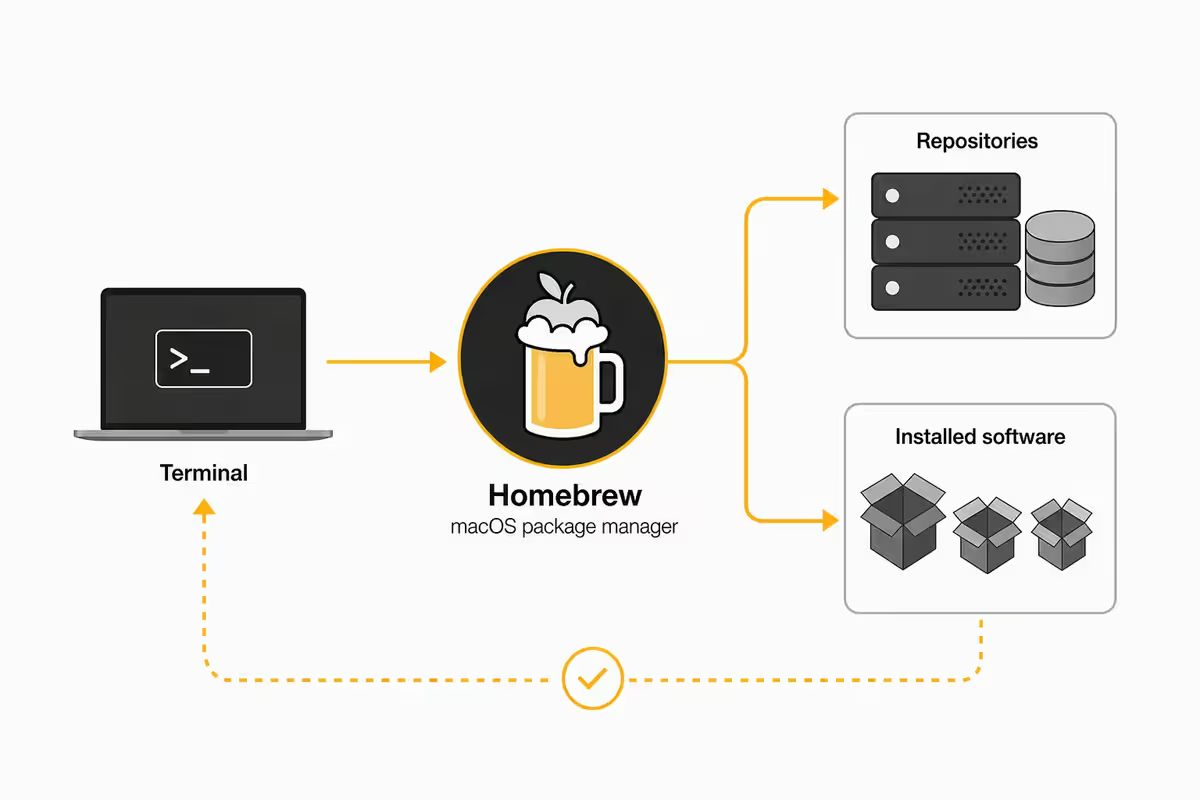
Step 2 — Homebrew, the macOS package manager
Homebrew is the de-facto package manager for macOS. Run the install script from brew.sh (linked from the official Homebrew homepage).
Add Homebrew to your shell's PATH (the install script tells you exactly what to run; here it is for Zsh which is the macOS default):
$ eval "$(/opt/homebrew/bin/brew shellenv)"
$ brew --version
Homebrew 4.4.x
Step 3 — Essential brew packages
Install the core CLI tools every web dev needs. These are safe to install in bulk:
$ brew install postgresql redis sqlite
$ brew install --cask iterm2 visual-studio-code rectangle
What each does:
| Tool | What it's for |
|---|---|
git | Version control — newer than the Apple bundled version |
gh | GitHub CLI for PRs, issues, releases from terminal |
wget / curl | HTTP file fetching — curl preinstalled but worth pinning |
jq | JSON parsing in shell — invaluable for API debugging |
tree | Visualise directory structures |
htop | Better Activity Monitor for terminal |
ripgrep (rg) | Faster grep — used by VS Code under the hood |
fd | Faster, friendlier find command |
bat | cat with syntax highlighting |
postgresql / redis / sqlite | Local databases for development |
iterm2 | Better terminal than Apple Terminal.app |
rectangle | Window snapping (free Magnet alternative) |
Skip brew install node for now — we'll install Node via nvm instead, which is a critical distinction explained below.
Step 4 — Terminal upgrade (iTerm2 + Zsh + powerlevel10k)
macOS ships with Apple's Terminal.app, but iTerm2 has been the dev community standard for over a decade. Features Terminal.app still doesn't have: split panes, hotkey window, profile-based colour schemes, mouseless copy-mode, native tmux integration.
Once iTerm2 is installed, set it as default and add Oh My Zsh for productivity:
Then install powerlevel10k for a fast, configurable prompt:
$ sed -i '' 's|^ZSH_THEME=.*|ZSH_THEME="powerlevel10k/powerlevel10k"|' ~/.zshrc
$ exec zsh
On first run, powerlevel10k walks you through a configurator with sensible defaults. Pick "Rainbow" or "Lean" for prompt style.
Step 5 — VS Code with essential extensions
VS Code is the dominant editor for web dev — fast, well-maintained, infinite extensions. Installed in the brew step above; now install extensions.
Install the code CLI first (one-time): open VS Code → Cmd+Shift+P → "Shell Command: Install 'code' command in PATH". Now you can launch projects from terminal with code ..
Core extensions to install (run from terminal):
$ code --install-extension esbenp.prettier-vscode
$ code --install-extension eamodio.gitlens
$ code --install-extension christian-kohler.path-intellisense
$ code --install-extension formulahendry.auto-rename-tag
$ code --install-extension bradlc.vscode-tailwindcss
$ code --install-extension ms-azuretools.vscode-docker
$ code --install-extension github.copilot
Language-specific (install what you use): ES7+ React/Redux snippets, Vue Volar, Python, Ruby, Go. Themes: One Dark Pro or Tokyo Night. Icon themes: Material Icon Theme.
Step 6 — Git config + GitHub SSH
Configure Git globally so commits attribute correctly across every repo:
$ git config --global user.email "[email protected]"
$ git config --global init.defaultBranch main
$ git config --global pull.rebase false
Generate an SSH key for GitHub (ed25519 is the modern standard — faster and shorter than RSA):
# Press Enter to accept default location ~/.ssh/id_ed25519
# Set a passphrase (recommended) or leave blank
$ eval "$(ssh-agent -s)"
$ ssh-add --apple-use-keychain ~/.ssh/id_ed25519
$ pbcopy < ~/.ssh/id_ed25519.pub
The pbcopy command puts your public key on the clipboard. Paste it into GitHub → Settings → SSH and GPG keys → New SSH key. Test the connection:
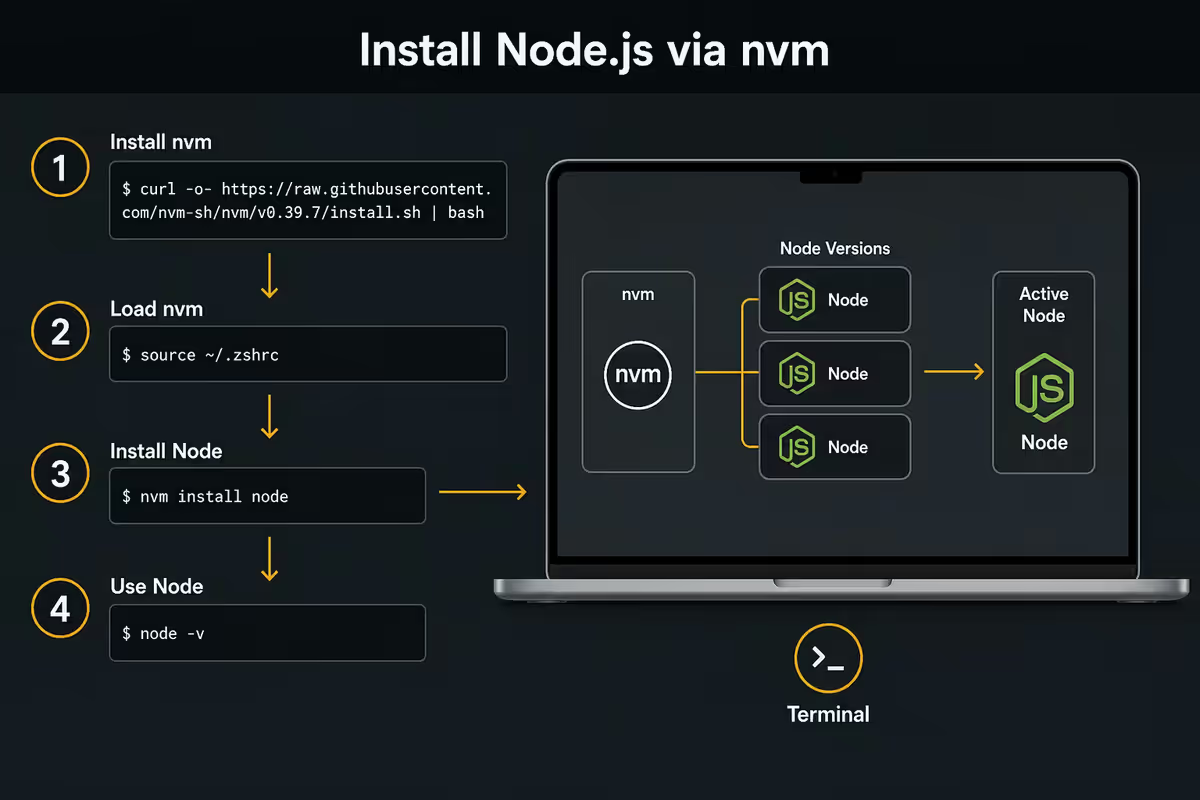
Step 7 — Node.js via nvm (not brew)
This is the most important decision in the whole setup. Do not install Node with brew install node. It locks you to one version system-wide, which breaks the moment you work on two projects requiring different Node versions.
Install nvm (Node Version Manager) instead:
The installer adds lines to ~/.zshrc. Restart your shell or run source ~/.zshrc. Then:
$ nvm install 20
$ nvm use 22
$ node --version
v22.12.0
Per-project Node versions: add a .nvmrc file at the project root containing the version (e.g. 20.18.0). Running nvm use in that folder picks it up. Add to your shell to auto-switch:
autoload -U add-zsh-hook
load-nvmrc() { [[ -f .nvmrc ]] && nvm use; }
add-zsh-hook chpwd load-nvmrc
Step 8 — Python via pyenv (if you do any full-stack)
Same logic as Node — the system Python on macOS is for Apple's tooling. Don't touch it. Install your own Python via pyenv so versions are isolated per project.
$ echo 'eval "$(pyenv init -)"' >> ~/.zshrc
$ exec zsh
$ pyenv install 3.13.1
$ pyenv global 3.13.1
For project virtualenvs: use python -m venv .venv or poetry / uv for modern dependency management. uv (by Astral, same team as Ruff) is the fastest pip/poetry replacement and increasingly the default in 2026.
Step 9 — Docker (or Colima / OrbStack)
If you need containerised dev environments, you have three solid options on Apple Silicon:
| Option | Pros | Cons |
|---|---|---|
| Docker Desktop | Official, GUI, widely used | Heavy on unified memory, paid for company use |
| Colima | Free, lightweight, CLI | No GUI, basic networking |
| OrbStack | Fastest, native Mac feel, paid | $8/month for commercial use |
For most devs, Docker Desktop or Colima. For performance-sensitive teams or container-heavy workflows, OrbStack is worth the $8.
Step 10 — REST clients (Postman, Insomnia, Bruno)
For testing APIs you need a HTTP client. The three serious options:
- Postman — most popular, full-featured, free tier limited to 3 collaborators, requires account login.
- Insomnia — open-source-ish, lighter than Postman, owned by Kong.
- Bruno — newer, fully open-source, file-based (collections in Git), gaining traction in 2025-2026.
For team work, Postman's collaboration features still win. For solo work or strict open-source preference, Bruno is excellent — collections live as plaintext files in your repo, version-controlled with the rest of your project.
Step 11 — Database GUI clients
Connecting to Postgres, MySQL, SQLite or others through a GUI is dramatically faster than psql for everyday inspection. Top options for Mac:
| Client | Strengths | Pricing (May 2026) |
|---|---|---|
| TablePlus | Beautiful UI, fast, supports every major DB | R1,500 one-time |
| Beekeeper Studio | Open-source, multi-DB, friendly UI | Free / R600/yr Pro |
| DBeaver | Java-based, supports everything including obscure DBs | Free community |
| Postico (Postgres only) | Mac-native, Postgres-focused, polished | R1,200 one-time |
| DataGrip | JetBrains, deeply integrated SQL refactoring | R3,500/yr |
For most Mac devs: TablePlus (worth the R1,500) or Beekeeper Studio (free and capable).
Apple Silicon vs Rosetta — what to care about
In 2026, almost every dev tool runs natively on Apple Silicon (ARM64). Rosetta 2 (Intel emulation) is rarely needed for web dev specifically. Where it still matters:
- Some Node.js packages with binary dependencies may have ARM64 binaries unavailable, falling back to compilation (slower install but works).
- Older Docker images may be x86-only — pull the arm64 variant or use
--platform=linux/amd64at the cost of speed. - Legacy Java tooling sometimes needs Rosetta. Modern OpenJDK builds are ARM-native.
- Some commercial dev tools still require Rosetta. The list shrinks monthly.
Apple's Rosetta 2 prompts itself when needed; you don't need to install it manually. For pure web dev (Node/Python/Go), you'll rarely encounter Rosetta in 2026.
Which MacBook to buy for web dev
The most-asked dev hardware question: which Mac for development.
| Workload | Recommendation | Why |
|---|---|---|
| Solo Next.js / React / Vue | MacBook Air M3 16GB | Light builds, no Docker — Air handles it cool and silent |
| Full-stack with Docker | MacBook Pro M-Pro 32GB | Docker + multi-monitor + browsers without swap pressure |
| Mixed dev + design + light video | MacBook Pro M-Pro 32GB | 14" or 16" — both excellent |
| ML / data + dev | MacBook Pro M-Max 64GB | Local LLM inference, large datasets fit in memory |
| Desktop-replacement dev | Mac Studio M-Max 64GB | Headless server power for monorepo builds |
The 32GB RAM rule: at the time of writing, 32GB is the sweet spot for serious web dev. The unified memory architecture means GPU, Neural Engine and CPU share the pool — Docker + Chrome + VS Code + database client + IDE language servers can comfortably exceed 16GB on a busy day. Cheaper to over-spec RAM at purchase than upgrade later (you can't).
SA dev considerations — bandwidth, timezone, remote work
Banking and payments on the dev side: Most SA devs working remote get paid via Wise, Payoneer, or direct USD-account inflows from companies that handle international payroll (Deel, Remote.com, Oyster). Tax-wise, register as a sole prop or Pty (Ltd) and provision-tax accordingly.
Common Mac dev-setup mistakes
Installing Node with brew install node instead of nvm. Locks the version system-wide; breaks the moment you work on a project requiring a different Node version. Always nvm.
Forgetting the PATH step after Homebrew install. On Apple Silicon Macs, Homebrew is at /opt/homebrew — not in PATH by default. Run the echo 'eval "$(/opt/homebrew/bin/brew shellenv)"' >> ~/.zprofile line.
Using HTTPS Git auth instead of SSH. HTTPS requires a personal access token instead of password (since 2021) and prompts for it constantly. Set up SSH once and never enter credentials again.
Docker eating all available RAM. Default Docker Desktop allocation is greedy. Set explicit limits in Docker → Settings → Resources.
Mixing system Python with project Python. Apple's bundled Python is for macOS internals. Never pip install to system Python — use pyenv or virtualenvs.
Skipping the SSH key passphrase. Convenient but if your machine is compromised, attackers get instant access to every GitHub org you belong to. Use a passphrase + Apple Keychain integration (ssh-add --apple-use-keychain) — passphrase typed once at unlock, never again.
Choosing 16GB RAM to save money. The single most-regretted dev-Mac decision. For dev work, 32GB is the floor on M-Pro / M-Max chips. Save on chip-tier, not RAM.
Key takeaways
- Install order matters: Xcode CLT → Homebrew → iTerm2 → Git+SSH → nvm+Node → VS Code. Out of order = 80% of the friction.
- Never
brew install node— use nvm so each project picks its own version via.nvmrc. - On Apple Silicon, Homebrew lives at
/opt/homebrew— adding it to PATH is the most-missed step. - Cap Docker Desktop memory in Settings → Resources to prevent macOS swap thrashing on M-series unified memory.
- 32GB RAM is the floor for serious web dev — RAM cannot be upgraded later on Apple Silicon.
Frequently asked questions
What should I install first on a new Mac for web development?
Install in this order: (1) Xcode Command Line Tools, (2) Homebrew, (3) iTerm2 + Oh My Zsh, (4) Git + SSH key for GitHub, (5) nvm + Node.js, (6) VS Code with extensions. Anything else goes after these six.What is Homebrew and do I need it?
Homebrew is the de-facto macOS package manager — equivalent of apt on Ubuntu. It installs CLI tools, language runtimes, databases and apps via 'brew install' commands. Almost every Mac developer uses it.Should I install Node.js directly or use nvm?
Use nvm. Installing Node directly locks you to one version system-wide — which breaks the moment you need different versions per project. With nvm you switch with 'nvm use 20' or 'nvm use 22'.Which terminal app is best for Mac developers?
iTerm2 (free) is the long-standing choice — tabs, split panes, hotkey window, profile colours. Pair with Zsh + Oh My Zsh + powerlevel10k for a productive setup. Warp is a modern alternative with AI completion.What VS Code extensions should I install for web dev?
Core: ESLint, Prettier, GitLens, Live Server, GitHub Copilot, Path Intellisense, Auto Rename Tag. Language-specific: ES7+ React snippets, Tailwind CSS IntelliSense, Vue Volar, Python, Docker.How do I set up Git and GitHub SSH on a Mac?
Set global config with 'git config --global user.name' and email. Generate SSH key with 'ssh-keygen -t ed25519', add to ssh-agent with 'ssh-add --apple-use-keychain', copy public key with pbcopy and paste into GitHub Settings.Do I need Docker Desktop on a Mac?
Only if you're working with containerised microservices or production-like local environments. For simple Node/Next.js, Docker is overkill. Alternatives: Colima (lighter, free) or OrbStack (commercial, fastest).Which MacBook is best for web development?
MacBook Pro 14" M-Pro with 32GB RAM is the sweet spot. MacBook Air M3 16GB works for solo work but struggles with Docker and heavy builds. 32GB RAM future-proofs more than upgrading chip tier.
Get the Evetech app
Exclusive app-only prices, daily flash sales, and free delivery on orders over R4,000 — download the app and start saving.