PC Building · Tools Guide
PC building tools you actually need. — Five items. R200-R600 total. CNA has them all.
PC building YouTube channels sell "essential build kits" with 30-piece bit sets, anti-static gloves and tweezers for R900+. You don't need any of that. Five tools cover almost every build. Here's exactly what to buy, where to buy it in SA, and what to ignore.
- essential kit
- 5 tools
- total spend
- R200-R600
- most critical
- PH2 mag
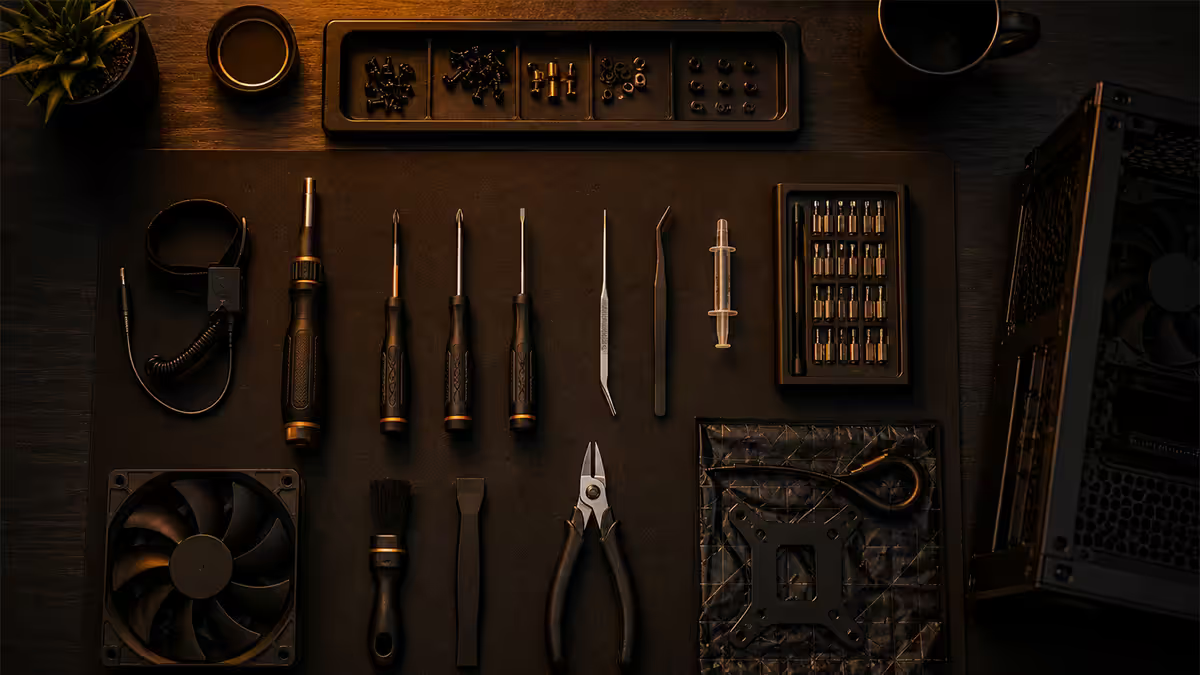
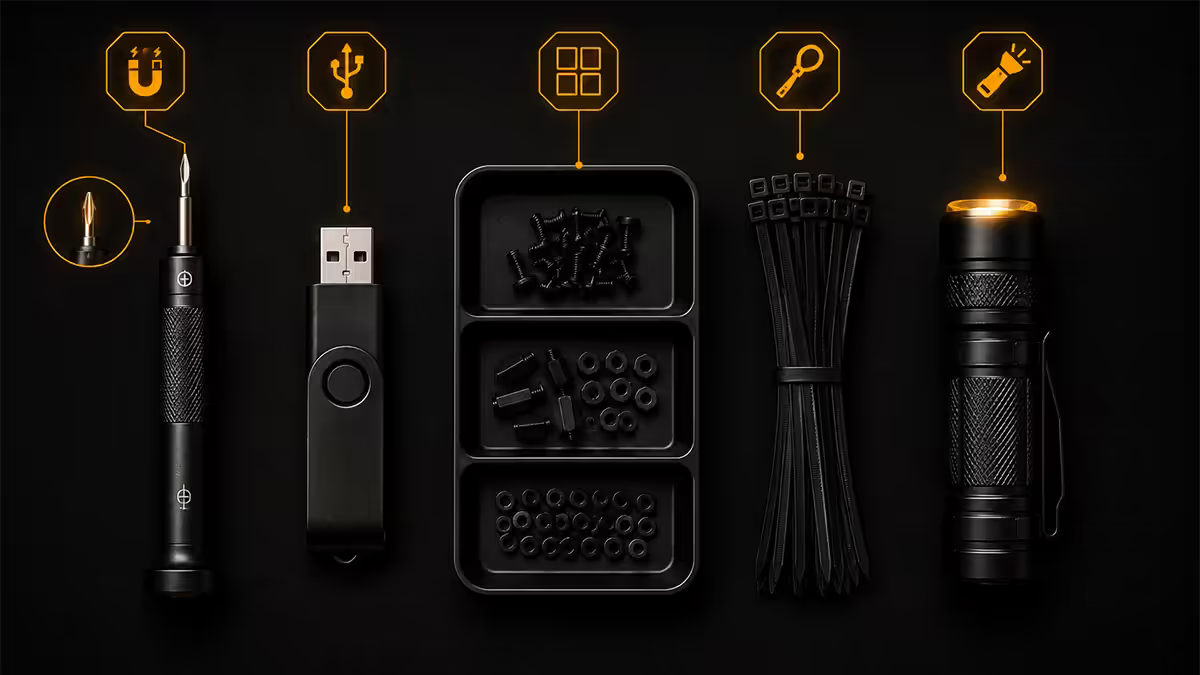
What you actually need — five tools, R200-R600 total
PC building is mechanical, not surgical. Modern cases have hand-tightening thumbscrews where possible. Modern motherboards have toolless M.2 retention clips. Modern PSUs have modular cables that don't require any tool to install. The actual screw-driving in a typical build is fewer than 25 turns across 12 fasteners. You don't need a workshop — you need five things.
| Tool | What it's for | SA price |
|---|---|---|
| Phillips #2 magnetic screwdriver | 95% of PC screws — motherboard, case, GPU, PSU mounts | R80-R150 |
| USB drive 8GB+ (USB 3.0) | Windows 11 installer + driver cache | R100 |
| Small parts tray or magnetic mat | Keeps screws sorted, prevents loss | R50-R150 |
| Anti-static wristband (optional) | ESD protection in carpet/synthetic environments | R150 |
| Lint-free microfibre cloth | Fingerprints on glass panels, IHS cleaning | R50 |
That's it. Total at the low end is R200, at the high end with premium picks R600. You can also borrow most of these from a friend or family member — a household tool kit usually contains a PH2 screwdriver already (just confirm it's magnetic, which the cheapest household drivers are not).
The PH2 magnetic screwdriver is critical
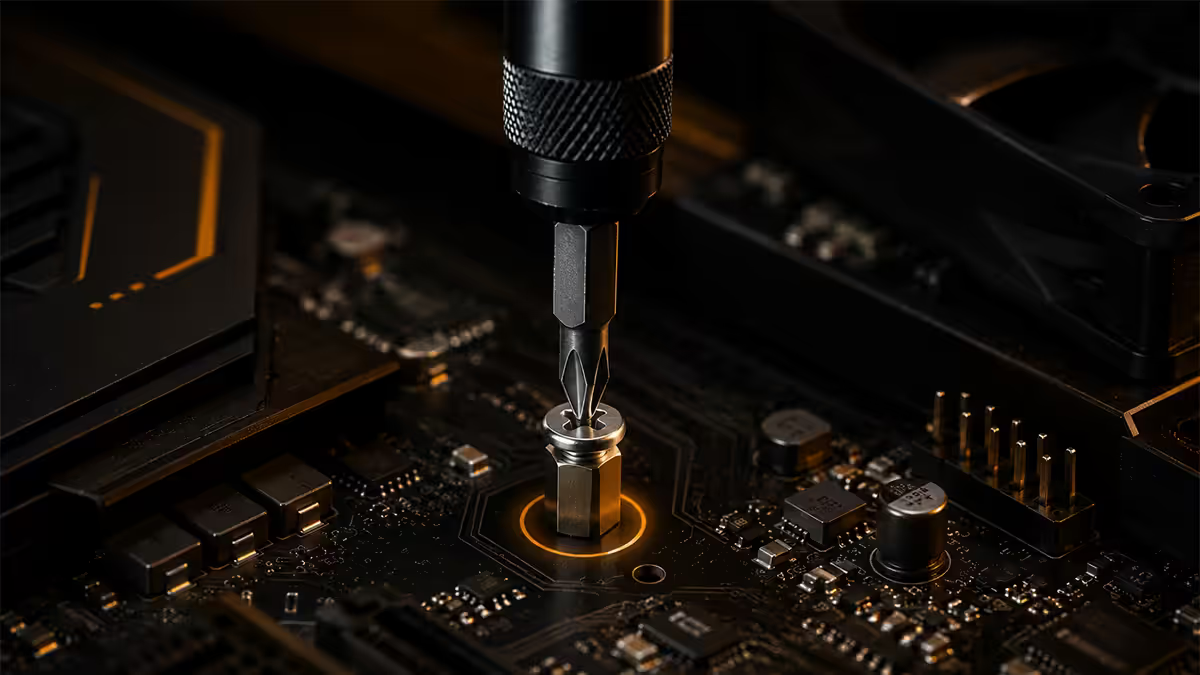
If you remember only one thing from this guide: buy a magnetic Phillips #2 screwdriver with a 10-15cm shaft. The magnetism is what makes PC building feel professional rather than fiddly.
Here's why it matters in practice. A motherboard sits on standoffs 4-6mm above the case floor. Mounting screws are tiny — typically M3 × 6mm. Without magnetism, you place the screw flat on the standoff, line up the driver tip, and try to make threaded contact while gravity wants to drop the screw between the standoffs onto bare PCB or onto your foot. Recovery options: tilt the case to slide the screw out (risks scratching PCB), use needle-nose pliers (risks dropping again), use a long magnet (which you don't own).
With magnetism, you stick the screw to the driver tip before approaching the standoff. Line up the driver, twist gently to find the thread, drive home. Zero dropped screws. Zero recovery time. Zero risk of damaging the motherboard PCB during retrieval.
What to buy specifically:
- PH2 (Phillips #2) head size. Not PH1 (too small — strips heads), not PH0 (jewellery size, useless here).
- Shaft length 10-15cm. Long enough to reach motherboard mounts inside a deep case, short enough for control.
- Magnetic tip. Cheap chrome-plated drivers often aren't magnetised — check before buying or test with a steel paperclip.
- Comfortable grip. Rubberised handle is worth R20-R30 more than smooth plastic. You'll be twisting for an hour.
- Avoid: ratcheting drivers (overkill), bit kits with 30 sizes (you'll use one).
Brand picks (any of these are fine): Stanley FatMax PH2 (R150 at Builders), Ryobi PH2 (R130 at Builders), Bosch PH2 (R180 at CNA), Stax PH2 (R80 at CNA). The cheap CNA driver is genuinely fine for a PC builder — you don't need a Wera or Wiha at PC-builder fastener torque levels.
USB drive for Windows installer
A new build needs an operating system. Windows 11 is installed from a bootable USB drive (you can no longer install from DVD — modern motherboards have no optical drive bay and Windows 11 ISO is too large for DVD anyway).
What to buy:
- Capacity: 8GB minimum, 16GB recommended (lets you cache extra drivers alongside the installer). The Windows 11 ISO is around 5-6GB.
- Speed: USB 3.0 / 3.1 / 3.2 marked as such on the housing. USB 2.0 drives still work but installer copy takes 20+ minutes vs 5 minutes on USB 3.
- Brand: SanDisk, Kingston, Lexar, ADATA — any reputable brand. R100-R150 for 32GB USB 3.
Creating the installer: Microsoft's Media Creation Tool (free download from Microsoft.com) writes the bootable USB in 10 minutes. You'll need a working PC to do this — borrow a laptop if needed. Alternatively, Evetech ships a pre-made Windows installer USB with most full system orders.
Don't forget: have your Windows 11 product key ready. Genuine Windows 11 Home retail at R2,400 in SA, Pro at R3,800. OEM keys (R600-R1,000) work but require tying to a specific motherboard. We strongly recommend retail keys for first-time builders — they transfer to your next build.
Small parts tray — losing screws kills momentum
A modern ATX build uses about 30-40 small screws across multiple sizes: motherboard mounts (M3 × 6mm), GPU PCIe bracket (#6-32 × 5mm), PSU mount (#6-32 × 10mm), case panels (M3 × 6mm thumbscrews), 2.5" SSD mounts (#6-32 × 5mm or M3 × 5mm), M.2 retention (M2 × 3mm — usually pre-installed). Mixing them up causes problems — using too long a screw on an M.2 mount can crack the SSD PCB.
Options:
- Magnetic parts mat (R80-R150). Best option — silicone mat with magnetic regions plus labelled sections. Screws stick to designated areas. iFixit and Wozinsky brands available at Takealot.
- Compartmentalised tray (R50-R100). Plastic tray with 4-6 compartments. Cheap, works fine, no magnetism.
- Three small bowls/saucers (free). If you don't want to buy anything, sort screws into three saucers labelled "motherboard," "drives," "case/PSU." Works perfectly.
The case accessory box. Most cases ship with the screws in small labelled bags inside an accessory box (usually screwed inside the drive bay or behind the motherboard tray). Open these over your parts tray so they don't spill across your workspace. Keep the empty bags for screw size identification — manufacturers label them well.
Nice-to-have tools — useful but not essential
Lint-free microfibre cloth (R50-R100). Useful for fingerprints on glass side panels and for cleaning thermal paste off the CPU IHS during cooler swaps. A coffee filter paper does the same job for paste cleanup at R5. Don't use kitchen paper towels — they shed fibres.
99% isopropyl alcohol (R80 for 100ml). For thermal paste cleanup and component cleaning. Available at CNA, Dis-Chem (pharmacy aisle) and Builders Express. Don't use methylated spirits — leaves residue. Don't use 70% rubbing alcohol — too much water content.
Small Phillips #1 (PH1) driver (R60). For laptop work and some M.2 SSD retention screws (rare — usually M.2 screws are PH0 size). Not needed for typical desktop builds in 2026 — virtually every desktop screw is PH2.
Compressed air can (R80-R120). For ongoing maintenance and dust removal during builds. Not strictly needed for a new build since components arrive dust-free. Buy one after the build — every 3-6 months you'll want it. The "Falcon Dust Off" and "Game" branded cans are widely stocked.
Reusable Velcro cable straps (R80 per pack). Better than zip ties because removable without damage. Most cases include 6-10 zip ties so you may not need to buy any. Worth having if you'll swap components in the next two years.
Phone torch or headlamp. Modern phones have a torch built in — that's all you need. If you wear glasses and your overhead light is poor, a R100 headlamp from Builders frees your hands. Often more important than you'd expect for inspecting motherboard standoff alignment.
Anti-static wristband — when it actually matters
ESD (electrostatic discharge) damage is real but rare in normal indoor conditions. SA humidity averages 40-70% — well above the danger threshold (typically below 30% humidity in dry winter rooms is when risk spikes). Modern CPUs and motherboards include built-in ESD protection that handles small static discharges.
The two-second rule. Before handling any component, touch a bare metal part of the chassis — the PSU shroud, the case I/O shield, or the case panel screw. This equalises charge between you and the case to roughly zero potential difference. Touch metal again whenever you stand up, walk around, or notice you've shifted in a synthetic chair.
When a wristband is worth R150:
- You're building on carpet (synthetic carpet generates strong charges).
- You wear wool, fleece or synthetic clothing during the build.
- You're in a dry environment (very low humidity, heated room without humidifier).
- You're a first-time builder and want the insurance.
When you don't need one: tile or wood floors, cotton clothing, normal SA humidity, and consistent touch-grounding habits. Most Evetech in-house builders don't use wristbands — they use the two-second rule. We've shipped 200,000+ builds without ESD damage being a meaningful issue.
Cleaning supplies — when and what
A new build doesn't need cleaning supplies for assembly itself — components arrive clean from the factory. You'll want cleaning kit for:
- Cooler swaps and re-pastes — 99% IPA + lint-free microfibre to clean off old thermal paste. R130 total kit.
- Glass panel fingerprints — microfibre cloth + glass cleaner (Mr. Muscle or similar, R30) or just water. Avoid alcohol on glass with anti-reflective coating (some premium cases have it).
- Dust removal (every 3-6 months) — compressed air can (R80-R120). Hold fans still while blowing through (free-spinning fans can damage bearings).
- Fan blade cleaning — microfibre cloth or cotton bud with a drop of IPA. Don't use water on fan bearings.
Cable management extras
For most builds, the cable ties bundled with the case are enough. ATX cases typically include 6-10 black zip ties and sometimes Velcro straps. Open the case accessory box before buying additional cable management kit.
If you need to buy:
- Pack of 50 small zip ties (R50). Builders Warehouse or any hardware store. Black for standard builds, white for white aesthetic builds.
- Reusable Velcro straps (R80). Pack of 10, 15cm each. Better than zip ties for builds you'll modify later.
- Cable combs (R150-R300). Plastic spacers that hold cable wires parallel. Only useful for showcase builds with sleeved cables.
- Side-cutter pliers (R80). For trimming zip ties cleanly. A household scissors works but leaves rougher edges.
What's overkill — skip these
| Tool | Marketing claim | Reality |
|---|---|---|
| 30-piece bit kit | "Every screw covered" | You'll use one bit. Buy a single PH2 driver. |
| Anti-static gloves | "ESD-safe handling" | Reduce dexterity, no real benefit over touch grounding. |
| Thermal paste applicator brushes | "Even paste spread" | The cooler's pressure spreads paste better than any brush. |
| Separate fan controller | "Tune your cooling" | Modern motherboards have 6+ PWM headers and BIOS curves. |
| Tweezers | "Pickup small parts" | Your magnetic screwdriver lifts every screw you need. |
| Electrical multimeter | "PSU testing" | PSU testing is rare; Evetech does it free if needed. |
| Heat gun | "Heatshrink work" | No PC build involves heatshrink work in 2026. |
| Soldering iron | "Repair connections" | Modern motherboards aren't user-soldering targets. |
The "PC builder's tool kit" category on Takealot and Wootware is largely marketing-driven. A R900 build kit usually contains 25 items where you'll use 3 — and the magnetic screwdriver inside is often lower quality than a R150 dedicated driver from CNA or Builders.
Workspace and lighting
More important than any tool: a clean, flat workspace with good lighting.
Workspace requirements:
- Flat solid surface 80cm × 60cm minimum. Kitchen table, dining table, or a desk works fine. Avoid glass tables (static + scratch risk) and shag carpet floors.
- Clear of food, drinks and pets. Coffee on a motherboard is a R5,000 mistake.
- Stable temperature. A garage in winter (5-10°C) increases ESD risk and slows thermal paste application. Indoor 18-25°C is ideal.
- Phone reachable but not on the case. Builds are 70% physical work, 30% looking up motherboard manuals on PDF.
Lighting: overhead light (existing room light) plus a phone torch or headlamp for peering inside the case. Modern cases have dark interiors that swallow ambient light. The phone torch tucked into the lid of an open case provides ample light for the front-side assembly. A R100 headlamp from Builders frees both hands and points wherever you look.
Time budget — realistically
| Stage | First-time builder | Experienced |
|---|---|---|
| Unboxing + parts inventory | 20-30 min | 10 min |
| CPU + cooler + RAM (outside case) | 30-45 min | 15 min |
| Motherboard mount + standoff check | 20-30 min | 10 min |
| PSU mount + cable layout | 20-30 min | 10 min |
| GPU install | 10-15 min | 5 min |
| Storage (M.2 + 2.5") install | 10-15 min | 5 min |
| Cable connections (front panel, fans) | 30-45 min | 15 min |
| Cable management + tidy | 20-40 min | 10-15 min |
| First boot + BIOS check | 10-15 min | 5 min |
| Windows install + drivers | 45-60 min | 30 min |
| Total | 3.5-5 hours | 2-2.5 hours |
Plan a 4-hour block for your first build. Don't start at 9pm thinking you'll finish before bed — Murphy's Law applies generously to first builds. A standoff in the wrong position, a CPU cooler that fouls the front fan, an M.2 screw lost in the case — small problems compound when you're tired.
Where to buy in South Africa
Magnetic PH2 screwdriver: Builders Warehouse (Stanley, Ryobi, Bosch — R130-R180), Builders Express (slightly cheaper), CNA (Stax brand, R80), Game and Makro (mixed brands, R100-R200). Any of these are perfectly fine.
USB drive: Game, Makro, Pick n Pay Hyper, Spar Hyper, CNA — anywhere with an electronics aisle stocks 32GB USB 3 drives at R100-R150. Takealot is reliable for online orders.
Small parts tray / magnetic mat: Takealot (iFixit, Wozinsky), Builders Warehouse, Game. Three saucers from your kitchen work for free.
Anti-static wristband: Takealot (R150 for decent quality), Wootware (sometimes stocked), eBay/AliExpress (avoid the R30 ones — they're often non-functional).
Lint-free microfibre cloth: CNA, Builders Express, Game, Spar (cleaning aisle), Takealot. A car detailing cloth from Midas works.
99% isopropyl alcohol: Dis-Chem (pharmacy aisle, R80 for 100ml), CNA, Builders Express, Clicks pharmacy. Some chemists require a request from behind the counter — ask for "isopropanol 99% for electronics cleaning."
Cable ties (50-pack): Builders Warehouse, Game (small packs), most automotive accessory stores (Midas, Tiger Wheel).
Common tool mistakes
Using the wrong screwdriver size. PH1 in a PH2 head will strip the cross pattern in 3-4 turns of moderate torque. Always confirm PH2 (Phillips #2) before driving any motherboard or case screw. PH1 is for laptops; PH0 is microscopic.
Using a non-magnetic driver. Most common cause of mid-build frustration. Drives get dropped, screws fall into the case interior, retrieval scratches PCB or motherboard surfaces. Magnetic PH2 saves dozens of micro-stresses across a build.
Over-torquing screws. PC fasteners are M3 × 6mm or #6-32 — small. They strip easily if you apply table-saw force. Snug + a quarter turn is the right tightness. Pre-electric drivers ("hand only") prevent this; battery-powered drills can damage motherboard standoffs in 0.5 seconds of over-application.
Building on carpet. Synthetic carpet generates static charges as you shuffle. Combined with synthetic clothing this is the worst-case ESD scenario. Move to a tile or wood floor area for the build, or use an anti-static wristband.
No parts organisation. Pouring 30 screws into a single pile guarantees you'll mix sizes and use the wrong screw somewhere. M.2 screws in motherboard standoffs strip threads; long PSU screws in M.2 slots crack the SSD PCB. Use the tray.
Key takeaways
- A magnetic Phillips #2 screwdriver (R80-R150) is the single critical tool. Buy one, skip the 30-piece bit kits.
- Total tool spend: R200-R600 for the full essential kit at CNA, Builders, Game or Takealot.
- ESD wristband useful but not essential — touch-ground on metal every 2 minutes and avoid carpets/synthetics during the build.
- Workspace and lighting matter more than tool choice. Clean flat surface 80cm × 60cm minimum, overhead light, phone torch for interior.
- Plan a 4-hour block for first-time builds. Don't rush, sort screws into a tray, follow the motherboard manual.
Frequently asked questions
What tools do I actually need to build a PC?
PH2 magnetic screwdriver (R80-R150), USB drive 8GB+ (R100), small parts tray (R50-R150), anti-static wristband (R150), lint-free microfibre cloth (R50). Total R200-R600 at CNA, Builders, Game or Makro.Why does the screwdriver need to be magnetic?
Magnetism lets you stick the screw to the driver tip before placement — eliminates dropped screws, scratched PCBs and cross-threaded mounts. Hard magnetism does not damage modern PC components.Do I need an anti-static wristband?
Useful but not strictly required. Touch a bare metal part of the case every couple of minutes. Wristband worth R150 if building on carpet, in synthetic clothing, or in dry winter conditions.What size Phillips screwdriver do I need for a PC?
PH2 (Phillips #2) covers 95% of PC screws. PH1 only for laptops and rare M.2 screws. Buy a single magnetic PH2 with 10-15cm shaft, skip the 30-piece bit kits.Where can I buy PC building tools in South Africa?
CNA, Builders Warehouse, Builders Express, Game, Makro, Pick n Pay Hyper, Spar Hyper all stock the essentials. A magnetic PH2 from any of these costs R80-R150 and works fine.What tools are overkill for PC building?
30-piece bit kits, anti-static gloves, paste applicator brushes, separate fan controllers, tweezers, multimeters, heat guns. Most "PC building kits" sold online contain 80% items you'll never use.Do I need cable ties or zip ties for a PC build?
Most cases include 6-10 zip ties or Velcro straps in the accessory box. Check before buying. If needed, R50 from Builders covers any normal build. Reusable Velcro (R80) better than zip ties for component swaps later.How long does a PC build actually take?
First-time: 3.5-5 hours assembly + Windows. Experienced: 2-2.5 hours. Cable management consumes 30-40% of build time on aesthetic builds. Plan a generous block — don't start at 9pm.