Home Networking Guide
How to fix dead WiFi zones. — Heatmap first. Mesh second. Wired backhaul always.
That back bedroom where the signal drops to a single bar? It isn't your fibre. It isn't your fault. And it usually isn't fixed by buying the wrong thing first — a range extender that halves your bandwidth.
- before you buy
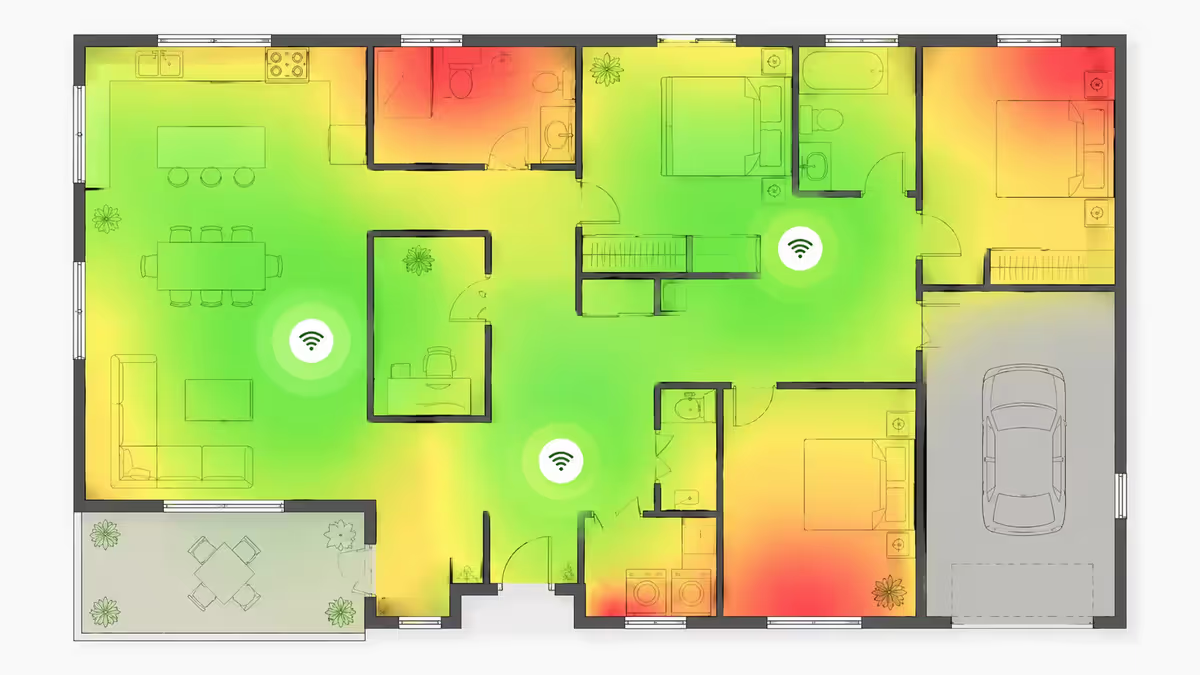
- Heatmap
- always
- Mesh > Ext
- 2× the speed
- Wired BH
Step 1 — Survey your dead zones before buying anything
The single most common networking-shopping mistake is buying gear before measuring the problem. Two homes that look identical from outside can need completely different solutions — one needs a single mesh satellite in a specific spot, the other needs a full mesh system with wired backhaul. The only way to know is to measure.
Free heatmap tools:
- NetSpot (Windows, Mac) — free home edition lets you upload a floor plan sketch and walk through rooms with a laptop measuring signal strength at each point. Generates a colour-coded heatmap.
- WiFi Analyzer (Android) — simple signal strength meter you carry from room to room. No heatmap visualisation but real numbers per location.
- AirPort Utility WiFi Scanner (iOS) — built-in to AirPort Utility on iPhone (toggle "Wi-Fi Scanner" in iOS Settings). Same purpose as WiFi Analyzer.
- Ekahau HeatMapper (Windows) — free professional-grade survey tool; steeper learning curve but the most detailed output.
What to measure:
- Signal strength at each location — measured in dBm. -50 dBm is excellent, -70 dBm is acceptable, -80 dBm and worse is dead-zone territory.
- Actual throughput — run a speed test (fast.com or speedtest.net) in each room while connected to WiFi. Compare to the speed test at the router. A big gap means the WiFi link, not the fibre, is the problem.
- Latency stability — ping a stable server (e.g. 8.8.8.8) for 60 seconds in each room. Packet loss or large ping variation indicates marginal signal.
Step 2 — Try the easy fixes first
Before spending money on new gear, work through the free fixes. Often one of these resolves the dead-zone issue without buying anything.
Move the router
Most ISP routers are installed wherever the fibre terminates — usually a wall corner, garage, or passage. Moving the router to a central, elevated location (top of a bookshelf, mounted on a high wall, central in the home) often dramatically improves coverage. Note: in SA fibre installs the router is connected to the ONT by a short Ethernet cable; you can usually extend this with a 5-10m Cat6 cable to relocate the router without needing the ISP technician.
Change the channel
In suburbs and complexes, dozens of WiFi networks compete for the same channels. Most ISP routers default to "auto" channel selection but settle on overcrowded channels. Use a WiFi analyser to find the least-used 2.4GHz channel (1, 6 or 11 only) and 5GHz channel (36-48 for the lower block, 149-161 for the upper). Set these manually in the router's admin interface.
Separate the bands
Some routers ship with band steering on by default, presenting a single SSID and choosing 2.4GHz vs 5GHz per device automatically. This often goes wrong — devices land on slow 2.4GHz when 5GHz is available. Splitting into two SSIDs ("HomeNet" for 5GHz, "HomeNet-2G" for 2.4GHz) lets you manually connect IoT devices to 2.4 and laptops/phones to 5 for better results.
Update firmware
ISP routers often go years without firmware updates. Check the admin interface for a firmware update option. Manufacturer routers (TP-Link, ASUS, Netgear) push updates regularly — enable auto-update. Sometimes a firmware update alone fixes signal quality issues caused by buggy power management or band-steering code.
Remove interference
Microwaves, cordless phones, baby monitors and Bluetooth speakers all transmit on 2.4GHz. Move the router away from these and from large metal objects (fridges, fileing cabinets). Solar inverters and certain LED drivers also produce interference; if a back room got worse after a solar install, that may be why.
Step 3 — The four serious options
When the easy fixes don't solve it, you have four real options. Most homes end up at option 3 (mesh) or option 4 (wired access points).
| Option | Cost | Verdict |
|---|---|---|
| 1. Range extender / repeater | R600-R1,500 | Avoid — halves bandwidth |
| 2. Powerline adapter | R1,500-R3,000 | Last resort — wiring-dependent |
| 3. Mesh WiFi system | R3,000-R8,000 | Best for most homes |
| 4. Wired access points | R4,000-R12,000 | Best if running Ethernet is feasible |
1. Range extender — why we don't recommend it
A range extender receives the WiFi signal, then re-broadcasts it. Because it uses the same radio for receive and transmit, bandwidth is halved at the extender — and halved again if you chain a second extender. They also typically create a separate SSID, so devices don't roam between the main network and the extended network automatically. Result: technically more coverage, practically worse experience. Skip.
2. Powerline adapter — useful when you can't run cable
Powerline adapters carry data over your home's electrical wiring. Speed varies wildly with wiring age and circuit layout — best case 500-800 Mbps, worst case 30-80 Mbps. They're a useful budget fallback (R1,500-R3,000 for a 2-pack) when running Ethernet isn't feasible and you only need to feed one or two rooms. Avoid as a primary solution for whole-home coverage.
3. Mesh WiFi system — the right answer for most homes
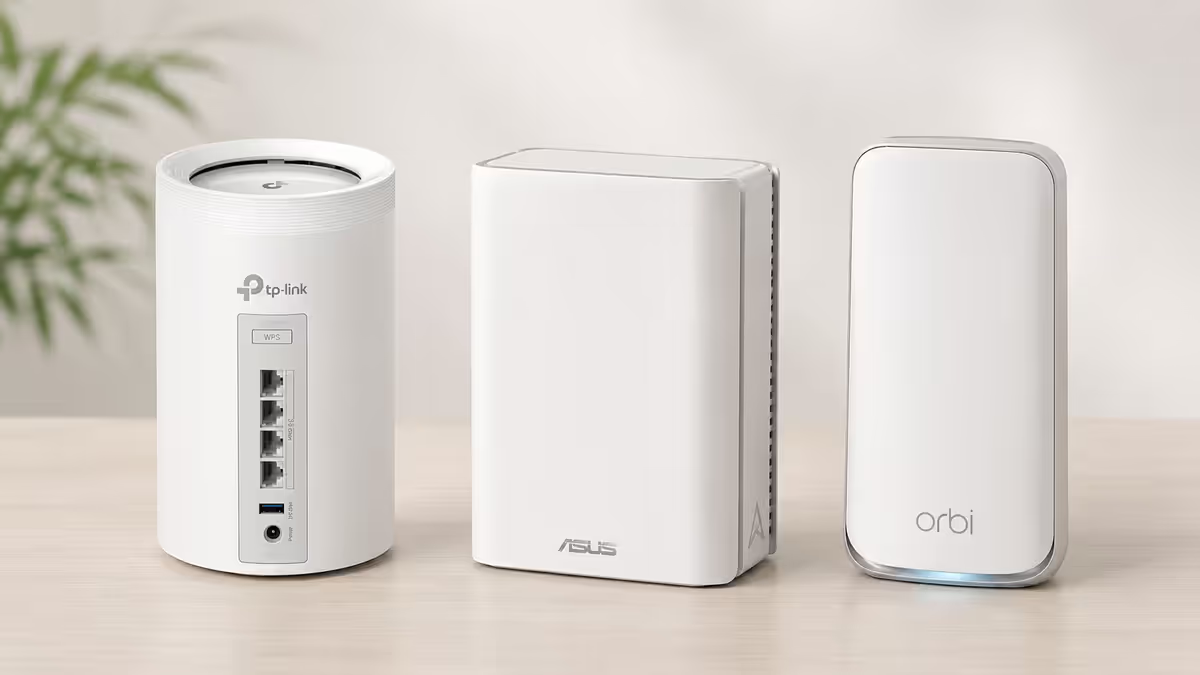
A mesh system uses 2-4 small router nodes that communicate with each other and present a single seamless network. Devices roam between nodes automatically as you move through the house. Modern mesh systems (TP-Link Deco, ASUS ZenWiFi, Netgear Orbi, eero) include a dedicated backhaul radio that keeps node-to-node bandwidth high — typically 600-1200 Mbps in real-world use.
4. Wired access points — best performance, more installation
If you can run Ethernet to two or three points in your home, dedicated wireless access points (Ubiquiti UniFi, TP-Link Omada, Aruba Instant On) outperform any mesh system. You get full 1Gbps Ethernet backhaul to each AP, and the WiFi performance at each AP is identical to the main router. This is the "permanent" solution for serious networking users; mesh is the "renter / less invasive" version.
Mesh systems explained
Mesh systems consist of 1 router node (connected to your fibre or ISP router) and 1-3 satellite nodes placed around the home. The router establishes the main WiFi network; satellites relay traffic from devices in their coverage area back to the router via the dedicated backhaul radio.
Node placement strategy
The single most important factor in mesh performance is satellite placement. Place satellites:
- Halfway between the router and the dead zone — not in the dead zone itself. The satellite needs strong signal from the router to relay to your devices.
- Line-of-sight to the router when possible — radio waves penetrate fewer walls between router and satellite than between satellite and your device.
- Elevated location — top of a shelf, mounted on a wall, on top of a cupboard. WiFi propagates better from height.
- Avoid corners and behind metal objects — fridges, microwaves, TVs and metal storage all attenuate signal significantly.
For a typical SA double-storey house, the right configuration is usually 1 main router downstairs + 1 satellite upstairs centrally located. For sprawling single-storey homes, 1 main + 2 satellites spaced evenly works well.
Wired backhaul — the game changer
"Backhaul" is the connection between mesh nodes that carries traffic back to the main router. Mesh systems support two types:
- Wireless backhaul — nodes communicate via a dedicated WiFi radio. Convenient (no cables), but bandwidth-halving at every hop. Typical real-world: 400-700 Mbps per satellite even on good gear.
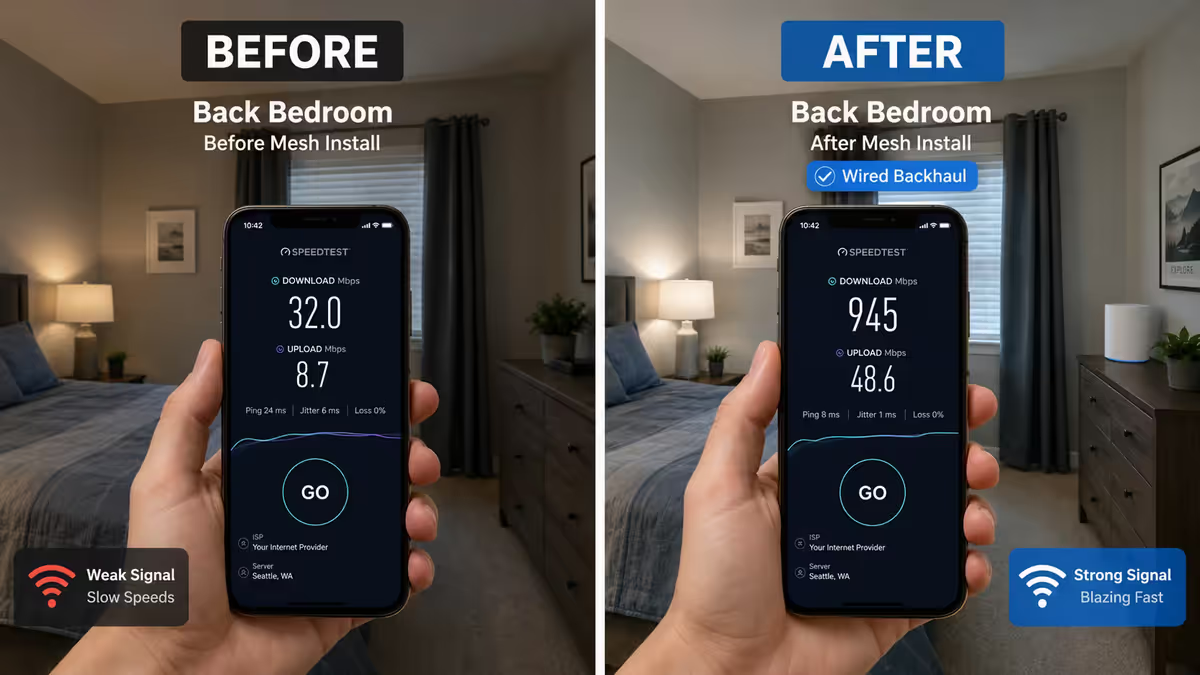
- Wired backhaul — each node connects to the router by Ethernet cable. Full 1Gbps backhaul to every node. Real-world performance: 850-1200 Mbps everywhere in the home.
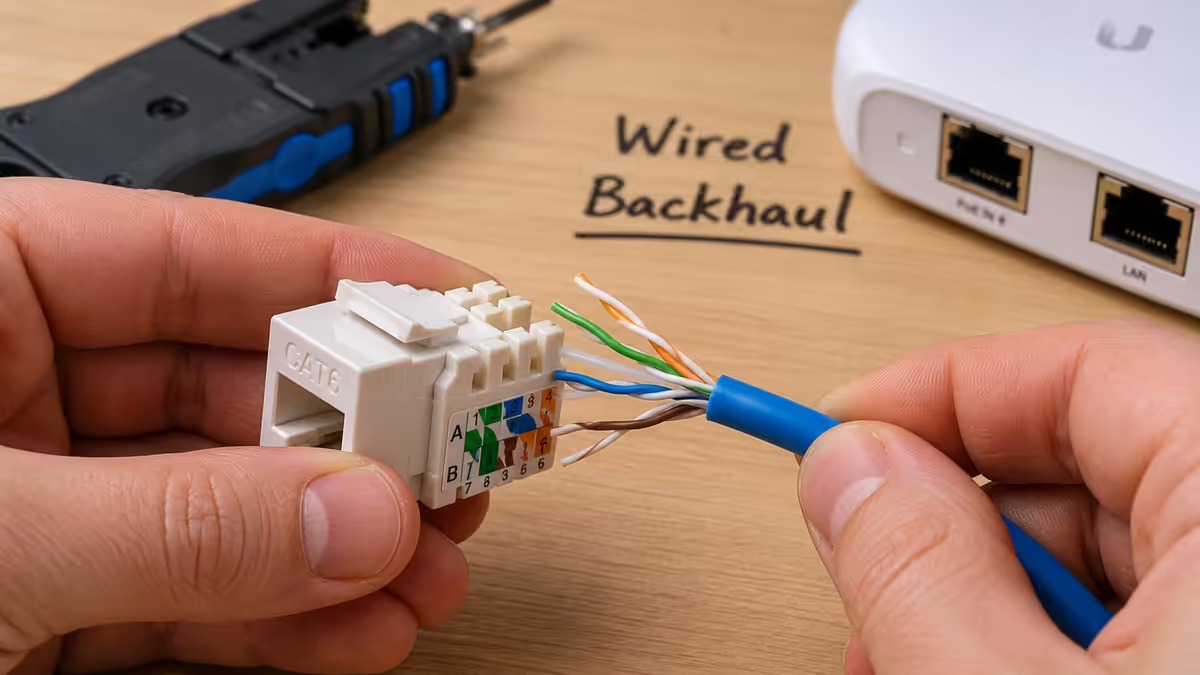
Wired backhaul transforms mesh performance. If you have any conduit, ducting, or accessible attic / underfloor route between the router location and where you want satellites, running a single Cat6 cable to each satellite location is the single biggest network upgrade you can make. A R350 spool of Cat6 + R150 in keystones + a few hours of installation makes a R5,000 mesh system perform like a R12,000 commercial network.
SA mesh picks — by home size and budget
Small to medium home (~100-150m², single storey)
- TP-Link Deco BE25 (2-pack) — WiFi 7, ~R3,500. Best value WiFi 7 mesh in SA. App-controlled, easy setup.
- ASUS ZenWiFi XD5 (2-pack) — WiFi 6, ~R3,200. Solid choice with AiMesh expandability.
- eero 6+ (2-pack) — WiFi 6, ~R3,800. Apple-style ease, optional eero Plus security.
Larger home (150-250m², double storey)
- TP-Link Deco BE65 (3-pack) — WiFi 7, ~R6,500. Three nodes cover most double-storey homes comfortably.
- ASUS ZenWiFi BT8 (3-pack) — WiFi 7, ~R7,800. ASUS app, AiProtection security.
- Netgear Orbi BE12 / BE25 (3-pack) — WiFi 7, ~R8,500-R12,500. Top-end performance, premium price.
- eero Max 7 (2-pack) — WiFi 7, ~R12,000. Premium option with 10Gbps capability.
Very large home or office (250m²+)
Consider wired access points instead of mesh. Ubiquiti UniFi (UniFi U6+, U7 Pro) or TP-Link Omada are the sensible options — typically R1,800-R3,500 per access point, with a controller (free software or hardware) managing them. Wired AP installations need at least one POE switch (R1,500-R3,000) and Ethernet runs to each AP location. The investment is bigger but the performance and reliability are commercial-grade.
| Standard | Year | Peak link rate | Real-world best |
|---|---|---|---|
| WiFi 5 (AC) | 2014 | 3.5 Gbps | 500-800 Mbps |
| WiFi 6 (AX) | 2019 | 9.6 Gbps | 800-1100 Mbps |
| WiFi 6E (AXE) | 2021 | 9.6 Gbps + 6GHz | 900-1200 Mbps |
| WiFi 7 (BE) | 2024 | 46 Gbps | 1500-2400 Mbps |
SA fibre context — bridge mode and double NAT
SA fibre is delivered to your home as a fibre line terminating at an Optical Network Terminal (ONT) — typically a small white box installed by the ISP. The ONT connects via Ethernet to your router, which broadcasts your home WiFi.
When you add a mesh system, you have two options:
- Option A — Disable the ISP router's WiFi. Set the ISP router to bridge mode (passes the connection through), then connect your mesh's main router to the ISP router via Ethernet. The mesh handles all WiFi, NAT and DHCP. Best performance but requires the ISP router to support bridge mode (most do).
- Option B — Run both routers ("double NAT"). Leave the ISP router as-is, plug the mesh in behind it. The mesh handles WiFi but the ISP router still does NAT. Works fine for most use cases but causes issues with NAS, port forwarding, gaming and some VoIP — and reduces theoretical performance slightly.
Option A is the right choice when supported. Some ISPs (Vumatel via certain partners) ship routers where bridge mode requires support intervention; ask the ISP support team to enable it. Most modern ONT/router combinations from Openserve, Octotel and Frogfoot support easy bridge mode via the admin interface.
Key takeaways
- Survey first with a free heatmap tool (NetSpot, WiFi Analyzer). Don't buy gear without measuring the actual dead-zone pattern.
- Try the free fixes — router placement, channel change, firmware update, interference removal — before any new hardware.
- Skip range extenders — they halve bandwidth. Buy a mesh system instead (TP-Link Deco, ASUS ZenWiFi, Netgear Orbi).
- Wired backhaul transforms mesh performance — single Cat6 cable to each satellite doubles real-world throughput.
- For SA fibre installs, set the ISP router to bridge mode and let the mesh handle all WiFi, NAT and DHCP.
Frequently asked questions
Why do I have WiFi dead zones in my home?
Router placement (often a corner instead of the centre), wall material (concrete and brick attenuate 5GHz), and distance (5GHz drops off rapidly beyond 8-10m through walls).Should I buy a WiFi extender or a mesh system?
Mesh almost always. Extenders halve bandwidth and create separate SSIDs. Mesh systems use dedicated backhaul and single SSID with proper roaming.What is mesh wired backhaul and do I need it?
Wired Ethernet between mesh nodes instead of wireless. Doubles real-world throughput — 850-1200 Mbps everywhere vs 400-700 wireless. Worth installing if feasible.How do I survey my WiFi coverage?
Free apps — NetSpot (Windows/Mac), WiFi Analyzer (Android), AirPort Utility WiFi Scanner (iOS). Walk through each room measuring signal strength and throughput.Does the SA ISP router need to be replaced?
For larger homes, yes. ISP routers are entry-level. Set to bridge mode and let a mesh system or wired APs handle WiFi.WiFi 6, WiFi 6E or WiFi 7 — which do I need?
WiFi 7 is the smart pick for new mesh purchases. WiFi 6E is fine if budget is tight. WiFi 6 is acceptable but a single-generation step behind.Why is my fibre fast in one room but slow in others?
The fibre is healthy — the WiFi link to your device is slow. Fix the wireless coverage, not the ISP.What about powerline adapters?
Useful budget fallback when Ethernet isn't feasible. Performance varies wildly — best case 500-800 Mbps, worst 30-80 Mbps. Mesh with wired backhaul is better when possible.
Get the Evetech app
Exclusive app-only prices, daily flash sales, and free delivery on orders over R4,000 — download the app and start saving.