Mac Security · Complete Guide
MacBook security, end to end. — FileVault. Touch ID. Find My. Time Machine. Done.
Apple's security stack on M-series MacBooks is the strongest consumer-grade protection on the market — when configured correctly. Most users have 4 of the 7 settings turned on. Here's the full stack for SA users.
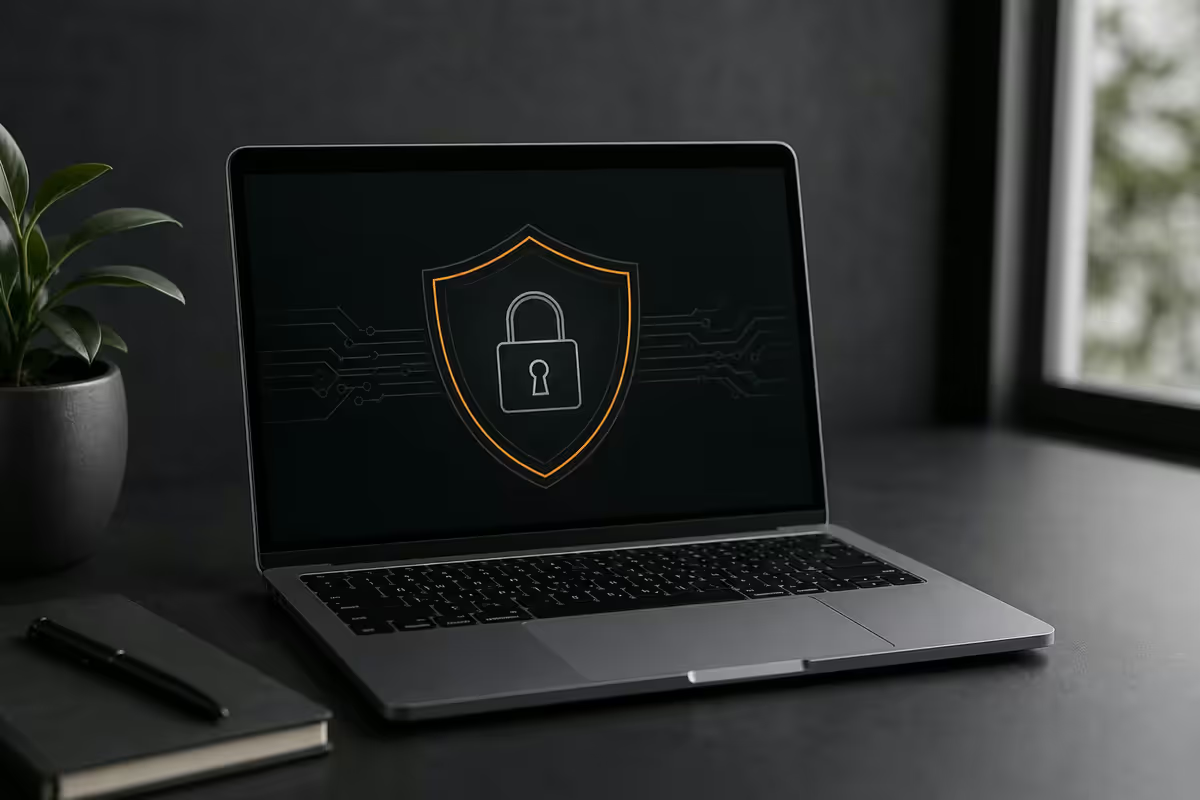
FileVault — full-disk encryption that makes stolen MacBooks unreadable
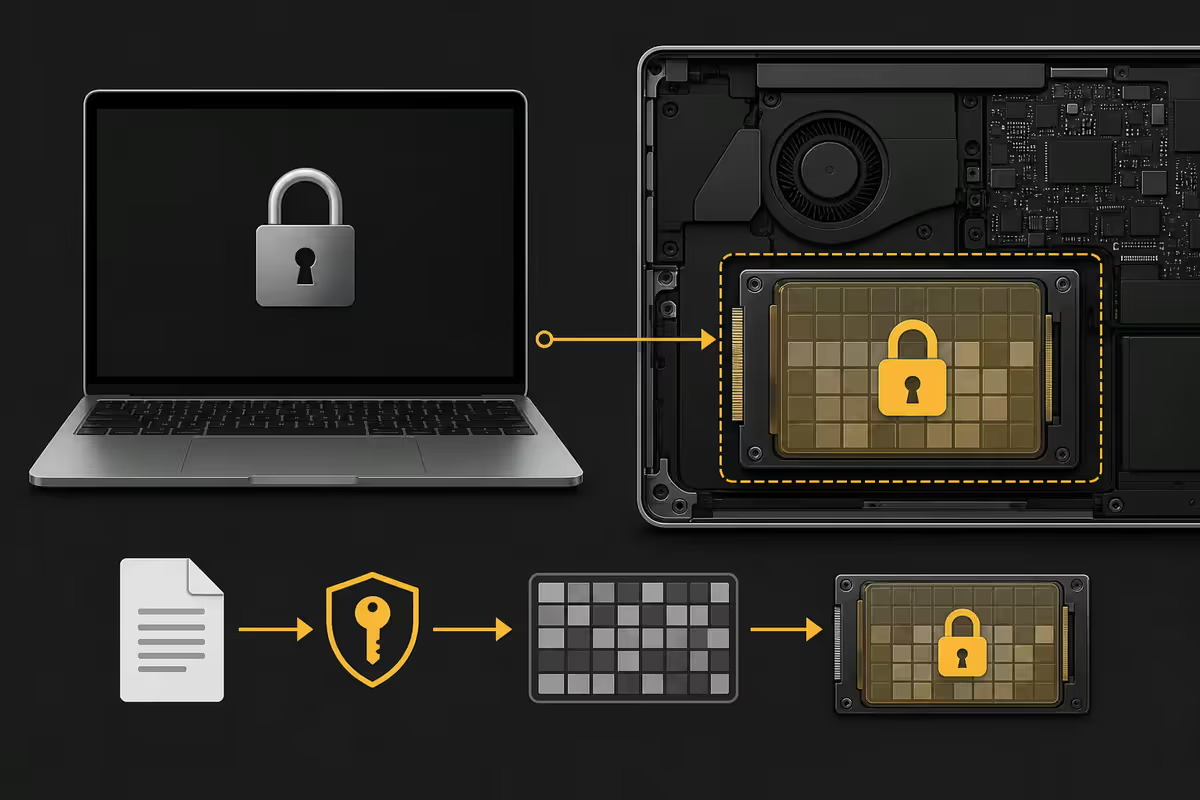
FileVault encrypts your entire internal SSD with AES-256. Without your password, the disk is mathematically unreadable — even if a thief pulls the SSD chip out and reads it directly. This is the foundational layer of MacBook security.
M-series Macs (M1 and later) — FileVault is effectively always on
On Apple Silicon, the SSD is hardware-encrypted from the moment the Mac is set up. The Secure Enclave holds the encryption keys. Even with FileVault "off" in System Settings, the data on disk is still encrypted — turning FileVault "on" just adds your user password as the unlock requirement.
Verify FileVault is on: System Settings → Privacy & Security → FileVault → should say "FileVault is turned on for the disk." If not, click Turn On.
Intel Macs — FileVault is opt-in
If you're still on an Intel MacBook, FileVault is not enabled by default. Enable it manually: System Settings → Privacy & Security → FileVault → Turn On. Initial encryption takes hours on first run — let it complete plugged in overnight. Performance penalty is negligible on modern SSDs.
Touch ID and login security
Touch ID on MacBook is the biometric layer for unlocks, password autofills, Apple Pay, and sensitive system prompts. It's anchored in the Secure Enclave, so your fingerprint template never leaves the chip and is never uploaded anywhere.
Enrol 2-3 fingerprints
System Settings → Touch ID & Password → Add Fingerprint. Enrol both index fingers, optionally a thumb. Consider enrolling the same fingerprint at slightly different angles for better recognition.
Use a long device password — not just for Touch ID fallback
macOS still requires a password at certain critical moments: after reboot, after Touch ID failures, every 48 hours, when changing security settings, when adding new fingerprints. Make this password genuinely strong:
- At least 12 characters — short passwords are crackable offline if FileVault keys are extracted (extremely hard, but theoretically possible).
- Memorable passphrase rather than random — "blue-octopus-volcano-tuesday" is stronger than "Tr0ub4dor!" and easier to recall.
- Different from your Apple ID password. Treating them as two distinct things means compromise of one doesn't unlock the other.
- Don't share it with anyone — including family. Use Guest user account or separate accounts for shared MacBooks.
Apple ID 2FA — mandatory in 2026
Two-factor authentication on Apple ID is enforced by default on all new accounts in 2026 and on most existing accounts. When you sign in from a new device or browser, you'll need both your password and a six-digit code sent to one of your trusted devices or trusted phone numbers.
Verify your 2FA setup
System Settings → click your name (top of sidebar) → Sign-In & Security → Two-Factor Authentication. Check:
- Trusted phone number is current. If you changed SA numbers and didn't update Apple, you could be locked out. Add a backup SA number if you have one.
- Trusted devices list reflects only devices you own. Remove any old MacBook, iPhone, iPad you've sold or lost.
- Account Recovery Contact set up. Pick a trusted family member's Apple ID — if everything goes wrong they can help you recover access.
Use passkeys where supported
Passkeys (Apple's implementation of FIDO2 / WebAuthn) are stronger than passwords + 2FA combined. They're phishing-resistant by design — even if you click a fake Apple link, the passkey simply won't work on the wrong domain. Use passkeys on every site that offers them (Google, Microsoft, GitHub, Amazon, etc.).
Password manager — iCloud Keychain or third-party?
Reusing passwords across sites is the single most common compromise vector. A password manager generates and stores unique strong passwords for every site, autofilling them when needed.
| Option | Cost (SA) | Best for |
|---|---|---|
| iCloud Keychain | Free with Apple ID | Apple-only households, passkey users. |
| 1Password | ~R75/mo or R750/yr | Mixed-platform families, business use. |
| Bitwarden | ~R20/mo or free tier | Privacy-focused, open-source preference. |
| Dashlane | ~R75/mo | Power users wanting VPN bundled. |
| LastPass | ~R55/mo | Legacy users only — recommend migrating. |
iCloud Keychain is genuinely good in 2026. End-to-end encrypted with your Apple ID. Syncs across Mac, iPhone, iPad. Autofills in Safari and supports third-party browsers. Generates strong passwords automatically. Supports passkeys natively. Free.
Step up to 1Password or Bitwarden if you need:
- Cross-platform sharing with Windows/Android family members or coworkers.
- Secure document storage (IDs, passport scans, medical records).
- Business-grade audit logs and admin policies.
- Vault sharing for teams.
Find My Mac — set it up BEFORE you need it
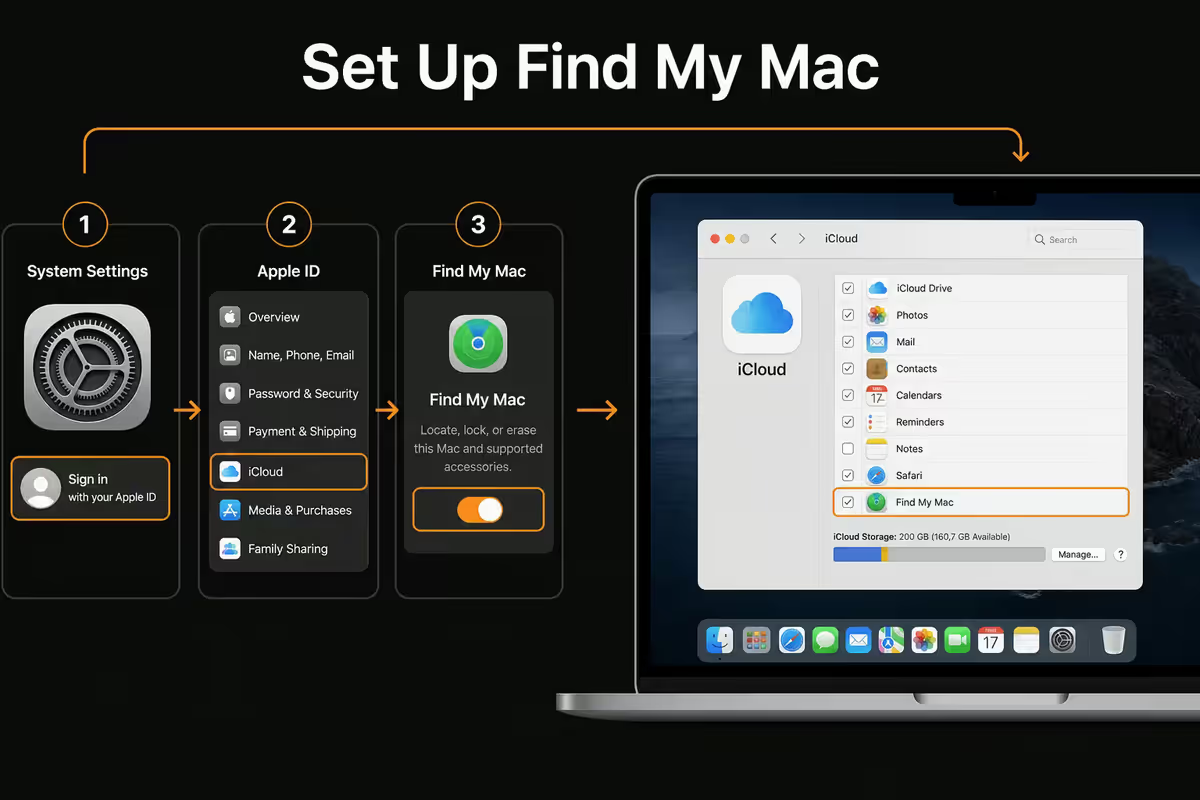
Find My Mac is Apple's free anti-theft tracking system. It lets you remotely locate, lock or wipe a lost or stolen MacBook from any other Apple device or from icloud.com. The single most important point: you must enable it before anything happens. You cannot enable Find My remotely on a MacBook you no longer have.
Enable Find My Mac
- System Settings → click your name (top of sidebar) → iCloud.
- Click Find My Mac → toggle on.
- Also toggle on Find My network (below) — this lets nearby Apple devices report your MacBook's location even when it's offline or asleep, via passive Bluetooth pings to the Find My network of all Apple devices globally.
- System Settings → Privacy & Security → Location Services → ensure Location Services is on (Find My needs it).
Remote actions you can trigger
From iCloud.com → Find My, or the Find My app on another iPhone/iPad/Mac:
- Play Sound — useful for misplaced MacBook in the house. Loud chime until you find it.
- Mark As Lost — remotely locks the device, displays a custom message on the lock screen ("Lost MacBook — please call 082-XXX-XXXX"), and tracks location continuously.
- Erase This Mac — wipes all data. Activation Lock remains (see below) so the device is still unusable. Use only when you're certain you won't recover the device physically.
Activation Lock — anti-resale protection
Activation Lock is the genius part of Find My Mac. Once Find My is enabled, your Apple ID is cryptographically tied to your MacBook at the firmware level. Even after a complete erase, the MacBook demands your original Apple ID password before it can be set up by anyone else.
In practice: a stolen MacBook with Activation Lock is essentially worthless on the resale market. Thieves can't sell it to a buyer who has any tech knowledge — it's just parts.
Activation Lock is automatic if Find My Mac is on. You don't enable it separately. But this is the entire reason setting up Find My Mac on day one of MacBook ownership matters so much.
Time Machine — the local backup essential
Time Machine is macOS's built-in continuous backup tool. Plug in an external drive once, point Time Machine at it, and macOS quietly backs up hourly forever. Restore individual files, entire folders, or migrate to a new Mac.
External drive recommendation for SA
- 1TB external SSD (Samsung T7 Shield, SanDisk Extreme, WD My Passport SSD) — R1,500-R2,000. Best balance of speed and portability.
- 2TB external SSD — R2,500-R3,500. Recommended if your MacBook SSD is 1TB+ (Time Machine needs roughly 2× your data size).
- 4TB external HDD (Seagate Backup Plus, WD Elements) — R1,800-R2,500. Cheaper but slower and less travel-friendly.
- NAS (Synology, QNAP) — R5,000-R15,000 for the unit. Network-attached, accessible to whole household.
Set up Time Machine
- Plug in your external drive. macOS will likely prompt "Use as Time Machine backup?" — click Use as Backup Disk.
- If not prompted: System Settings → General → Time Machine → Add Backup Disk → select your drive.
- Encrypt the backup — Time Machine asks during setup. Always say yes. An unencrypted Time Machine backup is a complete copy of your data sitting on a drive that can walk away. Encrypt with a password you'll remember.
- First backup takes hours. Subsequent backups are incremental and finish in minutes.
iCloud Drive — the off-site backup
Time Machine is local — it's vulnerable if your house burns down or is burgled along with the MacBook. iCloud Drive handles the off-site layer.
SA iCloud pricing (2026)
| Tier | Price/month (SA) | What fits |
|---|---|---|
| Free | 5GB | Almost nothing — token tier. |
| iCloud+ 50GB | ~R6/mo | Documents, light Photos, basic device backups. |
| iCloud+ 200GB | ~R20/mo | Decent Photos library, multiple device backups, family sharing. |
| iCloud+ 2TB | ~R75/mo | Heavy Photos/Videos library, big iCloud Drive folders, full family. |
| iCloud+ 6TB | ~R150/mo | Power users, video archives. |
| iCloud+ 12TB | ~R300/mo | Pro use, content creators. |
For most users in SA the 200GB-2TB tier is the sweet spot. Family Sharing splits one plan across 6 family members — significantly cheaper per person than separate plans.
The 3-2-1 backup rule
The industry-standard backup rule applied to MacBook:
- 3 copies of your data — the original on your MacBook, plus 2 backups.
- 2 different media types — local SSD (Time Machine) + cloud (iCloud / Backblaze / Dropbox).
- 1 off-site copy — cloud storage, or a Time Machine drive kept at a different location (parents' house, office).
A typical SA 3-2-1 setup for a MacBook user:
- Copy 1: The original on your MacBook SSD.
- Copy 2: Time Machine to external SSD at your desk — automatic hourly backups.
- Copy 3: iCloud Drive (Documents, Desktop, Photos) — off-site automatically.
- Optional 4: Backblaze Computer Backup (~R150/mo, unlimited storage) for full-disk off-site coverage of media files and downloaded content too large for iCloud.
Gatekeeper, Notarisation and XProtect — macOS's built-in defences
macOS runs several layers of malware protection silently:
- Gatekeeper — refuses to run apps that aren't signed by an identified developer or downloaded from the App Store. You'll see the "macOS cannot verify this developer" dialog when Gatekeeper blocks something.
- Notarisation — apps signed by developers are also scanned by Apple's malware service. The "Apple has reviewed this app for known malicious content" stamp.
- XProtect — built-in malware signature scanner. Updates automatically, blocks known threats in real time.
- Malware Removal Tool (MRT) — runs on boot to remove infections found by XProtect.
System Settings → Privacy & Security → "Allow applications downloaded from" — keep this on "App Store and identified developers" (the default). Don't lower it to "Anywhere" unless you genuinely need to run a specific unsigned app you trust.
Browser security — Safari, Firefox or Chrome?
Your browser is the single biggest attack surface on any computer. Choice matters.
| Browser | Privacy default | Best for |
|---|---|---|
| Safari | Strong — Intelligent Tracking Prevention | Mac-only users, low effort. |
| Firefox | Strong — fine-grained controls | Power users wanting configuration. |
| Chrome | Weak — Google data harvesting | Sites that require Chrome (rare in 2026). |
| Brave | Very strong — adblock built-in | Aggressive privacy preference. |
| Arc | Moderate — Chromium-based | Workflow innovators, niche. |
Safari is the right default for most Mac users. Intelligent Tracking Prevention blocks cross-site trackers by default. Privacy report shows what was blocked. Battery efficient. Tight integration with iCloud Keychain and passkeys.
SA theft considerations + AppleCare Theft & Loss
SA realities: MacBooks are high-value targets. Common theft scenarios we see in customer reports:
- Coffee shop / restaurant theft — Looked away for 10 seconds, MacBook gone. Centurion, Sandton, Cape Town CBD, Stellenbosch are notable hotspots.
- Gym locker theft — backpacks left in lockers being broken into during sessions.
- Airport & lounge theft — opportunistic grabs from charging stations or unattended bags.
- Car break-ins — visible MacBook in parked car. Always boot-stowed.
- House burglary — daytime break-ins specifically targeting electronics.
AppleCare+ with Theft & Loss (SA)
In SA, Apple offers AppleCare+ with Theft and Loss for MacBook, which Apple Insurance South Africa underwrites. Key points:
- Pricing: MacBook Air ~R5,200/year, MacBook Pro ~R6,800/year. Three-year plans available at a slight per-year discount.
- What it covers: physical replacement of a stolen or lost MacBook, subject to a deductible (~R3,500-R5,500 depending on model).
- Requirements: Find My Mac must be active at the time of loss. SA Police case number required for theft. File the claim within 72 hours where possible.
- What it doesn't cover: theft from unlocked / unattended public places that "reasonable care" wasn't exercised (terms vary — read fine print).
Is it worth it? For a R45,000+ MacBook Pro 16, the annual premium is roughly 15% of the device value over 3 years. For high-theft areas (Centurion, Sandton, CBDs) or users who travel a lot with their MacBook (coffee shops, conferences), the maths usually favours buying it. For an entry MacBook Air in a low-risk home/office context, household insurance might be cheaper.
Common MacBook security mistakes
Reusing your Apple ID password elsewhere. If a breach at a smaller site exposes your password and your Apple ID uses the same one, attackers can pivot directly to your Apple ID. Use a unique strong Apple ID password — and only that one in your password manager.
Disabling Find My to "save battery." Find My uses negligible battery — modern Apple Silicon Macs lose maybe 1% per day from Find My. Disabling it costs you Activation Lock and remote tracking the day the MacBook is stolen.
Skipping Time Machine encryption. An unencrypted Time Machine drive is a complete clone of your encrypted MacBook, sitting on a removable drive that thieves can grab. Always encrypt the backup.
Trusting "iCloud locked" SMS messages. Apple never sends SMS or emails saying "iCloud locked — click here to verify." If you get one, ignore it. Go to icloud.com directly in your browser to check your account status.
Sharing your login password with family. Use macOS multiple user accounts — each family member has their own. Or set up a Guest user account that doesn't persist data.
Not signing out before selling. Activation Lock will brick the device for the new owner. Always sign out of iCloud and erase before handing over.
Key takeaways
- FileVault is on by default on M-series Macs. Verify it. Store your recovery key somewhere safe.
- Apple ID 2FA is mandatory in 2026. Verify trusted phone numbers and trusted devices are current.
- Find My Mac enables Activation Lock — makes stolen MacBooks worthless on resale. Set it up before you need it.
- Time Machine to external SSD + iCloud Drive = the 3-2-1 backup rule for Mac users.
- AppleCare+ with Theft & Loss (~R6,800/yr for Pro) makes sense in SA's high-value-MacBook + high-theft context. Or compare with household insurance.
Frequently asked questions
Is FileVault enabled by default on Mac?
On Apple Silicon (M1+) the SSD is hardware-encrypted from day one. Enable FileVault in System Settings → Privacy & Security to require your password for decryption. On Intel Macs it's opt-in.How do I enable two-factor authentication on Apple ID?
System Settings → click your name → Sign-In & Security → Two-Factor Authentication. Apple ID 2FA is mandatory in 2026. Verify trusted phone number and trusted devices are current.Do I need antivirus on Mac?
Not in the traditional sense. macOS has Gatekeeper, Notarisation, XProtect and MRT built in. Power users may add Malwarebytes for Mac for periodic scans. For most users, the built-in stack is enough.What is Find My Mac and how do I enable it?
Remote location, lock and erase for lost/stolen MacBook. Enable: System Settings → click your name → iCloud → Find My Mac (also enable Find My network for offline tracking).How do I back up my MacBook?
3-2-1 rule: Time Machine to external SSD (local) + iCloud Drive (off-site). Optionally Backblaze Computer Backup for full off-site disk coverage.Is iCloud Keychain safe to use as a password manager?
Yes — end-to-end encrypted, free with Apple ID, supports passkeys. Step up to 1Password (~R75/mo) or Bitwarden (~R20/mo) for cross-platform sharing or business use.What is AppleCare Theft & Loss in South Africa?
AppleCare+ tier that replaces stolen/lost MacBook subject to deductible and police case number. SA pricing ~R5,200/yr (Air) to R6,800/yr (Pro). Requires Find My active at time of loss.What is Activation Lock on Mac?
Ties your MacBook to your Apple ID via Find My Mac. Even after a complete erase, the device demands your original Apple ID before setup. Makes stolen MacBooks worthless on resale.
Get the Evetech app
Exclusive app-only prices, daily flash sales, and free delivery on orders over R4,000 — download the app and start saving.