Gaming Room Acoustics
How to soundproof your gaming room. — What absorbs. What blocks. What's neither.
The acoustic foam panels everyone buys absorb echo for cleaner recordings — they do almost nothing to stop sound reaching your neighbours. Getting both right starts with knowing which is which.
- tier spread
- R500 - R5k
- biggest leak
- Doors
- where bass lives
- Corners
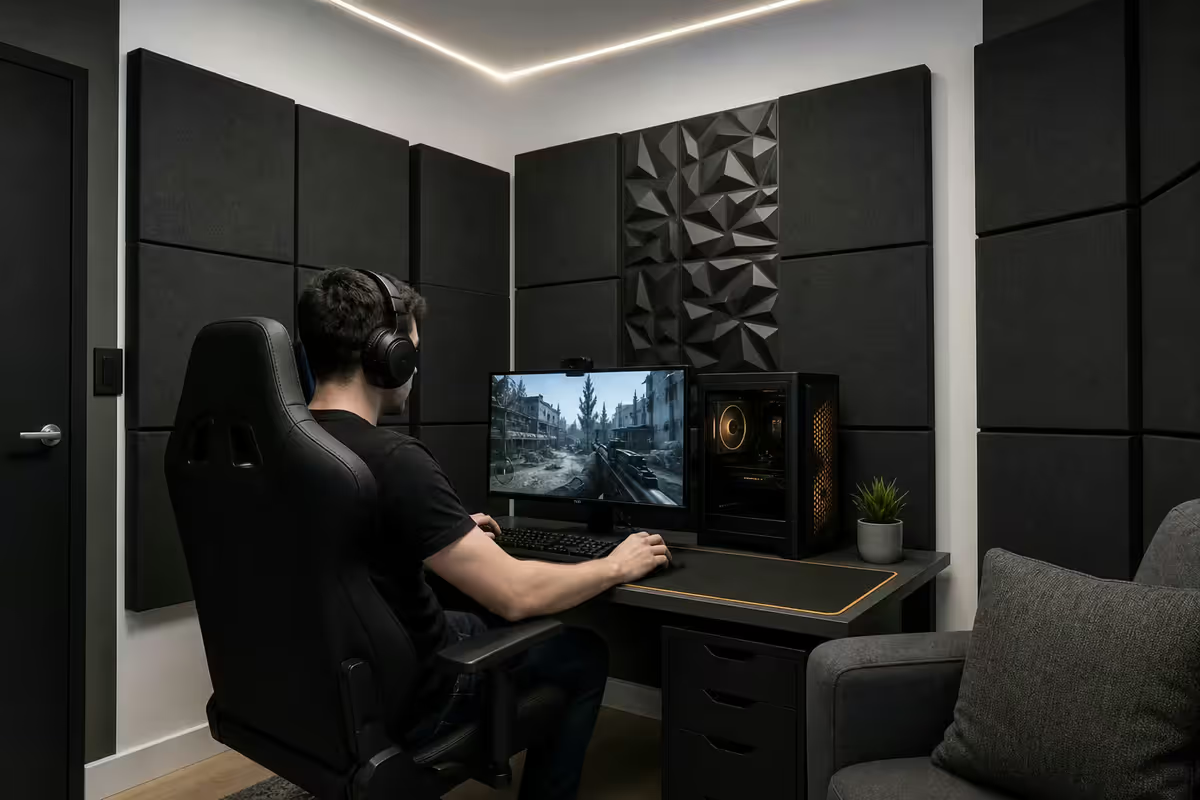
Absorption vs sound-blocking — the distinction that ends the confusion
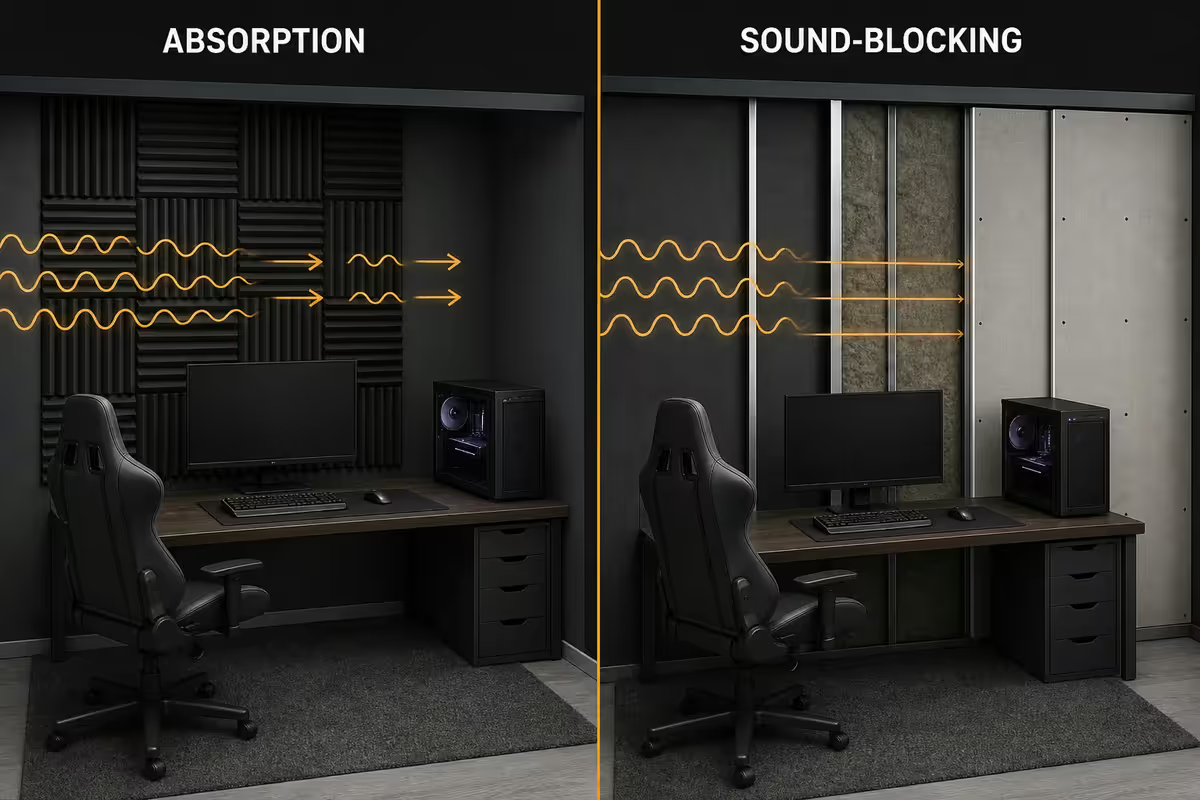
Almost every YouTube tutorial mixes these up. They are entirely different problems with entirely different solutions, and confusing them is why so many gaming rooms end up with R3,000 of acoustic foam and neighbours still complaining about gunfire at 22:00.
Absorption controls sound inside the room. Soft, porous materials — acoustic foam, rockwool panels, thick fabric, heavy carpet — convert sound energy into tiny amounts of heat as the wave passes through them. This kills reverberation, slap-back echo and the "boxy" quality of bare rooms. It is what makes your microphone recording sound clean and your speaker setup sound coherent.
Sound-blocking stops sound passing through walls, doors and windows. It needs mass (denser, heavier materials block more sound), air-tight sealing (sound leaks through any gap — under doors, around windows, through unsealed cable holes) and ideally decoupling (preventing vibrations transferring through shared studs). Soft foam does almost none of these.
The practical implication for a SA gaming room:
- If you stream or record voice, you need absorption — to make recordings sound professional regardless of what the room is made of.
- If you want neighbours not to hear your gunfire, you need sound-blocking — sealed doors, mass on shared walls, heavier glass on windows.
- Most rooms need both, but the techniques don't overlap. Buying foam panels does almost nothing for blocking.
Acoustic panels — what works and what's marketing
There are two materials sold as "acoustic panels" and they behave very differently.
Acoustic foam — the wedge or pyramid foam panels you see in every YouTuber's bedroom. Light, cheap, easy to mount. Absorbs mid and high frequencies effectively (above ~500 Hz) — your voice, snare drums, mouse clicks. Does essentially nothing for bass (below ~200 Hz). Six panels on the wall behind your monitor will noticeably reduce slap-back echo and make recordings cleaner. Useful for streamers.
Mineral wool / rockwool panels — proper acoustic absorbers, usually 50-100 mm thick, wrapped in cloth. Absorb across a much wider frequency range including some bass (down to ~80 Hz with thick rockwool). The professional choice for proper room treatment. More expensive but more honest performance.
Placement matters more than quantity:
- First reflection points — the spots on side walls where sound from your speakers bounces directly to your ears. Find by sitting in your gaming position; have a helper slide a mirror along the wall — anywhere you see your speakers reflected is a first reflection point. Treating these is the highest-impact placement.
- Behind the speakers — absorbs back-wave reflection that muddies stereo imaging.
- Behind the listening position — kills the slap-back echo from the back wall.
- Ceiling cloud — a horizontal absorber above the desk. Often skipped, often the most impactful single panel.
What doesn't help: covering every square metre of wall in foam. Past about 20-30% coverage, you get rapidly diminishing returns and a room that feels acoustically dead — which is just as fatiguing as an echoey one. Six well-placed panels beat thirty randomly-placed ones.
Bass traps — corners do the heavy lifting
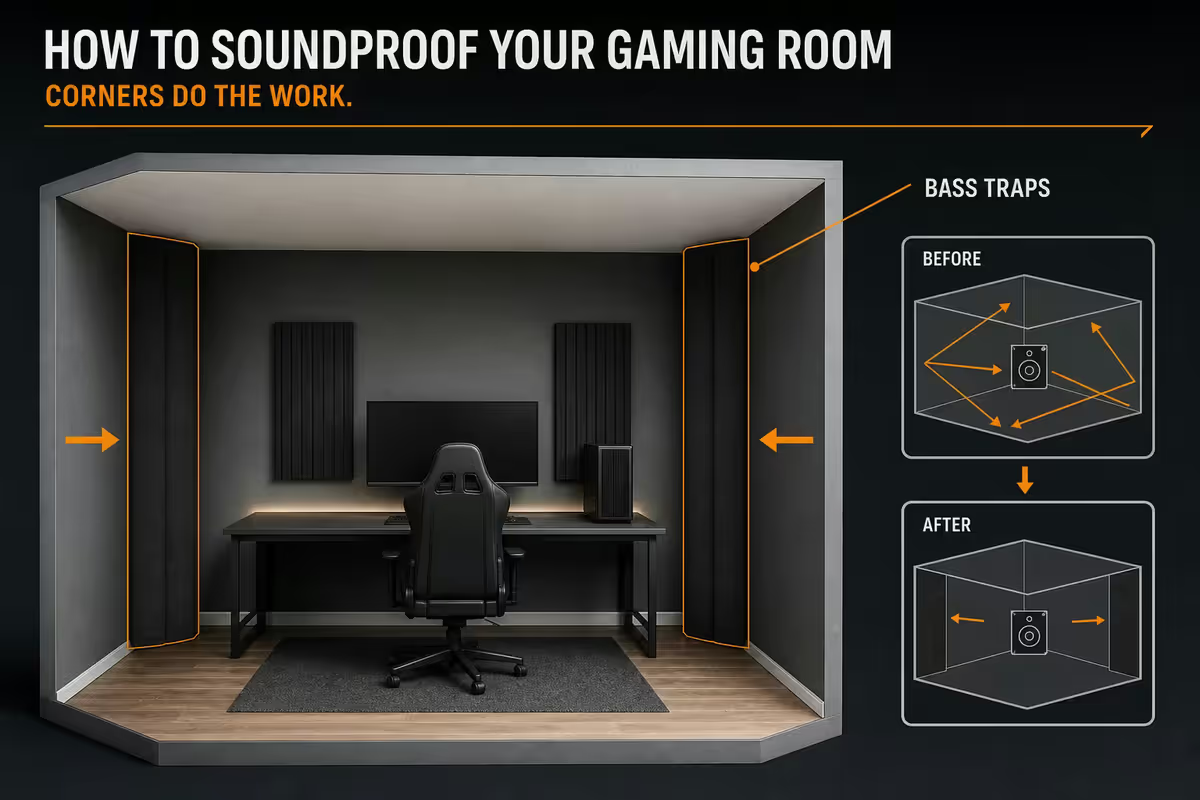
Low-frequency sound waves are physically long — a 40 Hz wave is around 8.5 metres long. They don't behave like high-frequency reflections; they fold around obstacles and accumulate where multiple surfaces meet. In a rectangular room, that means the corners.
Standard wall foam panels do almost nothing for bass. To control low end you need thick porous absorbers in the corners — typically 100-200 mm thick rockwool wedges that fill the floor-to-ceiling corner volume.
Standard placement:
- Two floor-to-ceiling bass traps in the corners behind your monitor (the front wall).
- Two more in the rear corners behind your listening position.
- If budget allows, four more in the ceiling-wall corners (the upper corners) where bass also accumulates.
The audible difference is striking. A room with no corner treatment has a "one note bass" quality where certain frequencies boom unpleasantly and others disappear. Corner bass traps flatten this response — bass becomes tight, defined, and present without dominating. Worth doing even before wall panels.
Doors and windows — where sound actually leaves
Here's the truth that surprises everyone treating their room for the first time: your door alone leaks more sound than your walls do. The gap between the bottom of the door and the floor — even 5 mm — is an open acoustic window. Sound takes the path of least resistance, and that path is almost always your door.
The three-step door seal that costs R400-R900 in SA:
- Door sweep on the bottom — a brush or silicone strip mounted on the door's outer face that presses against the floor when closed. Builders Warehouse, Cashbuild, Leroy Merlin all stock these from R150-R300. Eliminates the bottom gap.
- Adhesive foam weatherstrip around the door frame — the same product used for thermal sealing also seals acoustically. R80-R150 per door. Stick it on the door stop where the door meets the frame.
- Solid-core door upgrade if the current door is hollow — most internal SA residential doors are hollow-core and block almost nothing. A solid-core or solid-wood door (R900-R2,500) increases the door's STC rating by 8-12 dB, which is significant. Only worth it in owned property.
Windows are the second leak point. Single-glazed windows transmit a huge amount of sound. Options:
- Heavy curtains (blackout, multi-layer, velvet) — modestly reduces sound transmission while substantially helping room absorption. R600-R1,500 in SA.
- Acoustic-grade window seal — adhesive foam around the window frame seals tiny air gaps. R100-R200.
- Secondary glazing or laminated acoustic glass — proper soundproofing solution. Usually R3,000+ per window and requires installation. Worth it on a forever-home setup; not viable in a rental.
Soft furnishings — the free wins
Before buying a single acoustic panel, look at what's already in the room. A hard-floor bedroom with no curtains, no carpet, no bookshelves and one large desk is an acoustic mirror. The same room with a thick rug, heavy curtains, a fabric couch and shelves of books is half-treated already.
Free or near-free wins:
- Rug or carpet on the floor between you and the speakers — kills floor-bounce reflections that muddy stereo imaging.
- Fabric-front bookshelves filled with mismatched book heights — acts as a diffuser, scattering reflections rather than absorbing them, which keeps the room feeling alive.
- Soft furniture — a fabric couch or armchair against the back wall absorbs more high-frequency reflection than three foam panels.
- Heavy curtains even when you don't need light blocking — fabric over glass dampens window resonance.
- Wall-hung tapestries or thick wall art — fabric wall hangings absorb a useful chunk of mid frequencies.
Treat the easy wins first. The amount you'd need to spend on dedicated treatment to match a properly-furnished room is significant.
Microphone proximity — the streamer's secret weapon
Here's the trick podcast and streaming professionals use that solves more acoustic problems than any panel: get the microphone close to your mouth.
Two principles do the work:
- Inverse square law — sound intensity drops with the square of distance. A mic 5 cm from your mouth captures your voice roughly 100× louder than the room sound at 50 cm away. The mic preamp can be turned down, dropping the room noise in the recording by 20+ dB.
- Directional polar patterns — dynamic mics (Shure SM7B, Rode PodMic, Shure MV7) have cardioid patterns that strongly reject sound from the rear and sides. Combined with proximity, they can make a bare bedroom sound studio-clean.
A budget setup that beats R3,000 of acoustic treatment for streaming voice quality:
- Rode PodMic or Samson Q9U (R2,500-R3,500) — dynamic, USB, very forgiving.
- Boom arm (R600-R1,200) — positions the mic 5-10 cm from your mouth without taking up desk space.
- Pop filter (R150-R300) — controls plosives and keeps the mic out of direct breath.
This combination, in an entirely untreated bedroom, produces broadcast-quality voice with no foam in sight. The room sound simply isn't loud enough relative to your voice to reach the recording.
Across the 200,000+ custom PCs and streaming rigs we've configured from Centurion, the pattern is unmistakable: customers who spend R3,000 on Auralex foam before upgrading their microphone are unhappy with the result; customers who spend R3,000 on a Rode PodMic plus a boom arm in an untreated bedroom send us thank-you photos. Treat your room only after you've maxed out the mic-and-proximity approach. For pure streaming, the right mic in the wrong room beats the wrong mic in the right room every time.
Behind the Build · Centurion stream room tested
SA budget tiers — what to actually buy
- Door sweep + adhesive weatherstrip (R250)
- Two corner bass traps — DIY rockwool (R450)
- Borrowed thick rug + heavy curtain
- Free: fabric couch / bookshelf positioned for reflection control
- Six pre-built acoustic panels (R1,500-R2,000)
- Two pre-built corner bass traps (R600-R900)
- Door sweep + heavy curtain (R700)
- Optional: pre-fab ceiling cloud (R400)
- Auralex Studiofoam panel kit (R3,500)
- Auralex LENRD bass traps (4 units, R1,800)
- Solid-core door upgrade (R1,200)
- Acoustic-grade window seals (R500)
- Double-drywall on shared wall (R5,000)
- Decoupled stud / Green Glue (R3,000)
- Secondary glazing or acoustic window (R5,000)
- Owner-only — not viable in rental
Measuring with phone SPL apps
Before and after any treatment, measure. Several free phone SPL apps give you within ±3 dB of a real sound level meter — accurate enough to track whether your changes are actually working.
Recommended apps:
- NIOSH Sound Level Meter (iOS) — National Institute for Occupational Safety, scientifically validated, free.
- Sound Meter by Abc Apps (Android) — clean readouts, A/C weighting, decent accuracy.
- Decibel X (cross-platform) — good UI for tracking sessions; free tier sufficient.
Useful baseline measurements: play a known reference (white noise from YouTube at fixed volume) and measure at your listening position, at the wall behind you, and on the other side of the door / wall to neighbours. Repeat after each intervention. You'll see exactly which step moved the number and which didn't.
Key takeaways
- Absorption controls echo inside; soundproofing blocks sound through walls. Different materials, different placements.
- Treat corners with bass traps before covering walls in foam — corners are where bass accumulates.
- Doors leak more than walls. R400 of door sweep and weatherstrip outperforms R3,000 of wall foam for blocking.
- A close dynamic mic plus boom arm beats acoustic treatment for streaming voice quality.
- Measure with a phone SPL app before and after every change so you know what worked.
Frequently asked questions
What's the difference between absorption and soundproofing?
Absorption kills echo inside the room (soft porous materials). Soundproofing blocks sound passing through walls (mass + air seal). Different jobs, different materials.Does acoustic foam actually soundproof a room?
No. Foam absorbs sound for recording quality. It does almost nothing to block sound through walls. For that you need mass, air sealing and ideally decoupled wall structures.What are bass traps and where do I put them?
Thick porous absorbers placed in room corners where low frequencies accumulate. Two in front corners, two in rear corners delivers more low-end clarity than any other single treatment.How do I stop sound leaking through my door?
Door sweep on bottom + adhesive weatherstrip on frame + solid-core door if hollow. R400-R900 total. Doors are the single biggest sound leak point.Do heavy curtains help with sound?
Modestly. They absorb mid and high frequencies bouncing off glass. Do not meaningfully block external noise — for that you need double-glazing or acoustic glass.How loud is too loud for neighbours?
SA by-laws typically allow 50-55 dB daytime and 35-40 dB after 22:00. Headphone gaming is silent. Speaker gaming above 65 dB starts becoming audible through walls in townhouses.What's a realistic SA budget for soundproofing?
R500-R900 DIY tier covers door seal and corner bass traps. R2,500 mid tier adds wall panels. R5,000 Auralex tier covers full treatment. Beyond that you're into structural work.How do streamers avoid room sound on their mic?
Mic proximity. A dynamic mic 5-10 cm from your mouth captures voice loudly while room sits 30+ dB lower in the recording. Solves 80% of the problem without acoustic treatment.
Get the Evetech app
Exclusive app-only prices, daily flash sales, and free delivery on orders over R4,000 — download the app and start saving.