Gaming Performance · NVIDIA
How to optimise NVIDIA Control Panel for gaming — Twelve settings. Free FPS. Five minutes.
NVIDIA Control Panel hasn't changed visually since 2009, but the right twelve settings will deliver 5-15% more in-game FPS and significantly smoother frame pacing — without changing a single in-game graphics option. The "Optimal Power" default alone is costing you 3-7% on every title. Here's exactly what to flip.
- settings to change
- 12
- FPS gain
- 5-15%
- profiles supported
- Per-game
Why these settings matter
NVIDIA Control Panel ships with default settings tuned for compatibility, not performance. The defaults are intentionally conservative — they prioritise battery life on laptops, stability on legacy applications and "do no harm" behaviour for users who never open the Control Panel.
For a desktop gaming PC plugged into mains power, those defaults leave meaningful performance on the table. The Power Management default ("Optimal Power") keeps your GPU at lower clock speeds whenever it judges that's acceptable — which costs you frame rate in nearly every game. The default Low Latency Mode ("Off") allows the CPU to queue multiple frames ahead, which improves average FPS marginally but adds 8-15ms of input lag — a significant penalty in competitive titles.
The twelve key settings below will deliver, in aggregate, 5-15% higher in-game FPS in typical AAA titles, plus measurably lower input latency. None of these changes risk stability — they're the same settings you'd find on the test benches of any professional system integrator (including ours at Evetech). The whole process takes 5-7 minutes the first time you do it.
Where to find NVIDIA Control Panel in Windows 11
There are three ways to open NVIDIA Control Panel:
- Right-click desktop → "Show more options" (Windows 11) → "NVIDIA Control Panel." Most reliable method.
- Start menu search: type "NVIDIA Control Panel" and click the result. Works on most installations.
- System tray icon: right-click the NVIDIA green-eye logo in the system tray → "NVIDIA Control Panel."
If NVIDIA Control Panel is missing, install it from Microsoft Store (free, by NVIDIA Corporation) — Windows 11 fresh installs sometimes don't ship the Control Panel even after installing the GPU driver. Both NVIDIA Control Panel and the newer NVIDIA App should be installed; they coexist and handle different things.
Global 3D settings — the 12 key changes
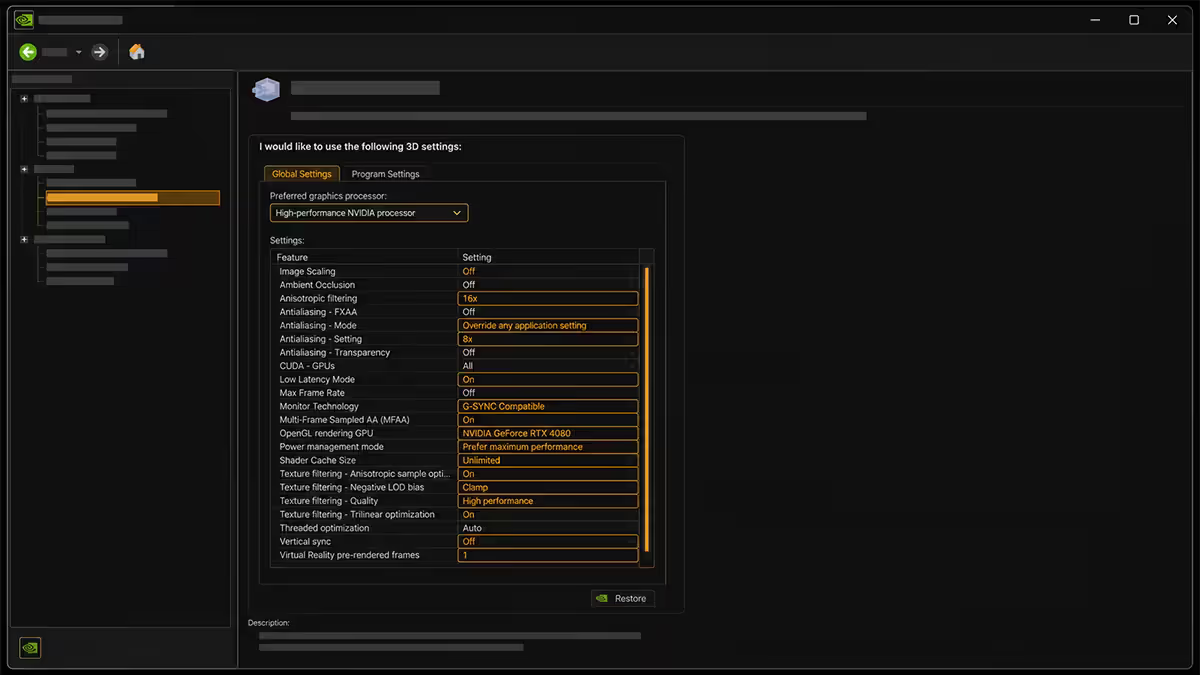
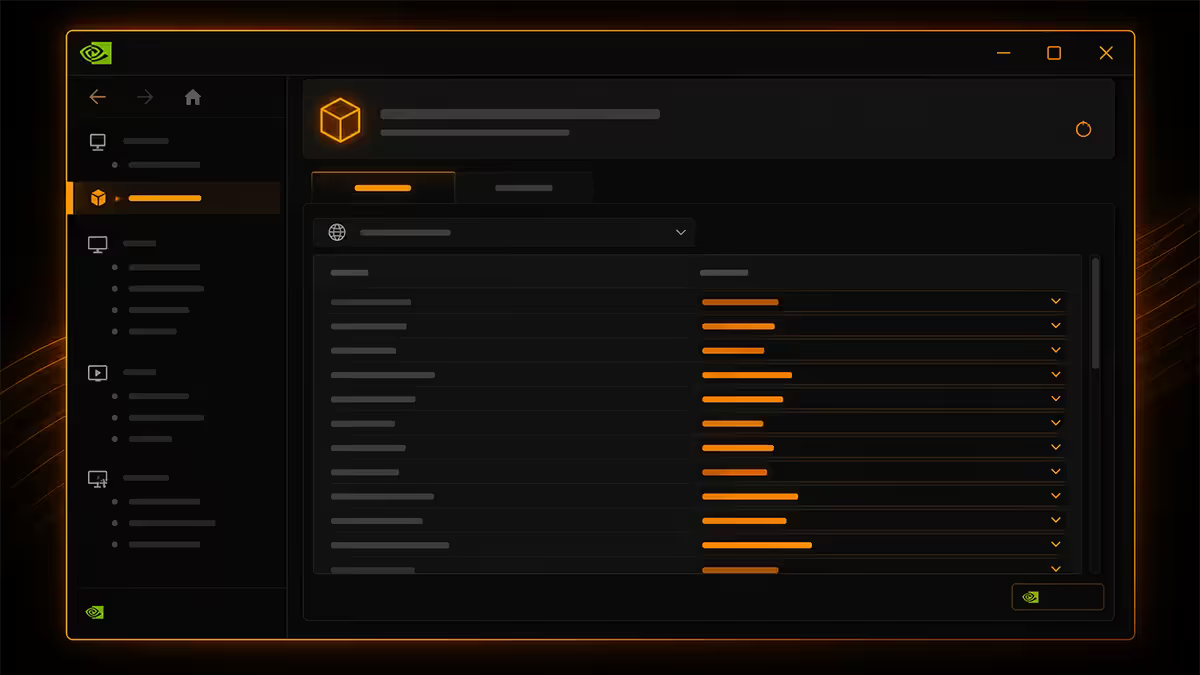
In Manage 3D Settings, the Global Settings tab applies to every application unless overridden by a per-game profile. Below are the changes that produce measurable FPS, latency or visual quality benefits.
| Setting | Recommended value | What it does |
|---|---|---|
| Image Sharpening | On (Sharpen 0.50, Ignore Film Grain 0.17) | Adds clarity to older titles without DLSS support |
| Anisotropic Filtering | 16x | Sharp distant textures, near-zero perf cost on modern GPUs |
| Antialiasing — FXAA | Off | Modern games use better in-engine AA; FXAA blurs |
| Antialiasing — Gamma Correction | Off | Only used by legacy AA modes |
| Background Application Max Frame Rate | 60 (desktop) / 30 (laptop) | Limits FPS when game is minimised — saves power/heat |
| Low Latency Mode | Ultra | Caps pre-rendered frames at 1; -8-15ms input lag |
| Max Frame Rate | Monitor max refresh minus 3 | Keeps gameplay inside G-Sync VRR range |
| Monitor Technology | G-Sync Compatible (if applicable) | Sets VRR signalling for your monitor |
| Power Management Mode | Prefer Maximum Performance | Keeps GPU at higher clocks; +3-7% FPS every game |
| Preferred Refresh Rate | Highest available | Forces highest refresh in fullscreen exclusive games |
| Texture Filtering — Quality | High Performance | Slightly faster texture sampling, no visible quality loss |
| Threaded Optimisation | On | Multi-core driver work, helps CPU-limited games |
| Triple Buffering | Off | Only matters with V-Sync; adds latency |
| Vertical Sync | Off (with G-Sync) / On (without VRR) | G-Sync handles tearing better than V-Sync |
| Virtual Reality pre-rendered frames | 1 | Minimum latency for VR titles |
The Power Management setting deserves its own paragraph
If you change only one setting in NVIDIA Control Panel, change Power Management Mode to "Prefer Maximum Performance." The default "Optimal Power" is excellent for laptops on battery — it keeps the GPU at lower clock speeds when the driver thinks max performance isn't needed, saving battery and reducing heat. On a desktop plugged into mains power, this default actively costs you frames in every game.
The fix delivers 3-7% more FPS in typical AAA titles, and significantly more (10-15%) in games that quickly load and unload assets (open-world titles, multiplayer arena shooters). The trade-off: marginally higher GPU power draw at idle and during light gaming. On a 750W PSU desktop build, this is irrelevant.
Low Latency Mode "Ultra" for competitive games
Low Latency Mode Ultra caps the GPU's pre-render queue at 1 frame. Without it (default "Off"), the CPU may queue 2-3 frames ahead, smoothing average FPS slightly but adding noticeable input lag — your mouse movement reaches the screen 8-15ms later than it could.
For competitive shooters (CS2, Valorant, Apex, Marvel Rivals), Ultra is the right pick — the latency reduction matters more than the marginal FPS smoothness lost. For single-player titles with frame pacing as the priority (RPGs, racing sims), "On" is a milder option that caps at 2 frames. Set Ultra globally; the only games that prefer "Off" are heavily CPU-limited strategy titles, which you can override per-game.
Frame rate cap to stay in G-Sync range
If you have a G-Sync compatible monitor, set Max Frame Rate to 3 below your monitor's maximum refresh rate. For a 240Hz monitor, cap at 237 FPS. For a 144Hz monitor, cap at 141. Why?
G-Sync variable refresh works within a refresh-rate range, not above the monitor's maximum. When your game FPS exceeds the maximum, G-Sync stops doing its tear-prevention work and your screen reverts to behaving like a fixed-refresh monitor. Tearing returns. Capping FPS 3 below max keeps you guaranteed inside the G-Sync range, where every frame is tear-free.
Per-game profile tab
The Manage 3D Settings → Program Settings tab lets you override global settings per game. Useful for games with specific quirks — competitive titles where you want different latency settings than single-player, older games that don't like Threaded Optimisation, or VR titles that need their own preset.
Recommended per-game profiles:
- Counter-Strike 2: Low Latency Mode "Ultra," Max Frame Rate "Off" (cap in-game instead), Power Management "Prefer Maximum Performance," Vertical Sync "Off."
- Valorant: Same as CS2 — competitive shooter latency priority.
- Cyberpunk 2077: Use defaults from Global (DLSS handles everything in-game), Max Frame Rate matches monitor.
- Microsoft Flight Simulator 2024: Threaded Optimisation "On," Texture Filtering "Quality" (not High Performance — distant textures matter).
- VR titles (Half-Life Alyx, MSFS VR): Virtual Reality pre-rendered frames "1," Max Frame Rate "Off," Power Management "Maximum Performance."
- Older Unreal Engine 3/4 games: If you experience stuttering, try Threaded Optimisation "Off" per-game.
How to add a per-game profile: Program Settings tab → "1. Select a program to customize" dropdown → if the game isn't in the list, click "Add" and browse to the game executable (usually under Program Files or your Steam library). Then change settings as needed; Apply at the bottom.
Display setup — G-Sync and HDR
Set Up G-Sync correctly
Display → Set Up G-Sync in the left sidebar opens the variable refresh rate configuration:
- Tick "Enable G-Sync, G-Sync Compatible." Mandatory.
- Select "Enable for windowed and full screen mode." Some borderless-window games benefit from this; cost zero.
- Select your monitor in the bottom list and tick "Enable settings for the selected display model" (this saves the per-monitor preference).
- Apply.
Then in Manage 3D Settings → Global → Monitor Technology, set G-Sync Compatible. Also set Vertical Sync to "On" — this provides a fail-safe above the G-Sync range; combined with the Max Frame Rate cap, you won't actually hit this fail-safe in practice but it's defence in depth.
HDR setup
If your monitor supports HDR (HDR10 minimum, ideally DisplayHDR 600+):
- Display → Adjust HDR in NVIDIA Control Panel.
- Toggle HDR On for your monitor.
- Set HDR brightness using the slider — most users want 800-1500 nits target depending on monitor.
- Calibrate using Windows HDR Calibration App (free from Microsoft Store) for proper paper-white and clip points.
HDR is best enabled per-monitor rather than globally — desktop work in HDR can look washed out or oversaturated on cheaper HDR monitors. Toggle HDR on only when actively gaming or watching HDR content. Windows 11 has a quick toggle in the Settings → Display panel.
NVIDIA App vs Control Panel — when to use which
NVIDIA released the NVIDIA App in 2024 to replace the ageing GeForce Experience (GFE). Both NVIDIA App and Control Panel coexist in 2026, handling different things.
| Function | NVIDIA Control Panel | NVIDIA App |
|---|---|---|
| Global 3D settings | Use this | — |
| Per-game profile overrides | Use this | — |
| Display setup (G-Sync, HDR, resolution) | Use this | — |
| Driver updates and rollback | — | Use this |
| Game Optimal Settings (auto-tune) | — | Use this |
| ShadowPlay / Game recording | — | Use this |
| In-game overlay (Alt+Z) | — | Use this |
| Game Filters (FreeStyle) | — | Use this |
| NVIDIA Broadcast (mic noise removal, virtual bg) | — | Use this |
| Streaming setup (Twitch, YouTube) | — | Use this |
Don't skip the NVIDIA App. The in-game overlay (Alt+Z by default) provides instant access to ShadowPlay recording (the "Save last 30 seconds" instant-replay feature is excellent for clipping highlights), and the driver update notifications are the easiest way to stay current. Game Filters let you adjust contrast, saturation and sharpness mid-game without alt-tabbing — useful for darkened titles or competitive scenarios.
Optimal Settings (formerly GFE auto-tune) in the NVIDIA App applies a starter graphics preset to supported games based on your GPU. It's a reasonable starting point if you're not sure how to balance settings in a new title — but it overrides any custom in-game settings you've set. Manual is better; Optimal is fine for first-time launches.
Driver update strategy
NVIDIA ships two driver branches:
- Game Ready Driver (GRD). Released alongside major game launches. Includes game-specific optimisations that can deliver 5-10% FPS gains on launch-day titles. This is the default for gaming PCs.
- Studio Driver (SD). Released less frequently, prioritises stability in content creation applications (DaVinci Resolve, Blender, Adobe Creative Cloud, OBS). Use Studio if your PC is primarily for content creation; otherwise stick with Game Ready.
Update cadence: every 2-3 months, or whenever you launch a major new AAA title. NVIDIA App's driver update notifications are reliable; click "Express Installation" to keep your existing settings.
Before updating:
- Create a System Restore point (Windows search "Create a restore point") — 30 seconds, lets you roll back if the new driver regresses performance in a title you play.
- Close active games and recordings.
- Don't update mid-tournament. Wait for a quiet evening.
When to roll back: if a new driver causes stuttering, crashes or significantly lower FPS in titles you played fine yesterday. Roll back via the NVIDIA App's "Installed driver" → "Uninstall." For truly stubborn driver issues, use DDU in Safe Mode for a clean uninstall, then install a known-good older driver from NVIDIA's website.
Common NVIDIA Control Panel mistakes
Leaving Power Management on "Optimal Power." The single biggest cost-free FPS leak. "Prefer Maximum Performance" globally is the right choice for any desktop.
Maxing every setting to "Quality." Texture Filtering Quality at "High Quality" instead of "High Performance" costs 1-2% FPS for no visible quality benefit at 1440p or 4K. NVIDIA's "High Performance" is already very high quality — the naming is misleading.
Enabling FXAA globally. FXAA is a post-process anti-aliasing that blurs the entire image, including text and UI. Modern games have better in-engine AA (TAA, DLAA, DLSS). Leave FXAA off globally.
Not setting Max Frame Rate. Without an FPS cap, you'll bounce above your G-Sync range in less demanding scenes, causing tearing. Cap 3 below monitor refresh.
Confusing G-Sync, G-Sync Compatible and G-Sync Ultimate. All three work with NVIDIA cards. G-Sync (hardware module) and G-Sync Ultimate (certified high-bandwidth) are increasingly rare premium options. G-Sync Compatible (the FreeSync certification programme) is the standard in 2026 — works fine, costs much less.
Updating drivers without a restore point. Every so often a driver update regresses performance in a specific title. The restore point takes 30 seconds and saves you a 2-hour reinstall headache when it happens.
Treating the NVIDIA App as optional. The in-game overlay, ShadowPlay and driver update notifications make it worth the install. The Optimal Settings auto-tune is the bonus.
Key takeaways
- Power Management Mode = "Prefer Maximum Performance" is the single highest-impact change. 3-7% FPS in every game.
- Low Latency Mode = "Ultra" for competitive shooters; "On" for single-player. Reduces input lag 8-15ms.
- Set up G-Sync correctly, then cap Max Frame Rate 3 below monitor max refresh — keeps you tear-free.
- Use NVIDIA Control Panel for settings + display, NVIDIA App for drivers + overlay + recording. They're complementary.
- Update Game Ready drivers every 2-3 months. Create a system restore point first. Roll back if a title regresses.
Frequently asked questions
How much FPS will I gain from optimising NVIDIA Control Panel?
5-15% higher FPS in typical AAA titles plus smoother frame pacing. The biggest single contributor is Power Management Mode = Prefer Maximum Performance (3-7% on every game).What is the most important NVIDIA Control Panel setting?
Power Management Mode = "Prefer Maximum Performance" instead of the default "Optimal Power." Delivers 3-7% more FPS in every game on a desktop plugged into mains power.Should I use NVIDIA Control Panel or NVIDIA App?
Both — they're complementary. Control Panel for global 3D settings, display setup, per-game profiles. NVIDIA App for driver updates, in-game overlay, ShadowPlay recording, Game Filters, streaming.What does Low Latency Mode Ultra do?
Caps the GPU's pre-render frame queue at 1, reducing input latency 8-15ms vs default "Off." Trade-off: slightly less smooth average FPS in CPU-limited scenarios. Worth it for competitive shooters.Should I leave V-Sync on or off?
Off if you have a G-Sync compatible monitor — let G-Sync handle tearing. On if you don't have any VRR (FreeSync/G-Sync). Combine V-Sync On + G-Sync as a fail-safe above max refresh.How do I set up G-Sync in NVIDIA Control Panel?
Display → Set Up G-Sync. Enable G-Sync Compatible. Enable for windowed and full screen. In 3D Settings → Monitor Technology = G-Sync Compatible. Cap Max Frame Rate 3 below monitor max refresh.What is Threaded Optimisation and should it be on?
Distributes driver work across multiple CPU cores. Set to "On" globally. Only set to "Off" per-game for very old titles (pre-2010) that have threading bugs.How often should I update my NVIDIA drivers?
Every 2-3 months, or whenever you launch a major new AAA title. Game Ready drivers contain game-specific optimisations. Always create a System Restore point before updating.
Related guides
- AMD: How to Optimise AMD Adrenalin Software — Radeon settings for max FPS, the AMD equivalent of this guide.
- Windows: How to Optimise Windows 11 for Gaming — Game Mode, HAGS, focus assist, the OS-side tweaks.
- Upscaling: DLSS Explained — Should You Use It? NVIDIA's AI upscaler, 30-50% free FPS with quality preserved.
- Per-game: DLSS & FSR — Per-Game Settings. Exactly what to enable in 30 popular SA titles.
Get the Evetech app
Exclusive app-only prices, daily flash sales, and free delivery on orders over R4,000 — download the app and start saving.