Troubleshooting · No-POST Diagnostic
PC won't POST? Read the LEDs first. — Four lights. They name the culprit.
Fans spin, the case glows, but the monitor stays asleep. The instinct is to assume the worst. Stop. Your motherboard is already telling you exactly which component failed — you just need to know how to read it.
- name the fault
- 4 LEDs
- CMOS reset cycle
- ~3 min
- fixed without RMA
- 80%+
Power vs POST — they're not the same thing
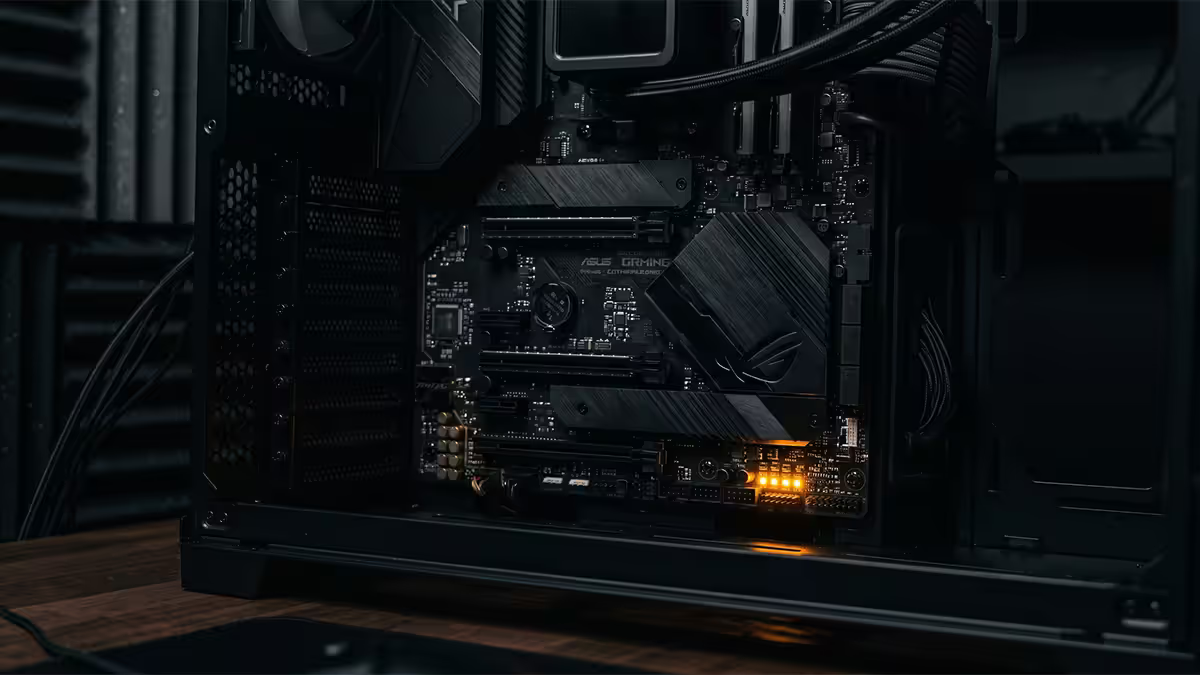
The first mistake every panicking PC owner makes is conflating power with POST. The CPU cooler fan spinning up does not mean your CPU is alive. The RGB lighting blazing does not mean RAM is detected. Case fans humming tells you the PSU is delivering 12V. None of those say a single thing about whether POST has begun, let alone completed.
Power-On is the moment the PSU receives the PS_ON signal from the motherboard and starts delivering rails. Fans spin. RGB lights up. The board's standby LED illuminates. This happens before any diagnostic test.
POST (Power-On Self-Test) is the structured diagnostic the board's BIOS executes immediately after power-on. It runs in stages: CPU detection and ID, memory detection and training, GPU detection and initialisation, bootable device discovery. Only when all four stages complete cleanly does control hand to the OS bootloader.
The display only lights up when the GPU has been initialised — typically two or three seconds into POST on a modern board. If POST fails before the VGA stage, you'll see nothing on screen. Ever. So "no display" is a symptom, not a diagnosis.
Reading the four debug LEDs
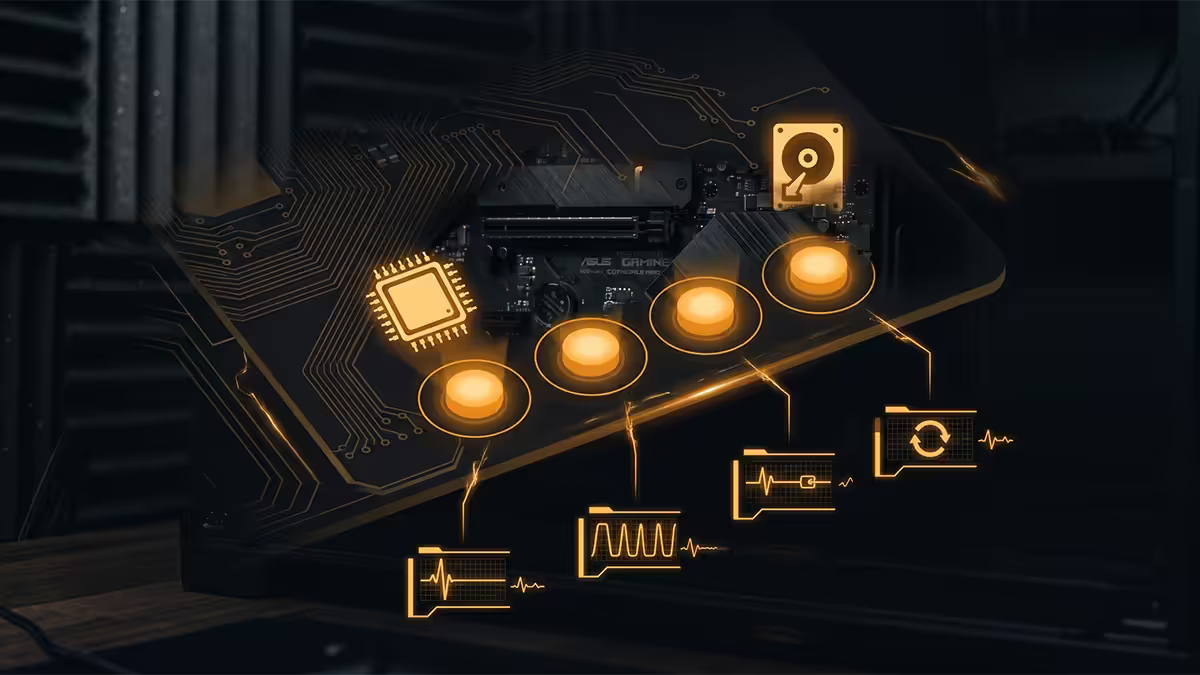
Every motherboard sold since ~2019 includes a debug LED cluster, typically labelled EZ Debug LED (MSI), Q-LED (ASUS), Status LED (Gigabyte) or Dr. Debug on ASRock — but the four-light convention is universal:
| LED | What it tests | What "stuck here" means |
|---|---|---|
| CPU | CPU detected, responding to BIOS | CPU not seated, no power to CPU, dead CPU, BIOS doesn't support this CPU |
| DRAM | Memory detected and trained | Wrong slot, dead stick, unstable XMP, IMC won't train this kit |
| VGA | GPU detected and initialised | GPU not seated, no PCIe power connector, dead GPU, dead PCIe slot |
| BOOT | Bootable drive found | No drive detected, no OS, drive not in boot order, corrupt boot record |
The LEDs light briefly in sequence during a healthy boot — you may see a flicker on each as POST passes that stage. When POST fails, the LED for the failed stage stays solid lit. That's your diagnostic.
The most common stuck-LED scenarios:
- DRAM stuck is by far the most common no-POST cause. RAM not fully clicked in, XMP profile being too aggressive after a CMOS clear, a memory training failure on a new build. Go to the single-stick RAM test below.
- VGA stuck typically means the PCIe power connector isn't seated, the GPU isn't fully clicked into the PCIe slot, or the GPU itself has failed. Reseat first, then test with iGPU output (motherboard HDMI/DP) if the CPU has integrated graphics.
- CPU stuck is rarer and more serious. Usually a CPU/socket compatibility issue (BIOS too old for newer CPU), a CPU power connector not plugged in (the EPS 8-pin near the CPU socket), or a physically damaged socket pin.
- BOOT stuck means POST completed cleanly — the system found the CPU, RAM and GPU — but couldn't find a bootable drive. Usually a loose NVMe, boot order wrong in BIOS, or a wiped/failed drive.
Q-codes, two-digit displays and beep codes
Higher-end boards add a two-digit Q-code display — a small 7-segment LED display that shows hex codes corresponding to specific POST stages. The codes are vendor-specific (ASUS, MSI and Gigabyte each have their own tables) but typically printed in the motherboard manual.
Common Q-codes worth knowing:
- 00 / FF — power-on, BIOS hasn't started yet. If stuck here, the CPU or board isn't responding.
- 15 / 19 / 23 — memory initialisation. Stuck codes here always indicate RAM problems.
- 62 / 92 / 99 — memory training complete, moving to PCIe and GPU detection.
- 9C / 9D / 99 — USB and storage detection. POST is nearly complete.
- A2 / A9 / AD — boot device detection. If stuck here, no bootable drive found.
Older boards without LEDs or Q-codes use beep codes via a small case speaker (often missing entirely on modern builds). One short beep is healthy; repeated long or staccato beeps indicate specific failures. ASUS uses "one long, three short" for memory; one continuous beep for power; long beeps for CPU. The vendor manual lists the table.
Clearing CMOS — the first thing to try
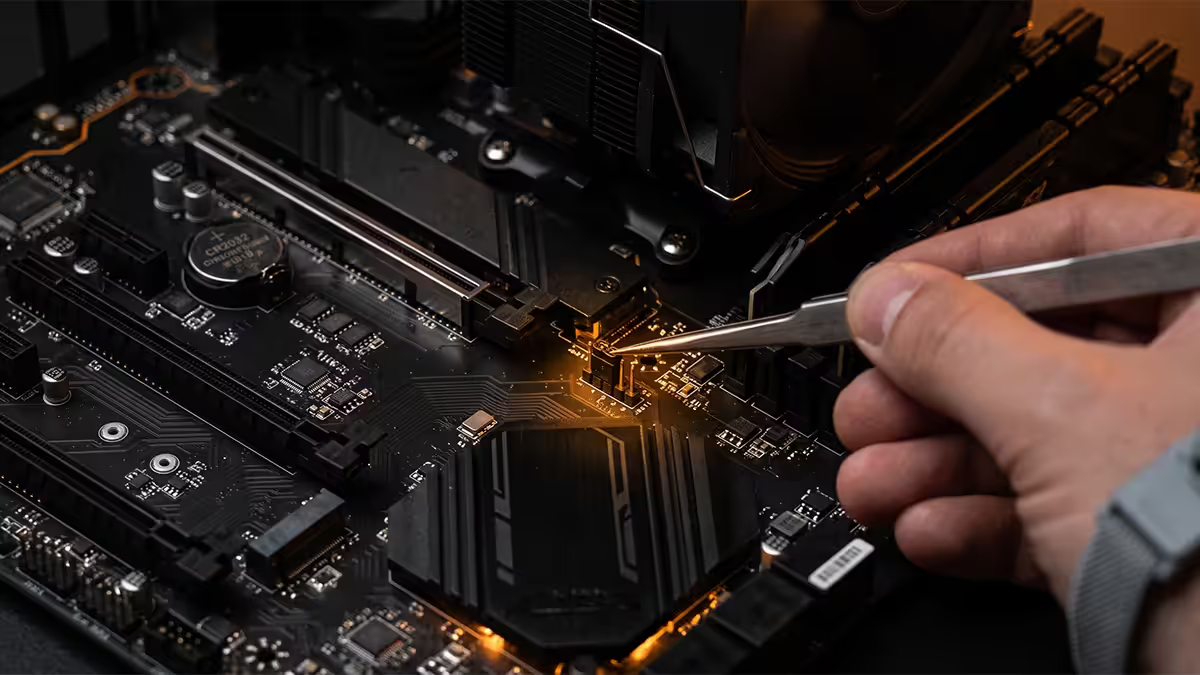
Before anything else, clear the CMOS. This resets BIOS to defaults, which clears overclocks, XMP/EXPO settings, fan curves, boot order and any corrupt configuration that's currently blocking POST. It's the single highest-success-rate fix and takes 60 seconds.
Three methods, in order of convenience:
- CLR_CMOS button. Most modern boards have a clearly labelled button on the rear I/O. Power off the system fully (PSU switch to 0). Press the CLR_CMOS button for 5 seconds. Power back on.
- CLR_CMOS jumper. A 2-3 pin header on the motherboard PCB, usually near the chipset. With the system off and PSU unplugged, move the jumper from pins 1-2 to pins 2-3 for 10 seconds, then move it back. If it's a 2-pin header, short it with a screwdriver for 10 seconds.
- Pull the CR2032 battery. The coin-cell battery on the board powers CMOS while the PSU is off. With the system fully unplugged, gently lever the battery out, wait 60 seconds, reinsert. CMOS will lose its stored settings.
After a CMOS clear, the first boot will go to defaults — JEDEC RAM speed, BIOS time reset, boot order reset. You'll need to re-enter BIOS and reconfigure (re-enable XMP/EXPO, fix the date, set boot order). Don't enable XMP again immediately if it was XMP that caused the original failure — get to desktop first, then try a more conservative profile.
Single-stick RAM test — find the bad stick in 3 minutes
If the DRAM LED is the one stuck, the diagnosis path is simple but methodical. The goal is to isolate which stick (or which slot) is failing.
The procedure:
- Power off, unplug PSU. Wait 30 seconds for caps to drain.
- Open the case. Remove all RAM sticks except one. Install that one stick in slot A2 — the second slot from the CPU.
- Power on. If it POSTs (gets past DRAM LED), that stick and slot are fine. Power down and continue.
- Swap to the next stick in the same A2 slot. Power on. If it POSTs, fine. If not, you've found a faulty stick — or a marginal IMC.
- If all sticks individually POST in A2, move a known-good stick to slot B2 (the fourth slot). If it POSTs, the slot is good. Continue across all slots.
- If a single stick POSTs but two sticks together don't, the issue is either XMP being too aggressive (try with XMP disabled), the IMC marginal at the second-stick load, or one stick has subtle damage that only shows up under dual-channel training.
Clear CMOS between major changes — the BIOS caches memory training data, and stale cache can cause a known-good config to fail until cleared.
GPU isolation — the VGA LED culprit
If the VGA LED is the one stuck, the GPU subsystem is the problem. The most common causes, in order:
- PCIe power connector not seated. A modern GPU needs one, two, or three 8-pin PCIe power connectors (or a single 12VHPWR/12V-2x6 on RTX 40/50 series). A loose connector means the GPU powers on partially and fails detection. Unplug, replug firmly until you hear the click. On 12VHPWR specifically, ensure the connector is fully inserted — partial insertion has caused melting issues.
- GPU not fully seated in PCIe slot. The gold contact fingers must be entirely inside the slot. Press down evenly on both ends of the card. The PCIe locking tab should engage automatically.
- Try a different PCIe slot. Most ATX boards have a secondary x16 or x8 slot below the primary. If the primary slot is dead, the secondary will still POST.
- Test with iGPU output. If your CPU has integrated graphics (most Ryzen 7000+ chips, all Intel non-F SKUs), remove the GPU entirely and plug your monitor into the motherboard's HDMI/DP output. If it POSTs and reaches BIOS, the GPU is the culprit; if it still doesn't POST, the issue isn't the GPU at all.
- Try the GPU in another PC. Confirms whether the card itself is dead. If it POSTs in a known-good system, your board's PCIe is the failure.
Bench testing — when the case is the saboteur
If every component-swap test points to "everything looks fine but it still won't POST", the case itself is suspect. Specifically, standoffs and case grounding.
A loose standoff under the motherboard PCB that doesn't align with a screw hole will short traces on the board's underside and prevent POST. The fix is to disassemble onto the motherboard's anti-static cardboard box — a bench test — and start with the absolute minimum:
- Motherboard on the anti-static bag, on top of the box (foam padding underneath).
- CPU installed, cooler mounted (without paste is fine for 30-second POST tests; don't run loaded).
- One stick of RAM in slot A2.
- GPU installed (or iGPU if available, no GPU at all).
- PSU connected — 24-pin ATX, 8-pin EPS CPU, GPU PCIe power. Nothing else.
- Power on by briefly shorting the PWR_SW pins on the front-panel header with a screwdriver.
If the bench setup POSTs, the problem is in the case. Most likely a standoff in the wrong spot. Reinstall the board into the case one screw at a time, testing POST after each — when it fails, you've found the offending standoff.
If the bench setup also fails, your isolation just got cleaner. The fault is in the CPU, RAM, GPU, motherboard or PSU — and you've eliminated every case-related variable.
When to RMA — and how to be sure
An RMA wastes 1-2 weeks of dead-PC time. Don't ship a working component back to the manufacturer. Before you RMA anything, you need to have isolated the failure to a specific part using a known-good donor.
| RMA target | What to confirm first | Confidence level needed |
|---|---|---|
| Motherboard | Bench test with known-good CPU, RAM and GPU from another PC fails | High — boards rarely fail and most RMAs are denied |
| CPU | A different known-good CPU POSTs in the same board with the same RAM | High — CPUs almost never DOA |
| RAM | MemTest86 errors on a stick across multiple slots | Medium — sticks fail more often than CPUs or boards |
| GPU | Same GPU fails to POST in two different known-good systems | Medium — GPUs sometimes fail in transit |
| PSU | Replace with a known-good PSU and system POSTs cleanly | Medium — PSUs degrade over time, can be intermittent |
For a CPU that's just been installed in a board purchased a year or more earlier, suspect BIOS compatibility before component failure. A board sold in 2023 may need a BIOS update before it'll POST with a Ryzen 9000 or Core Ultra CPU. Use the board's BIOS FlashBack feature (a USB port on the rear I/O with a dedicated button) — it flashes BIOS without CPU or RAM installed. This is the recovery path for "I just upgraded my CPU and now nothing POSTs".
Key takeaways
- Fans spinning is power, not POST. The two are independent processes.
- The lit debug LED (CPU / DRAM / VGA / BOOT) names your failure stage exactly.
- Always clear CMOS first — single highest-success-rate fix, costs you 60 seconds.
- DRAM stuck? Single-stick test in A2. Half-seated RAM is the #1 no-POST cause.
- VGA stuck? Reseat PCIe power, reseat the GPU, swap to iGPU output if available.
- Bench test outside the case to rule out shorts and standoff misalignment.
- RMA only after isolating to a specific part with a known-good donor system.
Frequently asked questions
What does POST mean?
Power-On Self-Test — the diagnostic the motherboard runs after power-on to verify CPU, memory, GPU and storage are detected. If POST completes, you see the BIOS splash. If POST fails, the board stops at the failing component, indicated by a debug LED or Q-code.My fans spin but there's no display — is the PC dead?
No. Fans mean PSU power; POST is separate. Display only lights up once POST hands over to BIOS. Look at the debug LEDs on the motherboard to find out which stage POST is stuck at.What are the four debug LEDs on my motherboard?
CPU, DRAM, VGA and BOOT — they light in sequence during POST. CPU detected, memory trained, GPU initialised, bootable drive found. The LED that stays lit indicates the stuck stage.How do I clear CMOS?
Three methods: CLR_CMOS button on rear I/O (simplest); CLR_CMOS jumper on the motherboard (short for 10 seconds with system off); or pull the CR2032 coin battery for 60 seconds. All return BIOS to defaults.Should I test with a single stick of RAM?
Yes if the DRAM LED is lit. Remove all but one stick, install in slot A2, try to POST. If it works, swap to the other stick. Clear CMOS between tests. If both POST individually but not together, the IMC or XMP is the issue.Do I need to bench test outside the case?
If standard troubleshooting hasn't worked, yes. Disassembling onto the motherboard box eliminates short-circuit risks from misplaced standoffs. If it POSTs on the bench, the problem is in the case wiring or mounting.When should I RMA the motherboard or CPU?
Only after isolating the failure with a known-good donor. RMA the board if bench test fails with confirmed-good CPU/RAM/GPU. RMA the CPU if a different known-good CPU POSTs in the same board. Don't RMA blindly.Could a BIOS update fix a no-POST PC?
Yes, when you've just installed a CPU newer than the board's shipped BIOS. Use BIOS FlashBack — flash the latest BIOS to a USB stick, plug into the FlashBack port, press the dedicated button. No CPU or RAM required.
Get the Evetech app
Exclusive app-only prices, daily flash sales, and free delivery on orders over R4,000 — download the app and start saving.