Mac Developer Setup Guide
Python on Mac — done right. — pyenv first. venv per project.
Your Mac ships with Python. Don't use it. Eighty per cent of "Python on Mac" pain comes from using the wrong interpreter, polluting it globally and forgetting which env owns what. Here's the setup that avoids all of that.
- Python
- Skip system
- the right way
- pyenv
- per project
- venv
Why not the Python that ships with macOS
Open Terminal on any Mac, type python3, hit return — you'll get a Python prompt. So why doesn't every guide tell you to just use that?
Apple bundles Python as a system tool, not a development environment. macOS itself, plus many of Apple's command-line utilities, depend on the exact version Apple shipped. If you start pip install-ing packages into it (especially with sudo), you risk breaking macOS tooling in ways that are painful to diagnose.
Three concrete problems with system Python:
- You can't choose the version. You get whatever Apple shipped — usually 6-12 months behind the latest stable release.
- Upgrading is locked. macOS upgrades change the bundled version unpredictably; you have no control.
- Global pollution. Every
pip installgoes to one shared environment shared with Apple's scripts — recipe for conflicts.
The fix: install your own Python, separately from Apple's. Two practical ways to do that — Homebrew (quick) or pyenv (proper).
Homebrew Python — the quick option
If you already have Homebrew installed, one line gets you a fresh Python:
brew install python3
This installs the latest stable Python (currently 3.12.x as of mid-2026), separate from Apple's system Python, with pip3 wired up correctly. You invoke it with python3 from any directory.
The catch: Homebrew controls when this Python upgrades. Run brew upgrade and your project's Python jumps to a new minor version overnight — sometimes breaking pinned dependencies. You also can't easily run multiple Python versions side-by-side.
| Approach | Best for | Trade-off |
|---|---|---|
| System Python (Apple) | Nothing — don't use it | Locked, risk of breaking macOS |
| Homebrew Python | Quick scripts, one version needed | Auto-upgrades, no version pinning |
| pyenv (recommended) | Real development, multiple projects | ~5 min setup vs ~30 sec |
| Anaconda / Miniconda | Data science, scientific computing | Heavier, parallel package manager |
pyenv — the right way
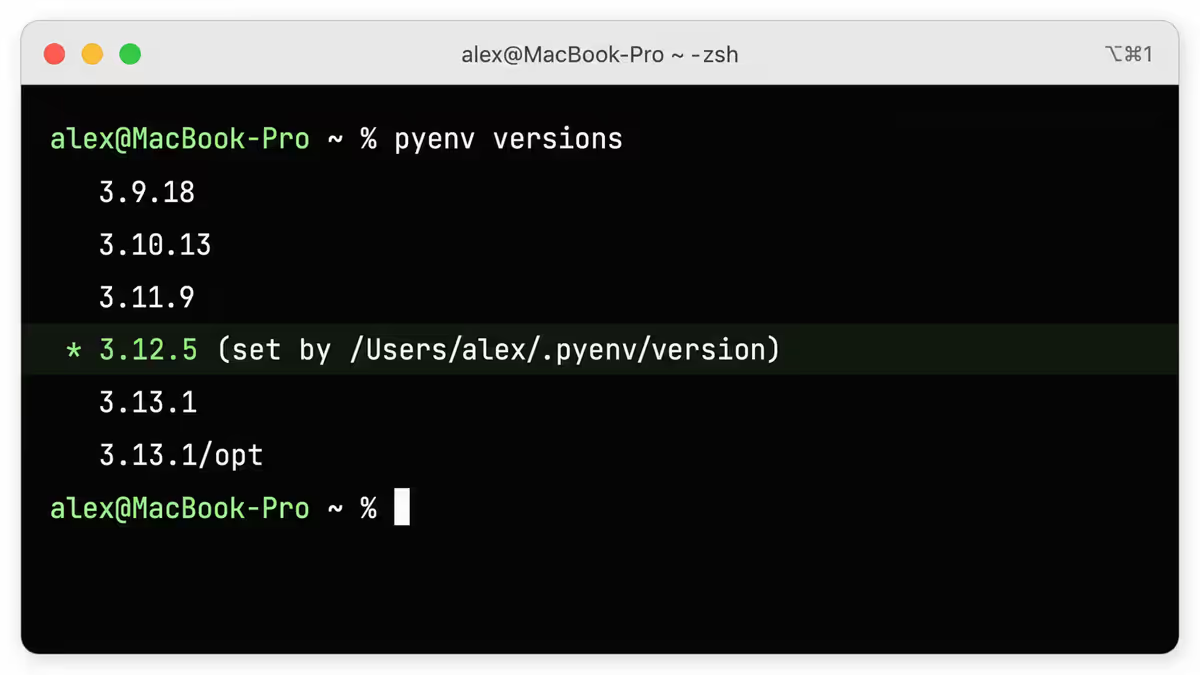
pyenv is a Python version manager. It lets you install any Python version, switch between them per project, and set a global default — all without touching system Python or fighting Homebrew upgrades.
Setup takes five minutes:
- Install pyenv:
brew install pyenv - Add the init lines to your shell (zsh is the default on modern macOS): append
eval "$(pyenv init -)"to~/.zshrc - Restart your terminal (or
source ~/.zshrc) - Install Python 3.12.5:
pyenv install 3.12.5 - Set it as your global default:
pyenv global 3.12.5 - Verify:
python --versionshould printPython 3.12.5
To work on a project needing a different version: cd into the project folder and run pyenv local 3.11.9. pyenv writes a .python-version file in that folder and automatically switches whenever you enter it. Magic.
Virtual environments — one per project
Even with pyenv giving you the right global Python, you still want a separate environment per project. Why? Because Project A needs pandas 2.0 and Project B needs pandas 2.2 — and you don't want to constantly swap them.
Virtual environments solve this. Each one is an isolated copy of Python and its installed packages, scoped to a single project folder. Modern Python ships venv built-in:
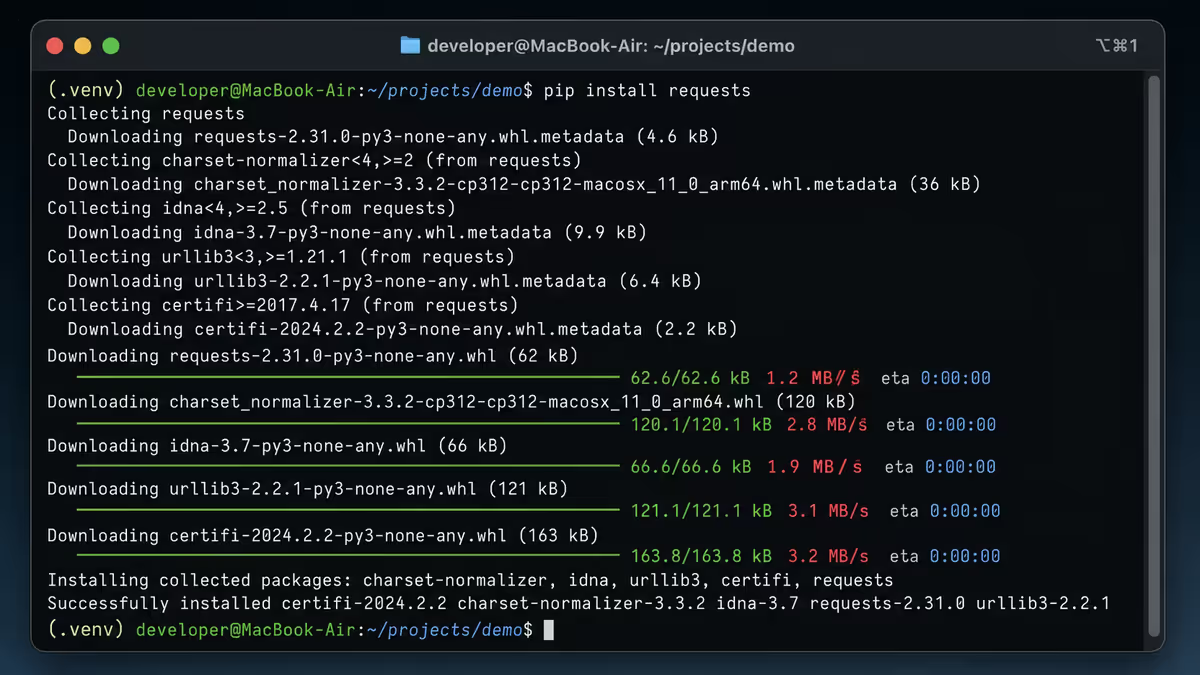
cdinto your project folderpython -m venv .venv— creates a.venv/folder with isolated Python + pipsource .venv/bin/activate— activates it; you'll see(.venv)in your promptpip install -r requirements.txt— installs packages only into this venvdeactivatewhen done — drops you back to the global Python
Always add .venv/ to .gitignore — never commit it. Other developers create their own from your requirements.txt or pyproject.toml.
Alternatives to plain venv: virtualenv (older, slightly more features), poetry (modern project + dependency manager — venv + requirements.txt unified, increasingly the standard for new projects), pipenv (Pipfile-based, less popular now), uv (new Rust-based, very fast — worth watching).
pip vs pipx — when to use which
Inside a venv, you use pip install for everything — that's the standard. But what about tools you want available globally, like black, ruff, poetry, httpie? You don't want them inside every project venv (they're not dependencies — they're tools). And you don't want them installed globally polluting your base Python.
That's what pipx exists for. It installs each Python CLI tool in its own private venv but exposes the command globally on your PATH:
brew install pipx(orpython -m pip install --user pipx)pipx ensurepath— adds pipx's bin folder to PATHpipx install black— black command now available everywherepipx install ruff,pipx install poetry,pipx install pre-commit— same pattern
Each tool lives in its own isolated env, can't conflict with anything else, and uninstalls cleanly with pipx uninstall black.
Essential packages worth knowing
A starter set of packages most Python developers end up wanting:
| Package | What it does | Install where |
|---|---|---|
| requests | HTTP client — fetch any URL | Per project (venv) |
| pytest | Testing framework — modern standard | Per project (venv) |
| numpy / pandas | Numerical arrays + data frames | Per project (venv) |
| matplotlib / seaborn / plotly | Plotting and visualisation | Per project (venv) |
| black | Code formatter — opinionated, no config | Global via pipx |
| ruff | Linter + formatter, very fast | Global via pipx |
| mypy | Static type checker | Per project (venv) |
| poetry | Project + dependency manager | Global via pipx |
| pre-commit | Git hook runner for formatters/linters | Global via pipx |
VS Code or PyCharm — IDE setup
Two IDEs dominate Python on Mac. Both are excellent. The choice comes down to weight and feel.
VS Code (free): lightweight, polyglot, huge extension ecosystem. Install the official Python extension and Pylance for type checking and intellisense. VS Code auto-detects venvs in the project folder and uses them. Best when you're doing Python plus other languages, or working on smaller projects.
PyCharm Community (free): heavier, Python-only, but better refactoring tools and a more capable debugger. Best for large pure-Python codebases.
PyCharm Professional (paid, ~R3,800/year): adds Django, Flask, FastAPI support, Jupyter integration, database tools and remote development. Justified if you're full-time on Python web stacks.
Jupyter Notebook / JupyterLab: the standard for data exploration and notebook-style analysis. Install per-project (pip install jupyterlab), launch with jupyter lab. VS Code and PyCharm Professional both render notebooks natively now.
Apple Silicon (M-series) considerations
In 2026, Python on Apple Silicon is essentially a solved problem. Almost every major package ships native ARM64 wheels — NumPy, pandas, PyTorch, TensorFlow, scikit-learn, OpenCV, Pillow. You don't need Rosetta 2 for normal Python development.
A handful of edge cases still exist:
- Some niche scientific packages still ship only x86_64 wheels and run via Rosetta. Performance hit is typically 20-40%.
- Older project pins (requirements.txt from 2021 with frozen versions) may have only x86 wheels of NumPy etc. Update pins or run via Rosetta venv.
- Some CUDA-dependent libraries don't work — but Macs don't have NVIDIA GPUs anyway. PyTorch and TensorFlow now have Metal Performance Shaders (MPS) backends that use the Mac GPU directly.
Performance: M-series Macs are excellent Python development machines. Pure-Python code is roughly 30-50% faster than equivalent Intel Macs, and ML inference using MPS is dramatically faster than CPU-only.
Anaconda — when to use it instead
Anaconda (and the smaller Miniconda) is a parallel Python distribution and package manager, popular in data science. It uses a different package registry (conda channels) and handles compiled dependencies (BLAS, LAPACK, CUDA, scientific C/Fortran libraries) more smoothly than pip in some cases.
Use conda if:
- You're primarily doing data science / ML and want pre-built scientific stacks
- You need exact reproducibility across team members on the same conda channel
- You're using packages with messy native dependencies (HDF5, GDAL, certain ML libraries)
Use pyenv + venv if:
- You're doing web development, automation, scripting, backend engineering
- You want the lightest possible footprint (~50MB vs ~3GB for Anaconda)
- You want to stay on pure standard tooling (pip, venv, poetry)
Common mistakes
Using sudo pip install. Pollutes system Python and can break macOS. Never do it. If a package needs system-wide install, use pipx.
Installing packages globally then forgetting which version is which. Without venvs, every pip install piles into one shared environment until something conflicts. Use a venv from day one.
Forgetting to activate the venv. Run pip install in the wrong shell, package goes to the wrong env. Check your prompt — it should say (.venv) when active.
Skipping the pyenv init line in .zshrc. Without it, pyenv works but python still points to system Python. Add the init line, restart the shell.
Mixing pyenv and Anaconda on one machine. They fight over which python wins on PATH. Pick one as primary.
Committing the .venv/ folder to Git. It's huge and machine-specific. Always .gitignore it.
Key takeaways
- Never use Apple's system Python for development. Never
sudo pip installon macOS. - Install pyenv via Homebrew. Use it to install Python 3.12.5 and set as global default.
- One virtual environment per project —
python -m venv .venvthen activate. Always gitignore. - Use pipx (not pip) for global CLI tools — black, ruff, poetry, pre-commit, httpie.
- Apple Silicon is fully supported in 2026 — almost all packages ship native ARM64 wheels.
Frequently asked questions
Why shouldn't I use the Python that ships with macOS?
Apple's bundled Python is for macOS internal scripts, not development. Modifying it breaks system tooling. The version is locked to Apple's release schedule. Install your own via pyenv.Should I use Homebrew Python or pyenv?
pyenv if you'll work on multiple Python projects (you will). Homebrew Python is fine for occasional scripts where one version is enough.What is a virtual environment and why do I need one?
An isolated Python and package set for a single project. Without it, every pip install pollutes a shared environment and projects conflict on versions. Use python -m venv .venv per project.What's the difference between pip and pipx?
pip installs into your current Python (system or venv). pipx installs CLI tools globally but each in its own isolated venv. Use pip inside project venvs, pipx for global tools like black, ruff, poetry.Does Apple Silicon (M-series) work fine for Python?
Yes — in 2026 almost every major package ships native ARM64 wheels. NumPy, pandas, PyTorch, TensorFlow all native. Performance is excellent.VS Code or PyCharm for Python on Mac?
VS Code free + lightweight, good for polyglot work. PyCharm heavier but better refactoring and debugger. Both excellent. Pick on weight preference.Should I use Anaconda instead of pyenv?
Anaconda if data science / scientific computing primary. pyenv + venv for general Python (web, backend, automation). Don't mix the two.How do I install Python packages globally on Mac safely?
Use pipx for CLI tools — each gets its own isolated venv. Never sudo pip install — that breaks system Python and macOS tooling.